Használati útmutató Dymo LabelManager PCII
Dymo
nincs kategorizálva
LabelManager PCII
Olvassa el alább 📖 a magyar nyelvű használati útmutatót Dymo LabelManager PCII (6 oldal) a nincs kategorizálva kategóriában. Ezt az útmutatót 4 ember találta hasznosnak és 2.5 felhasználó értékelte átlagosan 4.4 csillagra
Oldal 1/6

English
Quick Start
Follow these steps to install the LabelMANAGER PCII printer and print your first label.
1. Unpacking your LabelMANAGER PCII Printer
NOTE For Windows, do not plug the printer into your computer until asked to do so during the
software installation.
1 Unpack your printer and save the packing materials.
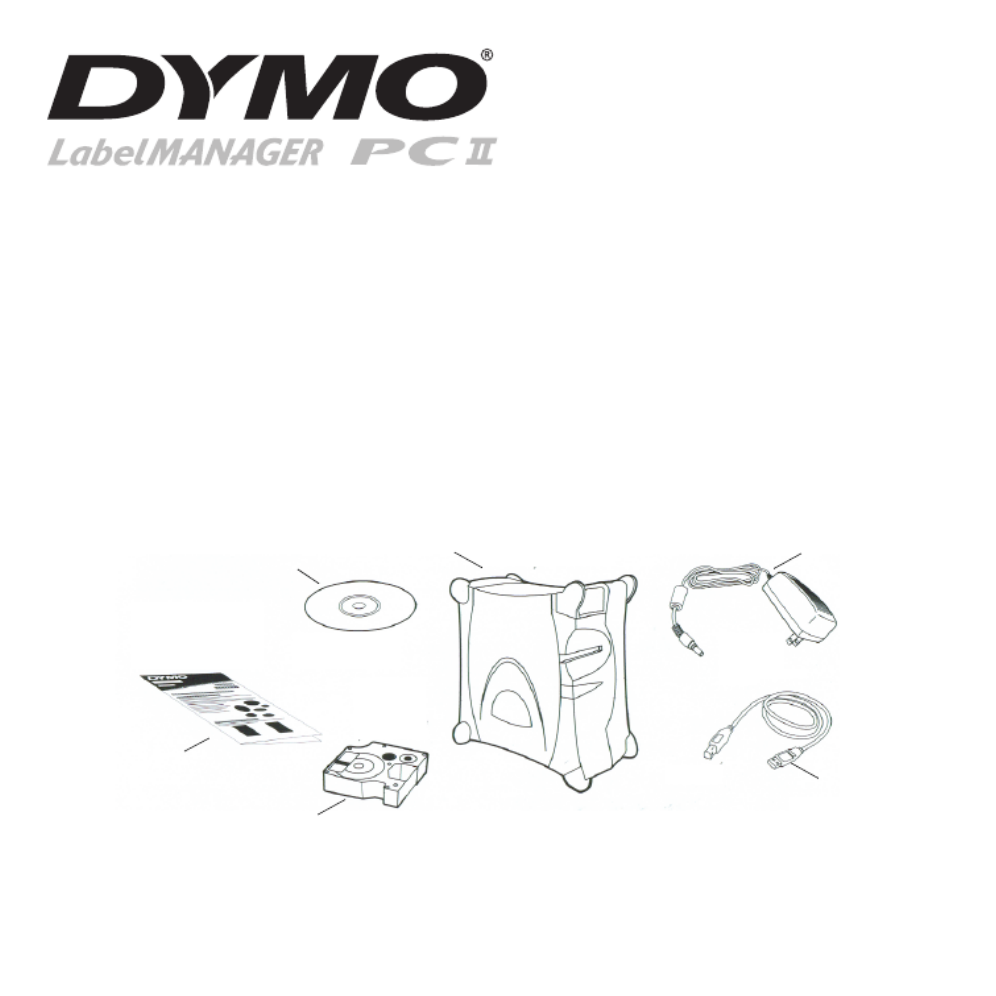
2Make sure you have all the items shown in Figure 1.
Figure 1
Power Adapter
LabelMANAGER PCII Label Printer
CD-ROM
D1 Tape Cassette
Quick Start Guide
USB Cable

2
2. Installing the Software
To install the software on a Windows system
NOTE Do not connect the printer until instructed to do so during the software installation.
1 Insert the DYMO Label Software CD into your CD-ROM drive.
After a few seconds, the installation screen appears.
If the installation screen does not appear:
a. Click Start, and then Run on the Windows taskbar. The Run dialog box
appears.
b. Enter D:\install.exe (where D is the letter assigned to the CD-ROM drive)
and click OK.
2 Select the language version to install and then follow the on-screen instructions.
To install the software on a Macintosh system
1 Insert the DYMO Label Software CD into the CD-ROM drive.
After a few seconds, the DYMO Label Software Installer icon appears.
See Figure 2.
2 Double-click the Installer icon and then follow the on-screen
instructions.
3. Connecting your LabelMANAGER PCII Printer
During the software installation, you will be asked to connect the printer to the USB port.
NOTE If you are connecting the printer to a Windows system, do not connect the printer to your
computer until asked to do so during the software installation.
DYMO Label
Software Installer
Figure 2

3
To connect the power
1 Plug the power adapter into the power connector on the
back of the printer. See Figure 3.
2 Plug the other end of the power cord into a power outlet.
To connect the USB cable
1 Plug the USB cable into the USB port on the back of the
printer. See Figure 3.
2 When asked during the software installation, plug the
USB cable into an available USB port on your computer.
4. Loading Labels
To load the D1 tape cassette
1 Press and release the label cassette cover to open the label
compartment. See Figure 4.
NOTE The first time you open the printer, remove the
protective cardboard insert from the tape exit slot.
2 Make sure the tape and ribbon are taut across the mouth
of the cassette and that the tape passes between the
guideposts. If necessary, turn the spool clockwise with a
pencil to tighten the ribbon.
3 Insert the cassette and press firmly until the cassette
clicks into place. Make sure tape and ribbon are
positioned correctly.
4 Close the label cassette cover.
You are now ready to print your first label.
Figure 3
USB
Power
Figure 4
Press
Figure 5
Remove
Cardboard Insert
Termékspecifikációk
Márka: | Dymo |
Kategória: | nincs kategorizálva |
Modell: | LabelManager PCII |
Szüksége van segítségre?
Ha segítségre van szüksége Dymo LabelManager PCII, tegyen fel kérdést alább, és más felhasználók válaszolnak Önnek
Útmutatók nincs kategorizálva Dymo
14 Január 2025
6 Január 2025
3 Január 2025
13 Szeptember 2024
3 Szeptember 2024
2 Szeptember 2024
2 Augusztus 2024
28 Július 2024
27 Július 2024
24 Július 2024
Útmutatók nincs kategorizálva
- nincs kategorizálva Symmons
- nincs kategorizálva Uniden
- nincs kategorizálva Futaba
- nincs kategorizálva Metz
- nincs kategorizálva Taiji
- nincs kategorizálva Asko
- nincs kategorizálva Deye
- nincs kategorizálva Hikmicro
- nincs kategorizálva Whitestone
- nincs kategorizálva Rome
- nincs kategorizálva Ematic
- nincs kategorizálva Majestic
- nincs kategorizálva JL Cooper
- nincs kategorizálva Skymaster
- nincs kategorizálva Ilve
Legújabb útmutatók nincs kategorizálva
10 Április 2025
10 Április 2025
10 Április 2025
9 Április 2025
9 Április 2025
9 Április 2025
9 Április 2025
9 Április 2025
9 Április 2025
9 Április 2025