Használati útmutató Kramer 4x1VB
Kramer nincs kategorizálva 4x1VB
Olvassa el alább 📖 a magyar nyelvű használati útmutatót Kramer 4x1VB (1 oldal) a nincs kategorizálva kategóriában. Ezt az útmutatót 12 ember találta hasznosnak és 5 felhasználó értékelte átlagosan 4.6 csillagra
Oldal 1/1
4x1V,4x1VB Quick Start
P/N:
2900-301283QS
Rev:
2
Scan for full manual
4x1V, 4x1VB Quick Start Guide
This guide helps you install and use your 4x1V, 4x1VBfor the first time.
Go to www.kramerav.com/downloads/4x1Vto download the latest user manual and check if firmware
upgrades are available.
Step 1: Check in the bwhat’sox
4x1V or 4x1VB4:1 Video Switcher
1 Quick start guide
4 Rubber feet
1 User manual
Step 2: Mount 4x1V, 4x1VB
Install using one of the following methods: 4x1V, 4x1VB
•Attach the rubber feet and place the unit on a at surface.
•Fasten a bracket on each side of the unit and attach it to a at surface
(see www.kramerav.com/downloads/4x1V).
•Mount the unit in a rack using the recommended rack adapter
(see www.kramerav.com/product/4x1V).
•Ensure that the environment (e.g., maximum ambient temperature &
air ow) is compatible for the device.
•Avoid uneven mechanical loading.
•Appropriate consideration of equipment nameplate ratings should be
used for avoiding overloading of the circuits.
•Reliable earthing of rack-mounted equipment should be maintained.
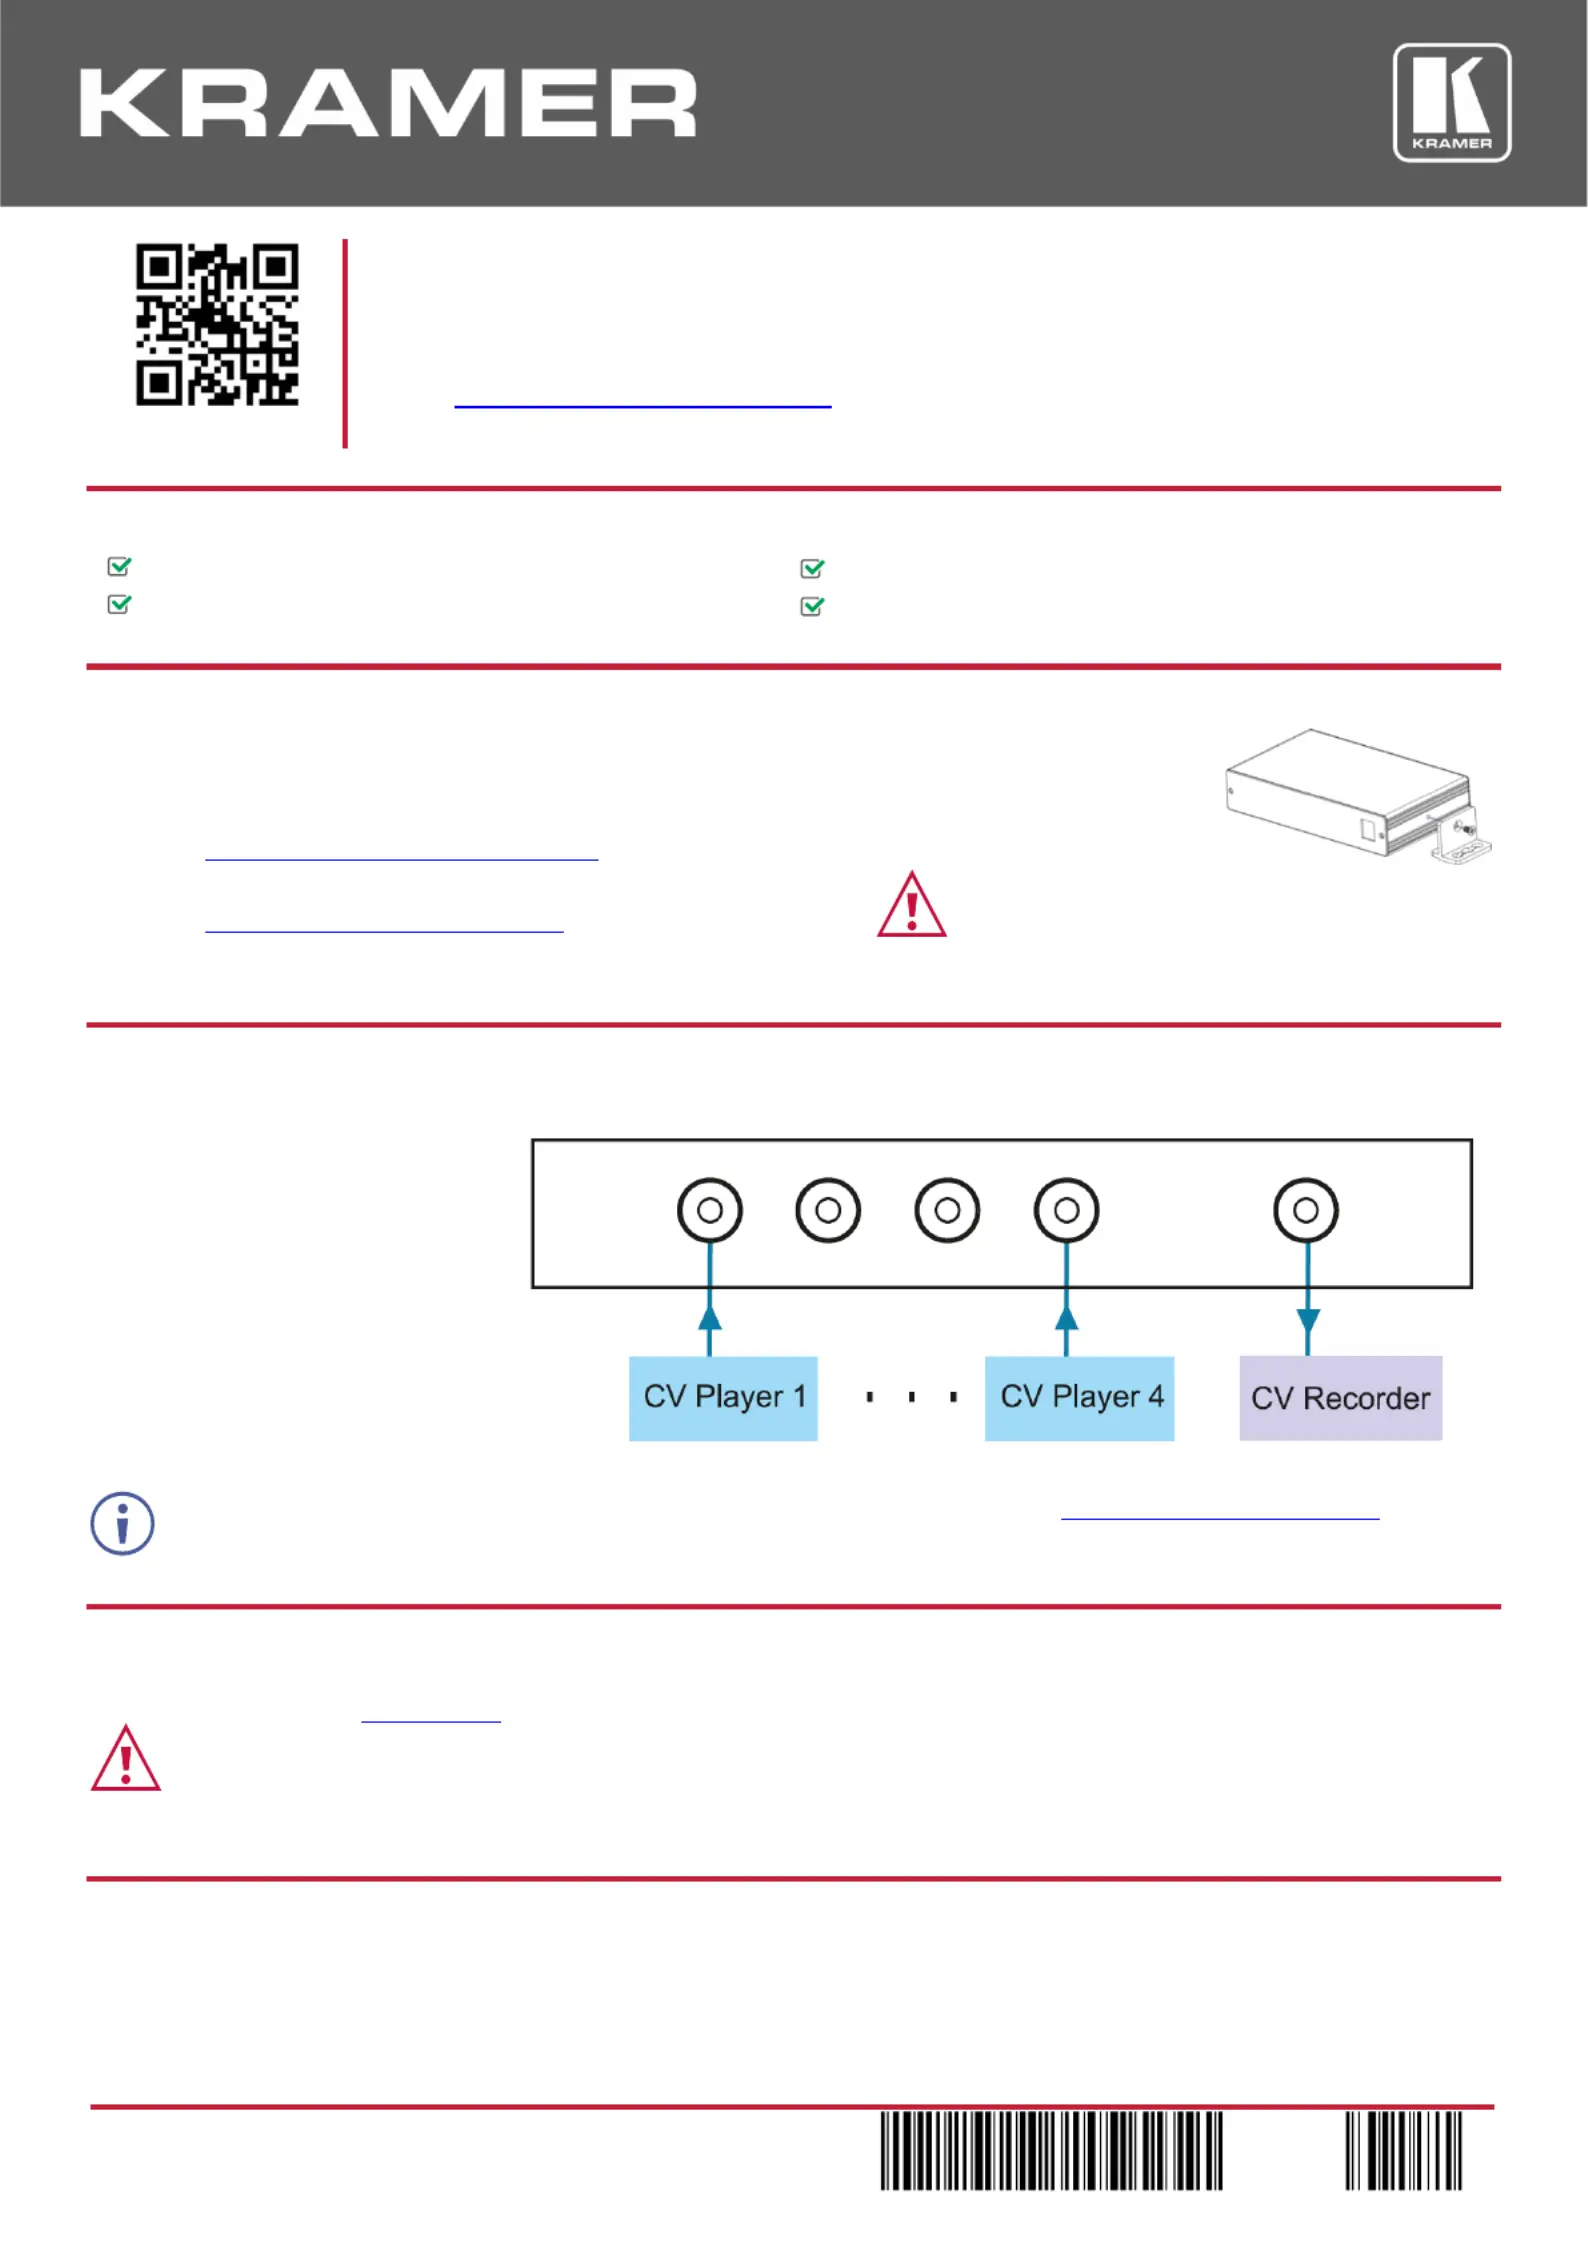
Step 3: Connect inputs and outputs
Always switch OFF the power on each device before connecting it to your . 4x1V, 4x1VB
The rear panel of the has RCA 4x1V
connectors (shown here).
The has BNC connectors. 4x1VB
To achieve specied extension distances, use the recommended Kramer cables available at www.kramerav.com/product/4x1V.
Using third-party cables may cause damage!
Step 4: Connect power
Connect the power cord to and plug it into the mains electricity. 4x1V, 4x1VB
Safety Instructions (See for updated safety information)www.kramerav.com
Caution:
•For products with relay terminals and GPI\O ports, please refer to the permitted rating for an external connection, located next to the terminal or in the User Manual.
•There are no operator serviceable parts inside the unit.
Warning:
•Use only the power cord that is supplied with the unit.
•Disconnect the power and unplug the unit from the wall before installing.
Step 5: Operate 4x1V, 4x1VB
Press one of the switcher input selector buttons to select the input that switches to the output.
Termékspecifikációk
| Márka: | Kramer |
| Kategória: | nincs kategorizálva |
| Modell: | 4x1VB |
Szüksége van segítségre?
Ha segítségre van szüksége Kramer 4x1VB, tegyen fel kérdést alább, és más felhasználók válaszolnak Önnek
Útmutatók nincs kategorizálva Kramer

4 Január 2025
20 December 2024
20 December 2024
20 December 2024
20 December 2024
20 December 2024
20 December 2024
20 December 2024
20 December 2024
20 December 2024
Útmutatók nincs kategorizálva
Legújabb útmutatók nincs kategorizálva
10 Április 2025
10 Április 2025
10 Április 2025
9 Április 2025
9 Április 2025
9 Április 2025
9 Április 2025
9 Április 2025
9 Április 2025
9 Április 2025