Használati útmutató Netgear APS2000W
Netgear
nincs kategorizálva
APS2000W
Olvassa el alább 📖 a magyar nyelvű használati útmutatót Netgear APS2000W (2 oldal) a nincs kategorizálva kategóriában. Ezt az útmutatót 12 ember találta hasznosnak és 6.5 felhasználó értékelte átlagosan 4.6 csillagra
Oldal 1/2
Installation Guide
Overview
The APS350W, APS600Wv2, APS920W, and APS2000W auxiliary power supplies (APSs)
are supported in the following M4350 series switch models:
• M4350-24F4V (SKU number XSM4328FV)
• M4350-24X4V (SKU number XSM4328CV)
• M4350-44M4X4V (SKU number MSM4352)
• M4350-24G4XF (SKU number GSM4328)
• M4350-48G4XF (SKU number GSM4352)
Each APS provides two bi-colored LEDs (DC OK LED and AC OK LED), which work
together to indicate the power supply status, as described in the following table.
DC OK LED
(Left LED)
AC OK LED
(Right LED)
Condition
Solid green Solid green DC output is present and voltage is good.
Blinking green Solid green AC power is present but DC output is for standby only.
Solid Red Solid green A power supply failure occurred and the APS will be
shut down.
Solid green Blinking red Loss of AC power occurred or AC power is not present.
Install an APS
In models with more than one power supply bay, you can install an additional APS.
1. Pull out the cover plate from the power module bay in which you want to insert the
additional APS.
2. Insert the APS into the power module bay, and gently push the APS into the bay.
CAUTION: When inserting the APS, do not use unnecessary force. Doing so
can damage the connectors on the back of the APS and on the midplane.
3. Connect the end of the power cord to the power receptacle on the APS.
4. Plug the AC power cord into a power source such as a wall socket or power strip.
When you apply power, the AC OK LED ands the DC OK LED on the APS lights. The
LED on the switch for the power supply bay also lights. If these LEDs do not light,
make sure that the power cord is plugged in and that the power source is good.
Auxiliary Power Supplies for the
M4350 Series Fully Managed Switches
APS350W, APS600Wv2, APS920W, and APS2000W
Package contents
• Auxiliary power supply
• Power cord (varies by region)
• Installation guide
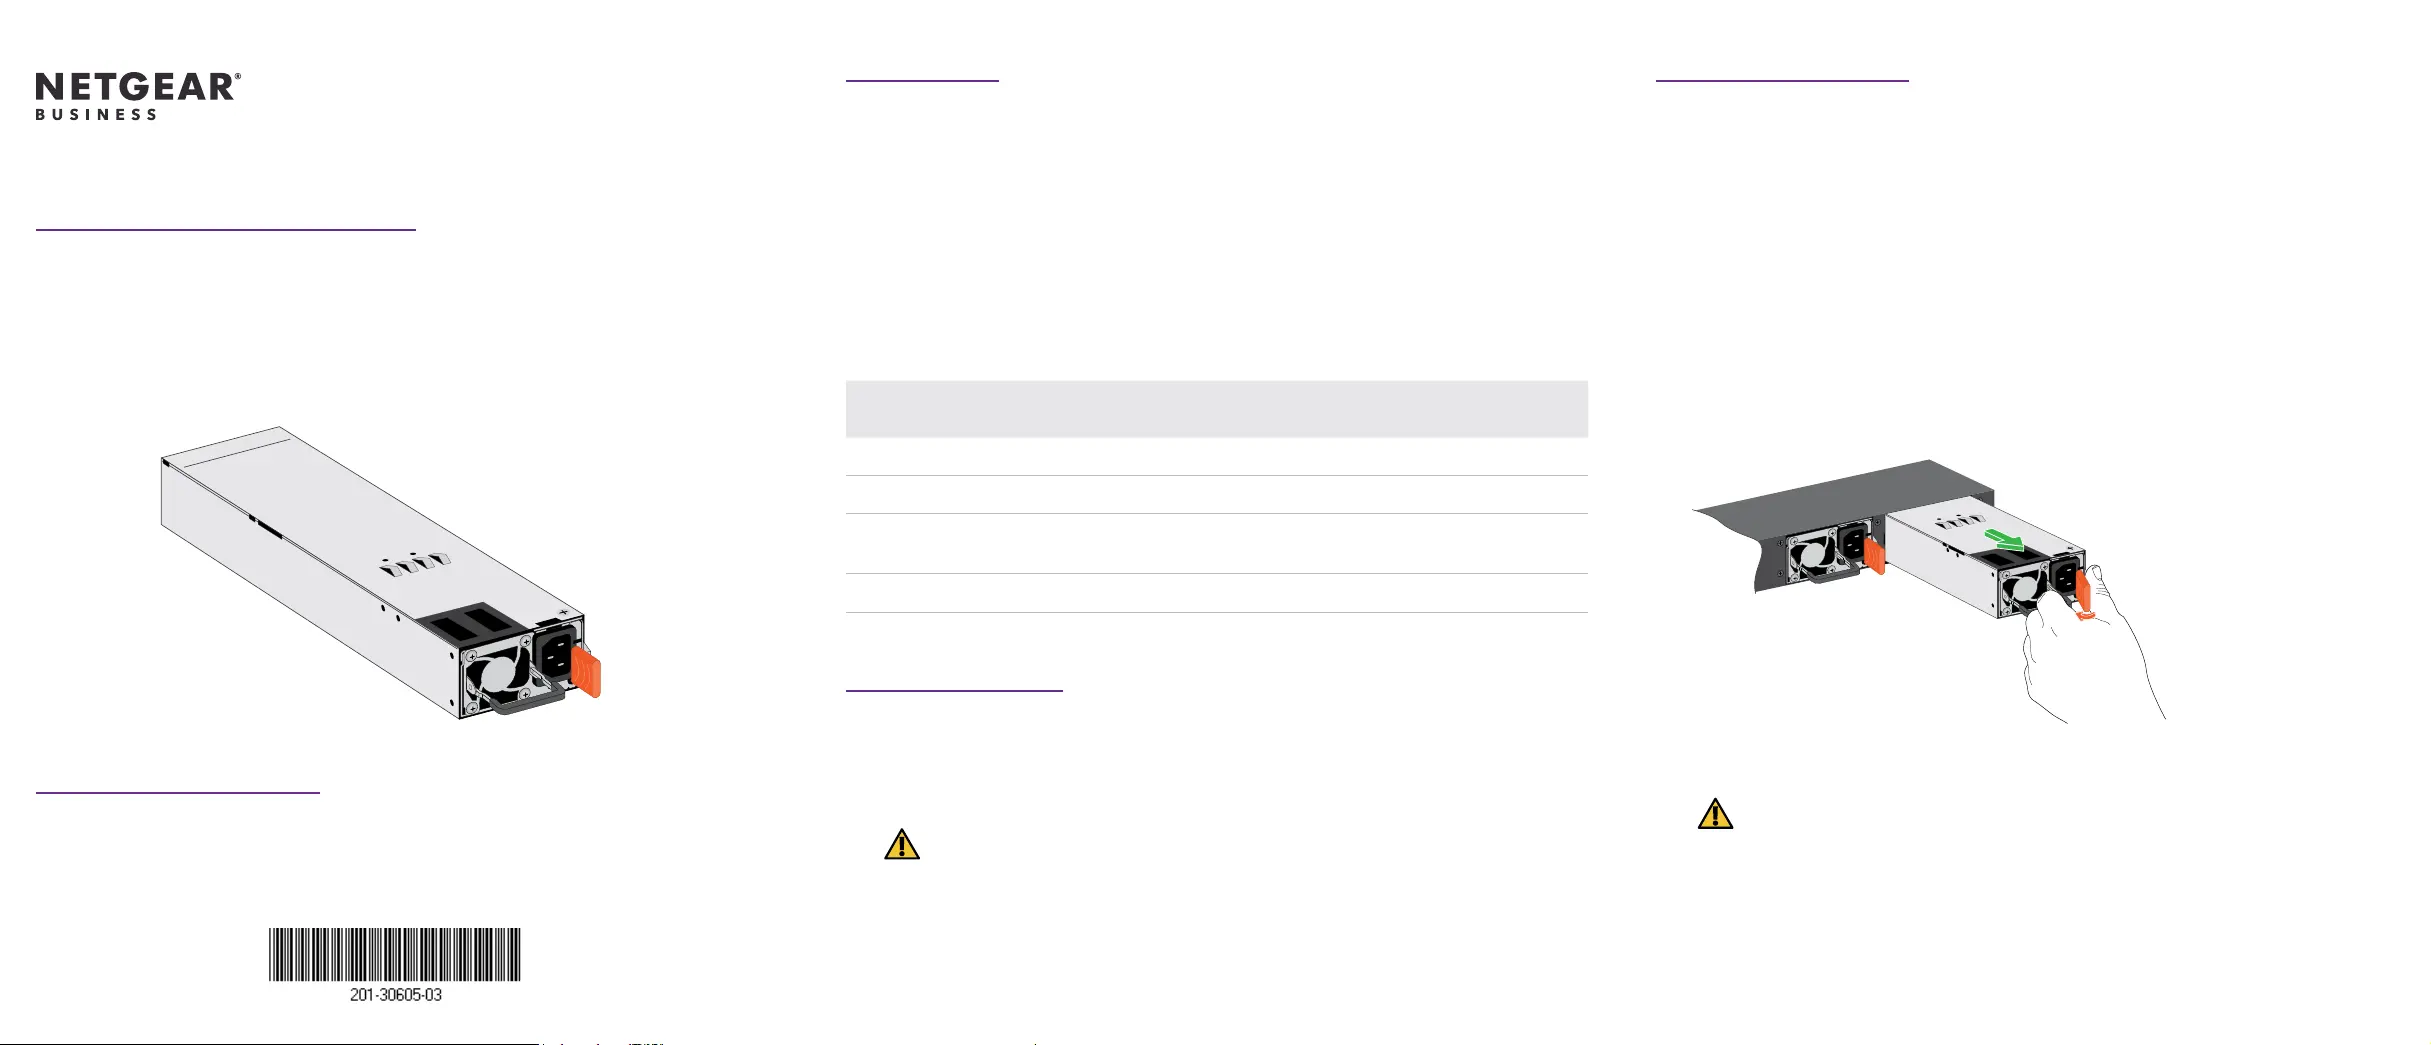
Replace an APS
In models with more than one APS, the APSs are hot-pluggable.
1. If your switch functions with a single APS only, disconnect the power cord from the
APS and let the switch power down.
If your switch functions with more than one APS, you do not need to power down the
switch and you can perform a hot swap.
2. Remove the APS from the power module bay by doing the following:
a. Position the extraction handle perpendicular to the APS.
b. Insert your left index nger into the extraction handle.
c. Use your left thumb to move the orange release latch to the left and keep it in the
release position.
d. Pull the extraction handle.
We recommend that you use your right hand to support the APS.
3. Insert the replacement APS into the power module bay, and gently push the APS into
the bay until the latch locks.
CAUTION: When inserting the APS, do not use unnecessary force. Doing so
can damage the connectors on the back of the APS and on the midplane.
4. Connect the end of the power cord to the power receptacle on the APS.
5. Plug the AC power cord into a power source such as a wall socket or power strip.
When you apply power, the AC OK LED ands the DC OK LED on the APS lights. The
LED on the switch for the power supply bay also lights. If these LEDs do not light,
make sure that the power cord is plugged in and that the power source is good.
May 2023
Termékspecifikációk
| Márka: | Netgear |
| Kategória: | nincs kategorizálva |
| Modell: | APS2000W |
Szüksége van segítségre?
Ha segítségre van szüksége Netgear APS2000W, tegyen fel kérdést alább, és más felhasználók válaszolnak Önnek
Útmutatók nincs kategorizálva Netgear

27 Március 2025

24 December 2024

14 Október 2024

13 Október 2024

6 Október 2024

4 Október 2024

2 Október 2024

1 Október 2024

28 Szeptember 2024

26 Szeptember 2024
Útmutatók nincs kategorizálva
- nincs kategorizálva Bravilor Bonamat
- nincs kategorizálva Kospel
- nincs kategorizálva Hobart
- nincs kategorizálva Wagner SprayTech
- nincs kategorizálva Profilo
- nincs kategorizálva Fuji
- nincs kategorizálva MGL Avionics
- nincs kategorizálva Air King
- nincs kategorizálva Tru Components
- nincs kategorizálva Sitecom
- nincs kategorizálva Aquatica
- nincs kategorizálva Baumr-AG
- nincs kategorizálva Martin
- nincs kategorizálva Goal Zero
- nincs kategorizálva EtiamPro
Legújabb útmutatók nincs kategorizálva

10 Április 2025

10 Április 2025

10 Április 2025

9 Április 2025

9 Április 2025

9 Április 2025

9 Április 2025

9 Április 2025

9 Április 2025

9 Április 2025