Használati útmutató Noctua NH-L9i-17xx chromax.black
Noctua Hardverkoeling NH-L9i-17xx chromax.black
Olvassa el alább 📖 a magyar nyelvű használati útmutatót Noctua NH-L9i-17xx chromax.black (47 oldal) a Hardverkoeling kategóriában. Ezt az útmutatót 21 ember találta hasznosnak és 8 felhasználó értékelte átlagosan 5.0 csillagra
Oldal 1/47
NOCTUA NH-L9i-17xx chromax.black
INSTALLATION MANUAL
Scan this code to display
multilingual manuals on
your phone.
Even with high-grade products and strict quality control, the
possibility of defects cannot be eliminated entirely.
Therefore, we aim at providing the highest possible level of
reliability and convenience by offering a warranty period of 6
years and direct, fast and straightforward RMA service.
Should you encounter any problems with your NH-L9i-17xx
chromax.black, please don’t hesitate to contact our support
team at support@noctua.at.
Please also consult the FAQ section on our website:
www.noctua.at/faqs
Warranty, support and FAQs!
Connect the fan to the motherboard. Depending on your CPU
and the temperature inside the case, you may interconnect
the supplied NA-RC7 Low-Noise Adaptor (L.N.A.) in order to
further reduce the fan’s operating noise.
Caution: When using the L.N.A., check the temperature of
your CPU using appropriate software (e.g. the respective
applications of your motherboard manufacturer), in order to
evade automatic throttling of the CPU due to the increased
temperature. If the cooling performance is insufcient, please
increase case ventilation or remove the L.N.A.
In case you would like to use a 92x25mm fan for further
improved performance, please rst unscrew the pre-installed
NF-A9x14 fan and use the supplied longer screws to install
the 92x25mm fan.
Fan setup3
Caution: Gently tighten the screws until they stop, but do not
use excessive force (max. torque 0.6 Nm).
3.
If there are residual traces of thermal paste or thermal pads
on your CPU, please clean them off rst.
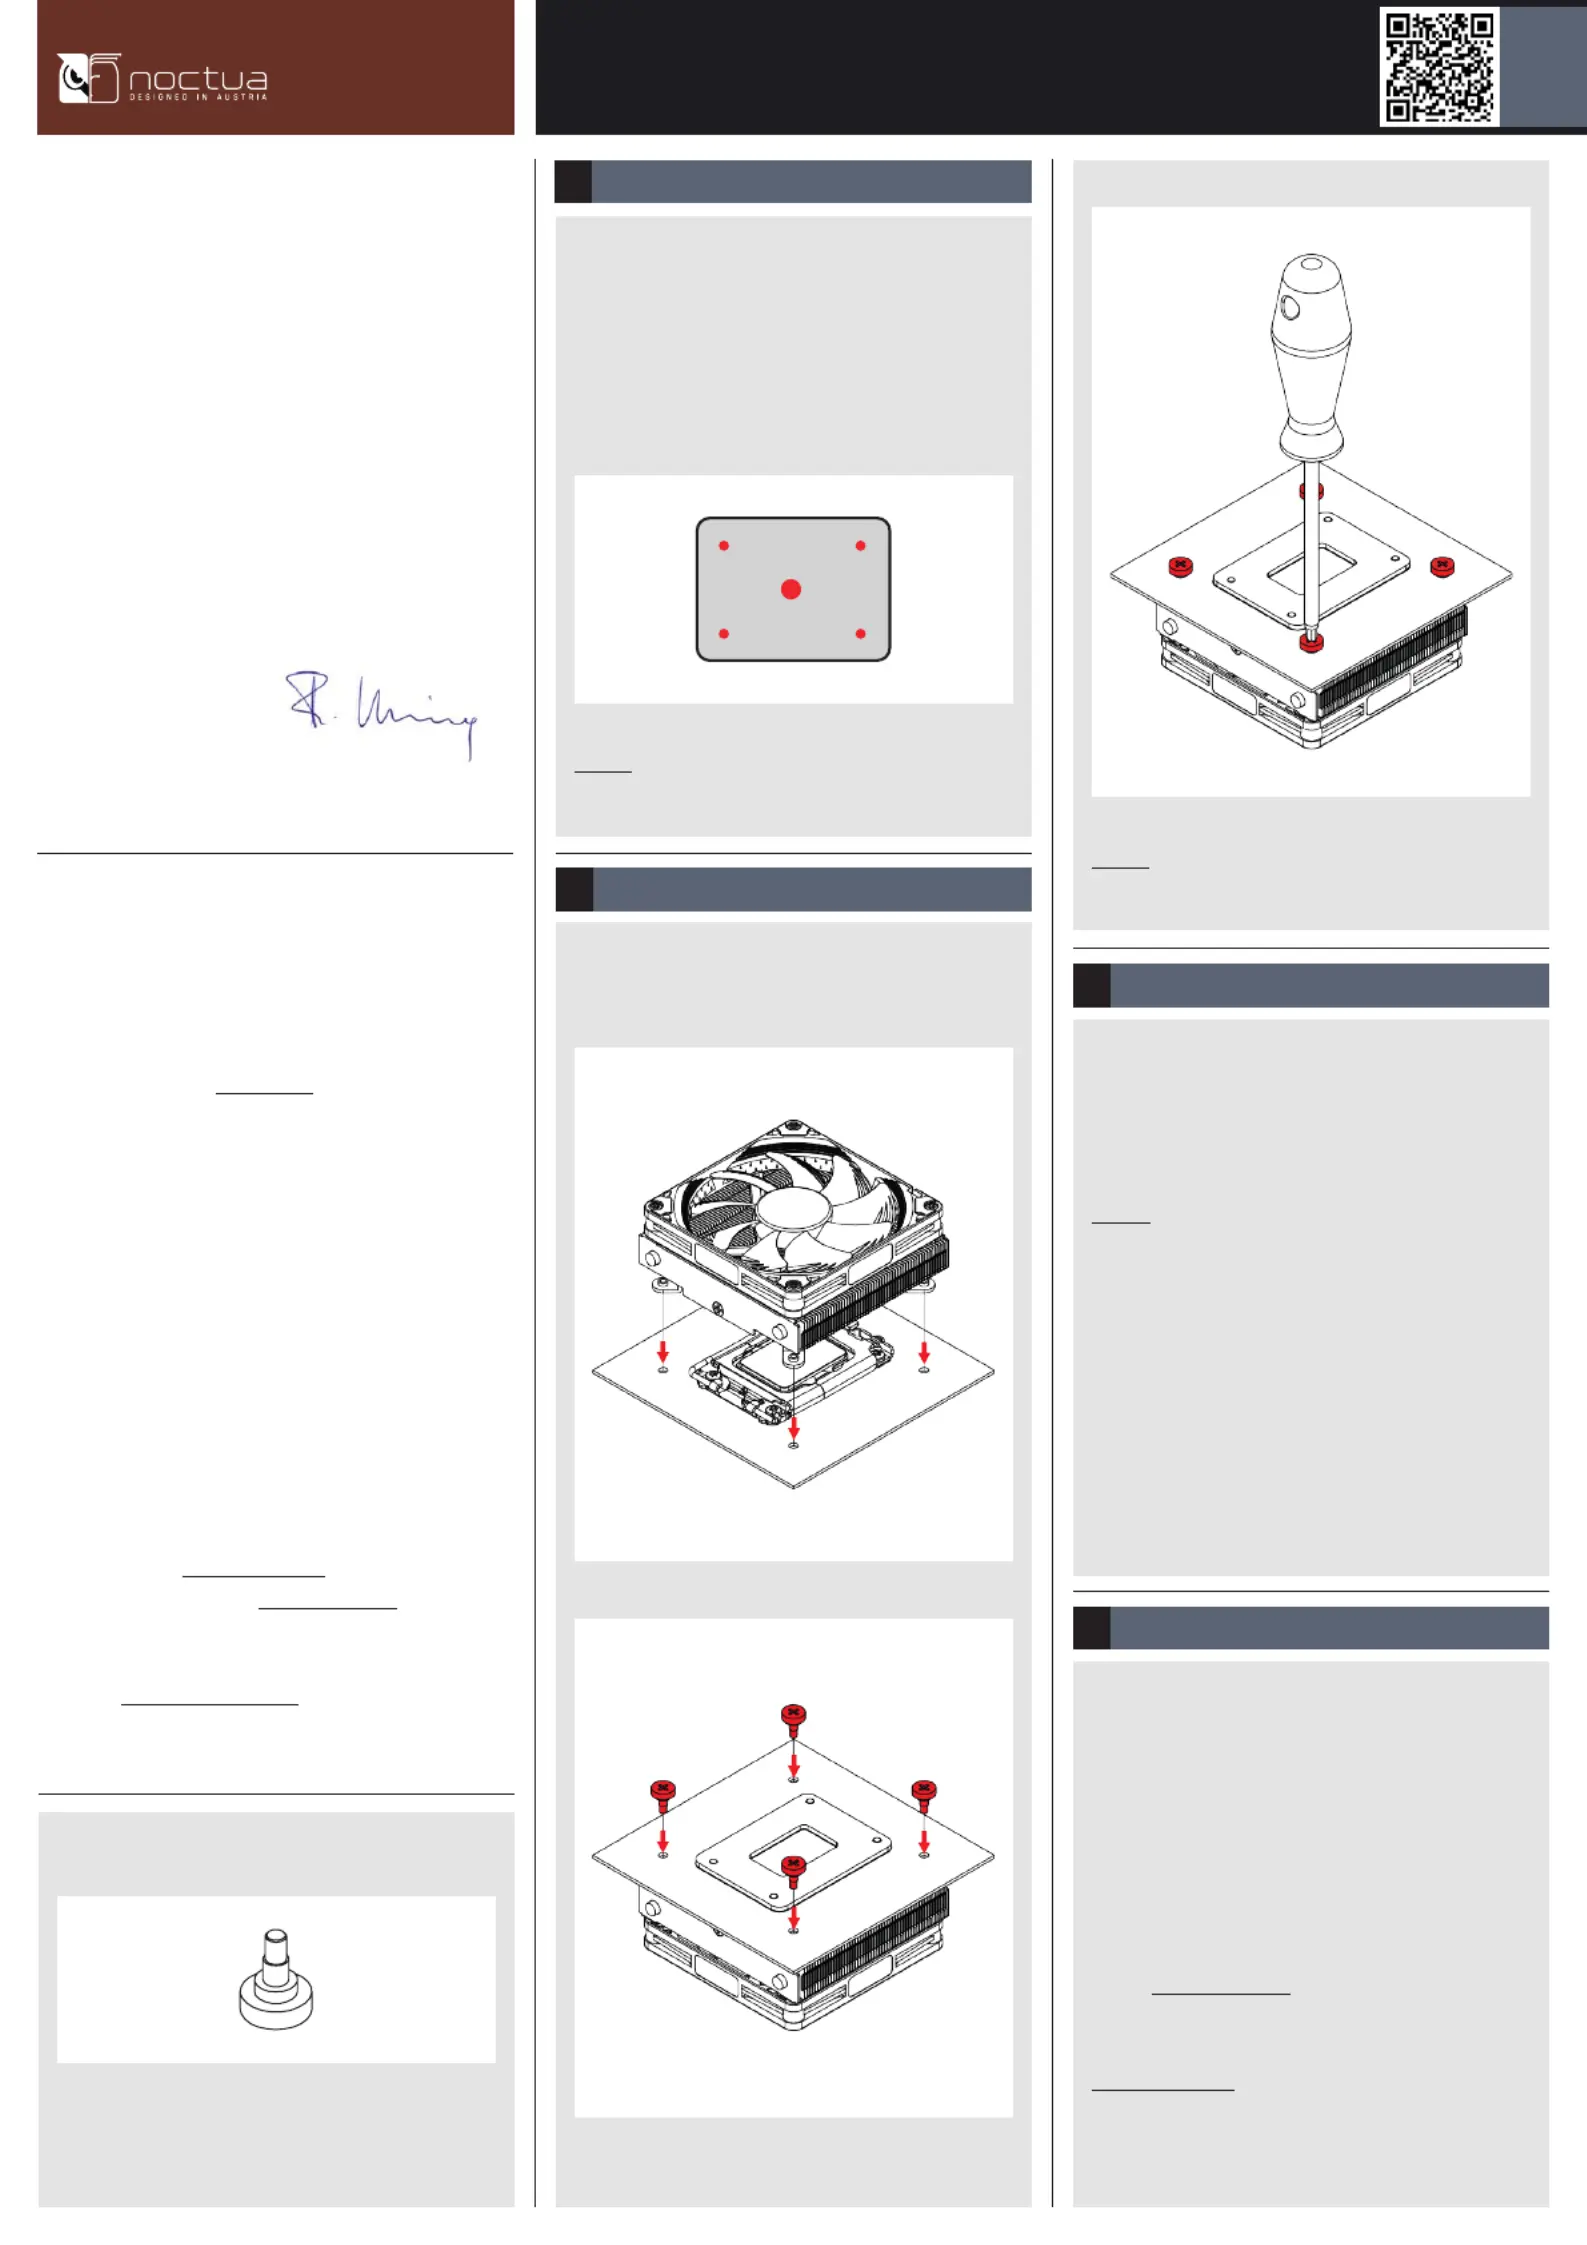
Then apply the supplied NT-H1 thermal paste onto the
CPU as shown below (4 dots with ~2mm diameter near the
corners plus 1 dot with 3-4mm diameter in the centre):
Applying the thermal paste1
Caution: Applying too much thermal paste will lower heat
conductivity and cooling performance!
Put the heatsink onto the CPU and x it from the rear side of
the motherboard using the mounting screws.
Fastening the heatsink to the CPU2
1.
2.
Dear customer,
Congratulations on choosing the Noctua NH-L9i-17xx
chromax.black. This small cooler packs all essential
technologies of our award-winning high-end models into
a highly compact package in order to give you the best
possible quiet cooling experience for HTPCs and small form
factor builds. I’m condent that you will be able to sense
some of the research, attention and care we’ve put into
making this product.
Enjoy your NH-L9i-17xx chromax.black!
Yours sincerely,
Roland Mossig, Noctua CEO
This manual will guide you through the installation process
of the SecuFirm2™ mounting system step by step.
Prior to installing the cooler, please consult the compatibility
centre on our website (ncc.noctua.at) and verify that the cooler
is fully compatible with your motherboard.
Please also make sure that your PC case offers sufcient
clearance for the cooler and that there are no compatibility
issues with any other components (e.g. tall RAM modules).
Double check that the heatsink does not make contact with
the VGA card, other PCIe cards, motherboard heatsinks or any
other components.
Noctua cannot be held responsible for any damage or losses
caused by compatibility issues.
Should you encounter any difculties, please check the FAQs
on our website (www.noctua.at/faqs) and don’t hesitate to
contact our support team at support@noctua.at.
Multilingual versions of this manual are available on our
website: www.noctua.at/manuals
Required mounting parts:
4x NM-IBT4 mounting screws
Termékspecifikációk
| Márka: | Noctua |
| Kategória: | Hardverkoeling |
| Modell: | NH-L9i-17xx chromax.black |
Szüksége van segítségre?
Ha segítségre van szüksége Noctua NH-L9i-17xx chromax.black, tegyen fel kérdést alább, és más felhasználók válaszolnak Önnek
Útmutatók Hardverkoeling Noctua

10 Április 2025
10 Január 2025
10 Január 2025
27 December 2024
26 Szeptember 2024
26 Szeptember 2024
24 Szeptember 2024
12 Szeptember 2024
12 Szeptember 2024
1 Szeptember 2024
Útmutatók Hardverkoeling
Legújabb útmutatók Hardverkoeling
9 Április 2025
9 Április 2025
9 Április 2025
8 Április 2025
8 Április 2025
8 Április 2025
8 Április 2025
8 Április 2025
8 Április 2025
8 Április 2025