Használati útmutató ProFlo PF140NC
ProFlo
nincs kategorizálva
PF140NC
Olvassa el alább 📖 a magyar nyelvű használati útmutatót ProFlo PF140NC (1 oldal) a nincs kategorizálva kategóriában. Ezt az útmutatót 12 ember találta hasznosnak és 6.5 felhasználó értékelte átlagosan 4.6 csillagra
Oldal 1/1
Installation Instructions
PF140NC
Warranty and Codes
This PROFLO product carries a 1-year limited warranty.
Distributed Exclusively by Ferguson and Wolseley Canada
© 2015 Ferguson Enterprises, Inc. All Rights Reserved
No Caulk Shower Drain
Be sure to check all local plumbing codes before beginning installation.
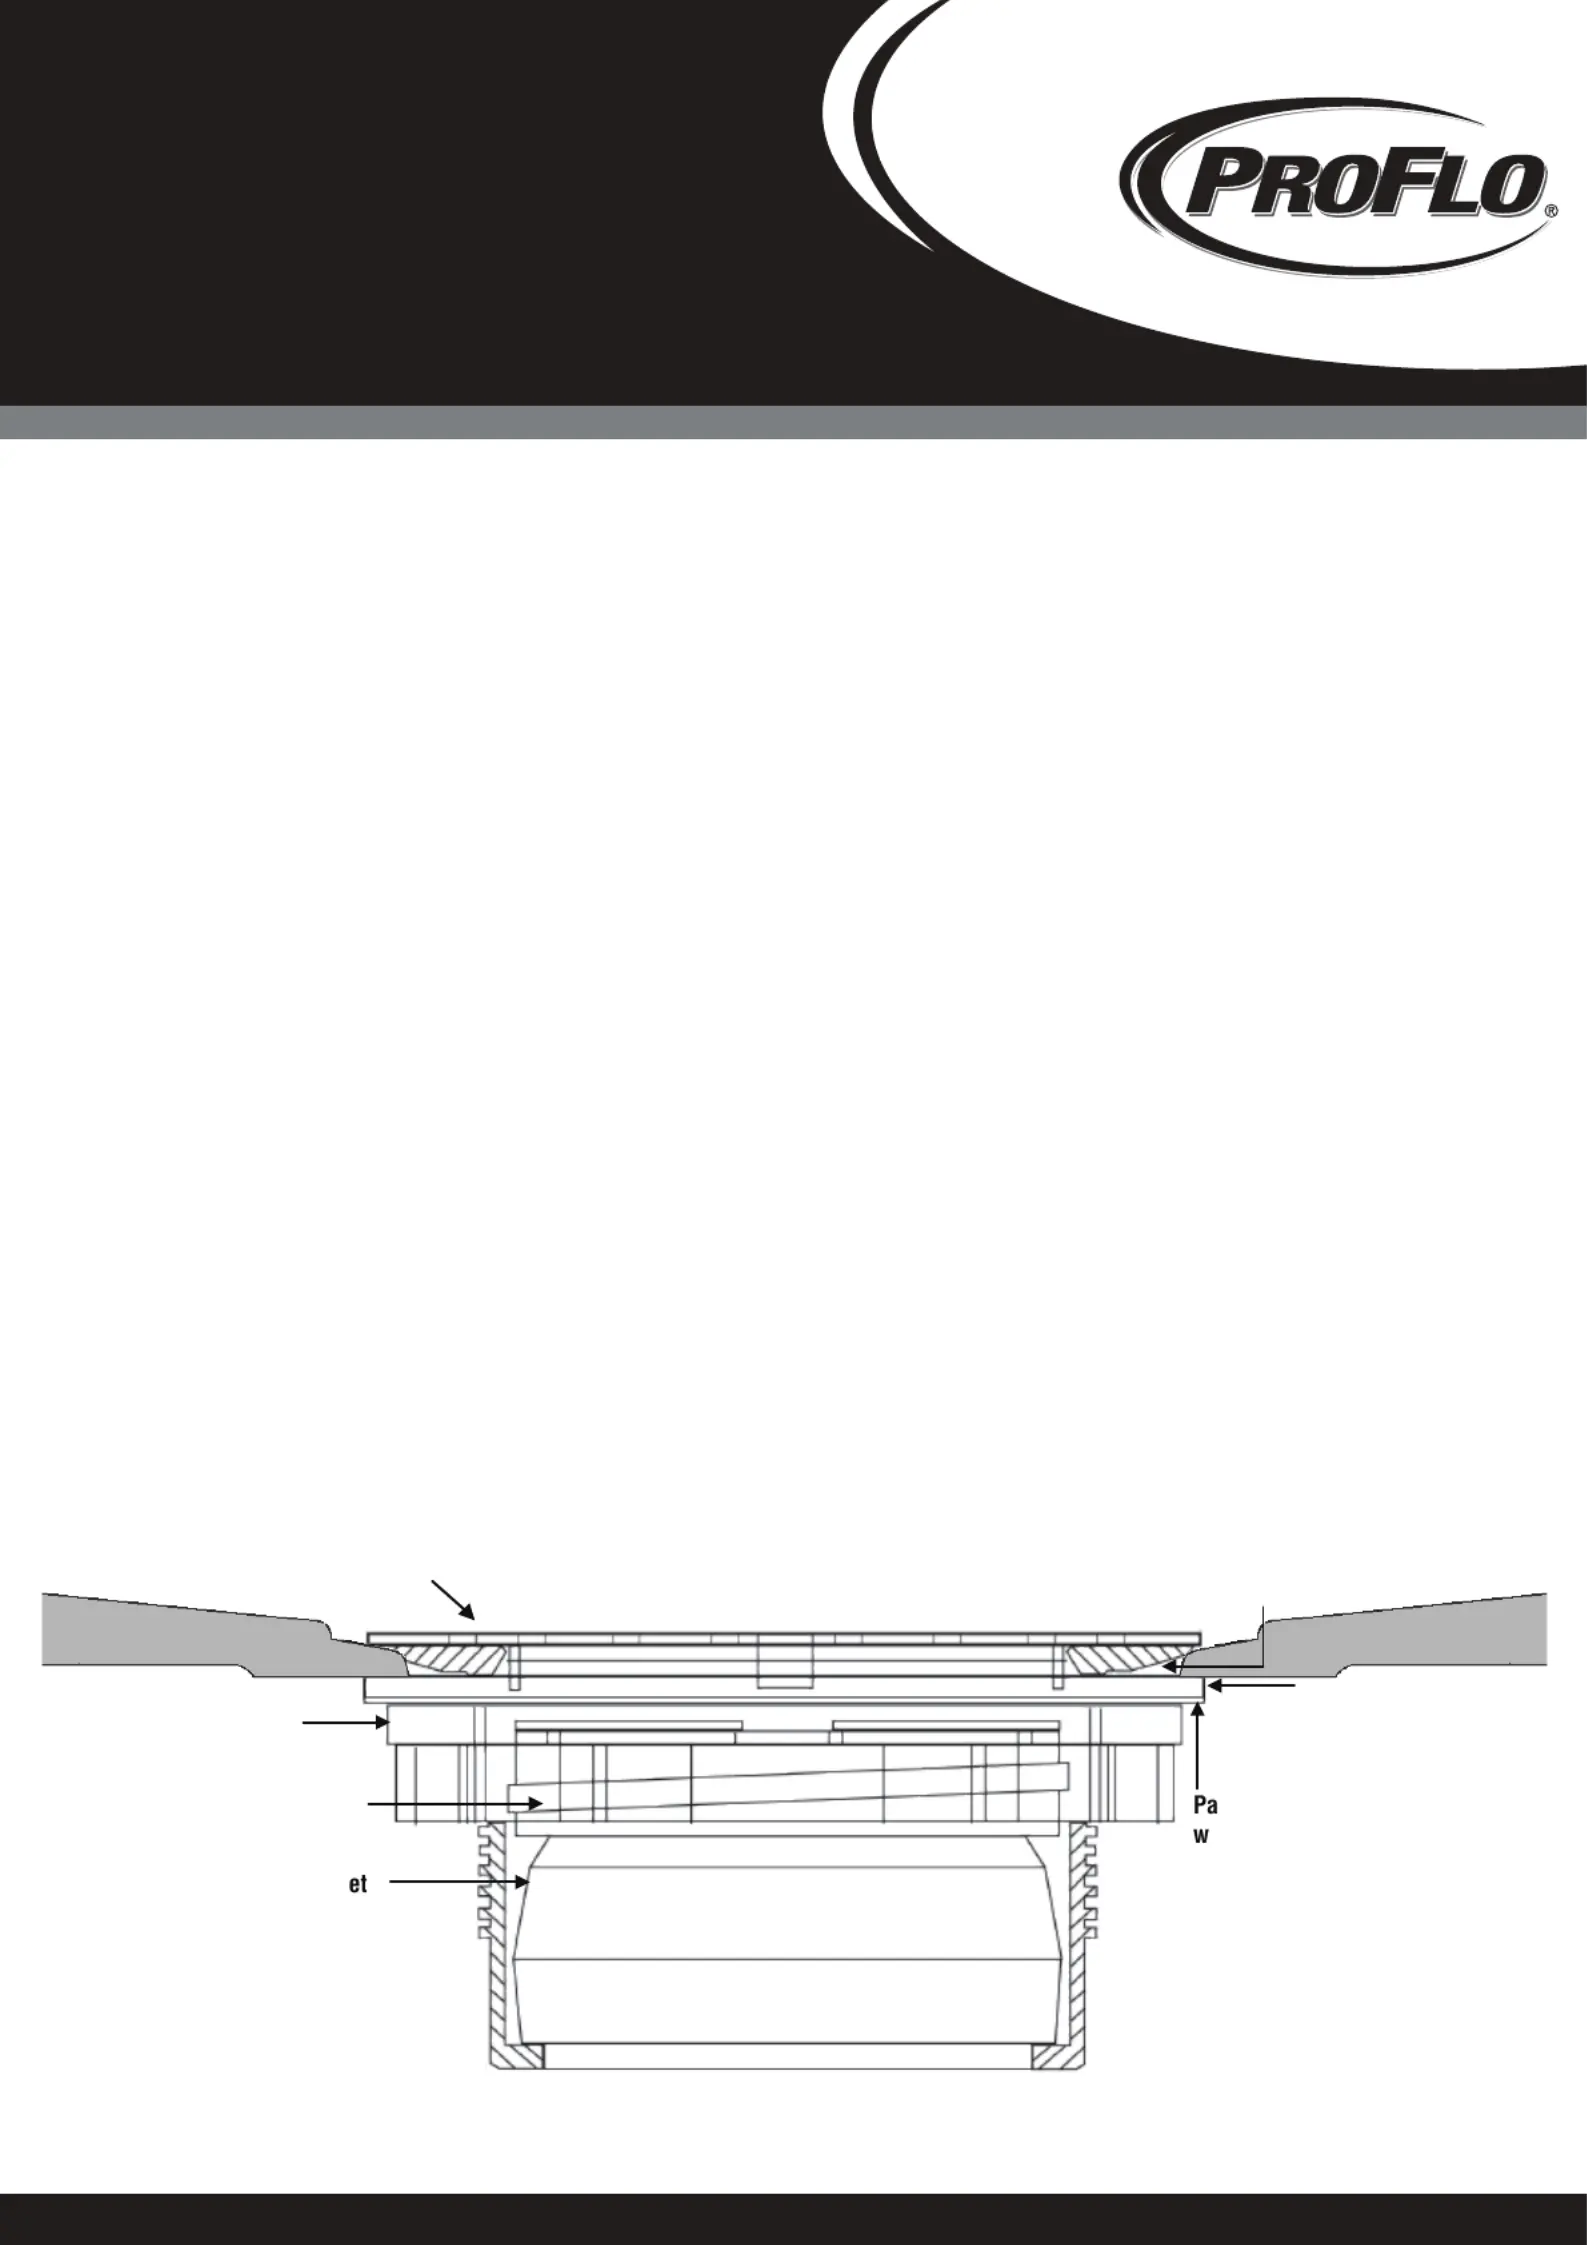
1. Unscrew and remove brass locknut, paper friction washer and rubber sealing washer.
Remove strainer from drain with a screwdriver.
2. From the top side of the shower, loosen (do not remove) the compression nut in the drain
body and apply a bead of silicone around the underside of drain top.
3. Push the drain body firmly down against the shower floor.
4. From below the shower drain, slide rubber gasket then paper friction washer into drain body and
slide over pipe. Make certain that the beveled end of the gasket is facing up and is flush with pipe
surface. Be sure there are no obstructions and that the sealing washer makes clean, even
contact with the bottom of the shower floor. Engage the locknut and tighten up against washer
stack.
5. From the top side of the shower drain, clean shower floor of any excess silicone.
6. From below the shower drain, install the pipe into the drain body through the compression gasket
until the pipe is flush with the top of the gasket.
7. From the top side of the shower drain, tighten compression nut with wrench. Adapter bar provided.
8. Allow 24 hours for silicone to cure and then check for leaks.
9. When the installation is complete, remove the adhesive cover from the strainer.
* Note: The compression gasket is designed to work with 2” schedule 40 plastic pipe only.
See the replacement gaskets for different types of installations.
a. Turn water on in shower and from below shower floor, check the drain area for leaks
concentrating on:
i. [1] the area between pipe and compression gasket
ii. [2] between shower floor and sealing washer
b. If a leak occurs in area [1], use the wrench to tighten the compression nut.
c. If a leak occurs in area [2], tighten outer locknut.
CAP 12/2015
Locknut
Compression nut
Compression gask
per friction
asher
Rubber sealing
washer
Apply silicone bead
Shower floor
Strainer
PF140NCGCI For cast iron installation
PF140NCGCO For copper installation
PF140NCGPL Replacement for plastic pipe installation
Termékspecifikációk
| Márka: | ProFlo |
| Kategória: | nincs kategorizálva |
| Modell: | PF140NC |
Szüksége van segítségre?
Ha segítségre van szüksége ProFlo PF140NC, tegyen fel kérdést alább, és más felhasználók válaszolnak Önnek
Útmutatók nincs kategorizálva ProFlo

7 Április 2025

7 Április 2025

7 Április 2025

7 Április 2025

7 Április 2025

7 Április 2025

7 Április 2025

7 Április 2025

7 Április 2025

7 Április 2025
Útmutatók nincs kategorizálva
- nincs kategorizálva BRIO
- nincs kategorizálva Sure-Fi
- nincs kategorizálva Acefast
- nincs kategorizálva Becken
- nincs kategorizálva Rocktrail
- nincs kategorizálva KidKraft
- nincs kategorizálva Imperia
- nincs kategorizálva MBM
- nincs kategorizálva GLORIA
- nincs kategorizálva TeachLogic
- nincs kategorizálva Meinl
- nincs kategorizálva Seek Thermal
- nincs kategorizálva Airlive
- nincs kategorizálva Sedona
- nincs kategorizálva Pylontech
Legújabb útmutatók nincs kategorizálva

10 Április 2025

10 Április 2025

10 Április 2025

9 Április 2025

9 Április 2025

9 Április 2025

9 Április 2025

9 Április 2025

9 Április 2025

9 Április 2025