Használati útmutató RIDGID 65R-C
RIDGID nincs kategorizálva 65R-C
Olvassa el alább 📖 a magyar nyelvű használati útmutatót RIDGID 65R-C (8 oldal) a nincs kategorizálva kategóriában. Ezt az útmutatót 17 ember találta hasznosnak és 5 felhasználó értékelte átlagosan 4.1 csillagra
Oldal 1/8
Threading
1.Inspect the threader before use. Replace dies or any
other part that shows damage or wear. To insure high
thread quality, only use RIDGID replacement dies.
Worn dies can result in poor thread quality
and high handle forces.
2.Mount the pipe firmly in a pipe vise. When threading an
existing pipe, make sure it is secure and will not move.
Cut the end of the pipe cleanly and squarely using a
pipe cutter
(Figure 3)
.
To prevent tipping, long lengths of pipe
should also be supported with a pipe stand. Vise and
stands should be on level ground.
When working on a scaffold or lift, the oper-
ator should be properly secured to prevent injury in the
event of a fall.
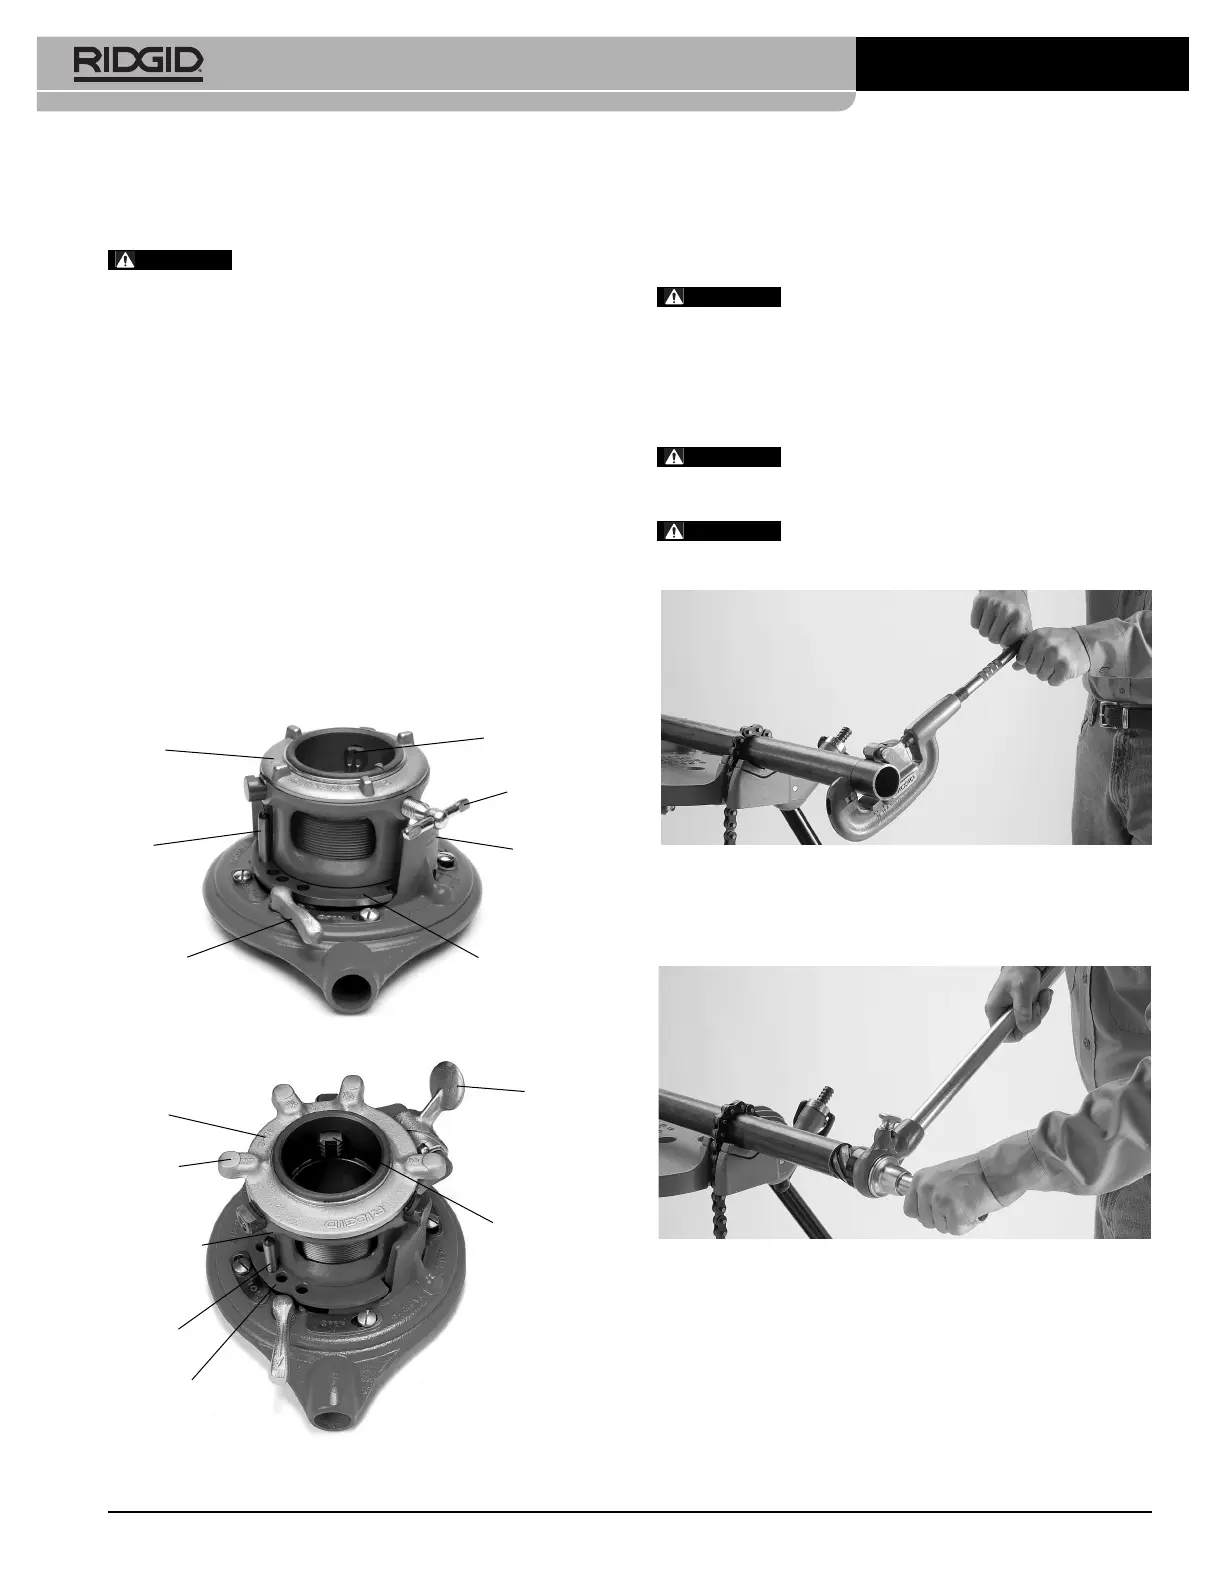
Figure 3 – Cutting End Of Pipe
3.Ream the end of the pipe to remove any burrs that may
have been produced during the cutting of the pipe
(Figure 4)
.
Figure 4 – Reaming End Of Pipe
4.Adjust thread size for the size pipe to be threaded (refer
to previous instructions for thread size adjustment).
5.Adjust workholder:
65R-C:Turn gauge ring until desired pipe size corresponds
with mark on top of workholder
(Figure 1)
.
65R-TC:Turn gauge ring until desired pipe size is aligned
with locking cam
(Figure 2)
.
RIDGID
®
5/14
Printed in U.S.A.
EC40741
999-998-280.10
REV. C
RIDGID
®
65R-C and 65R-TC Threaders are designed to
thread 1" to 2" pipe and conduit using a manually operated
internal ratchet.
Read these instructions carefully before
using this tool. Failure to follow all instructions may
result in property damage and/or serious injury.
Thread Size Adjustment
1.Place threader with workholder up
(Figures 1 and 2)
and unscrew workholder by turning counter-clockwise
until change plate is clear of posts.
2.Move post to desired pipe size. Screw workholder
clock wise until change plate slides over post.
3.Adjust change plate to desired thread size.
Standard Size Thread:Set change plate between the two
“Standard” marks.
Oversize Thread:For oversize (shallow) thread, set change
plate slightly below the “Standard” marks.
Undersize Thread:For undersize (deep) thread, set change
plate slightly above the “Standard” marks.
Figure 1 – 65R-C Threader
Figure 2 – 65R-TC Threader
65R-C & 65R-TC Manual Pipe Threader Instructions
WARNING
Gauge
Ring
Post
Change
Plate
Workholder
Jaw
Clamp
Screw
Standard
Marks
Release Cam
Lever
Gauge
Ring
Workholder
Jaw
Locking
Cam
Change
Plate
Lugs
Post
Workholder
WARNING
WARNING
WARNING
Termékspecifikációk
| Márka: | RIDGID |
| Kategória: | nincs kategorizálva |
| Modell: | 65R-C |
Szüksége van segítségre?
Ha segítségre van szüksége RIDGID 65R-C, tegyen fel kérdést alább, és más felhasználók válaszolnak Önnek
Útmutatók nincs kategorizálva RIDGID

12 Január 2025
12 Január 2025
12 Január 2025
15 Szeptember 2024
3 Szeptember 2024
29 Augusztus 2024
29 Augusztus 2024
29 Augusztus 2024
28 Augusztus 2024
28 Augusztus 2024
Útmutatók nincs kategorizálva
Legújabb útmutatók nincs kategorizálva
10 Április 2025
10 Április 2025
10 Április 2025
9 Április 2025
9 Április 2025
9 Április 2025
9 Április 2025
9 Április 2025
9 Április 2025
9 Április 2025