Használati útmutató StarTech.com CPUMNTUD
StarTech.com lapos panel támaszték CPUMNTUD
Olvassa el alább 📖 a magyar nyelvű használati útmutatót StarTech.com CPUMNTUD (2 oldal) a lapos panel támaszték kategóriában. Ezt az útmutatót 21 ember találta hasznosnak és 4 felhasználó értékelte átlagosan 4.3 csillagra
Oldal 1/2
Quick-Start Guide
To view manuals, FAQs, videos, drivers, downloads, technical drawings, and more, visit www.startech.com/support.
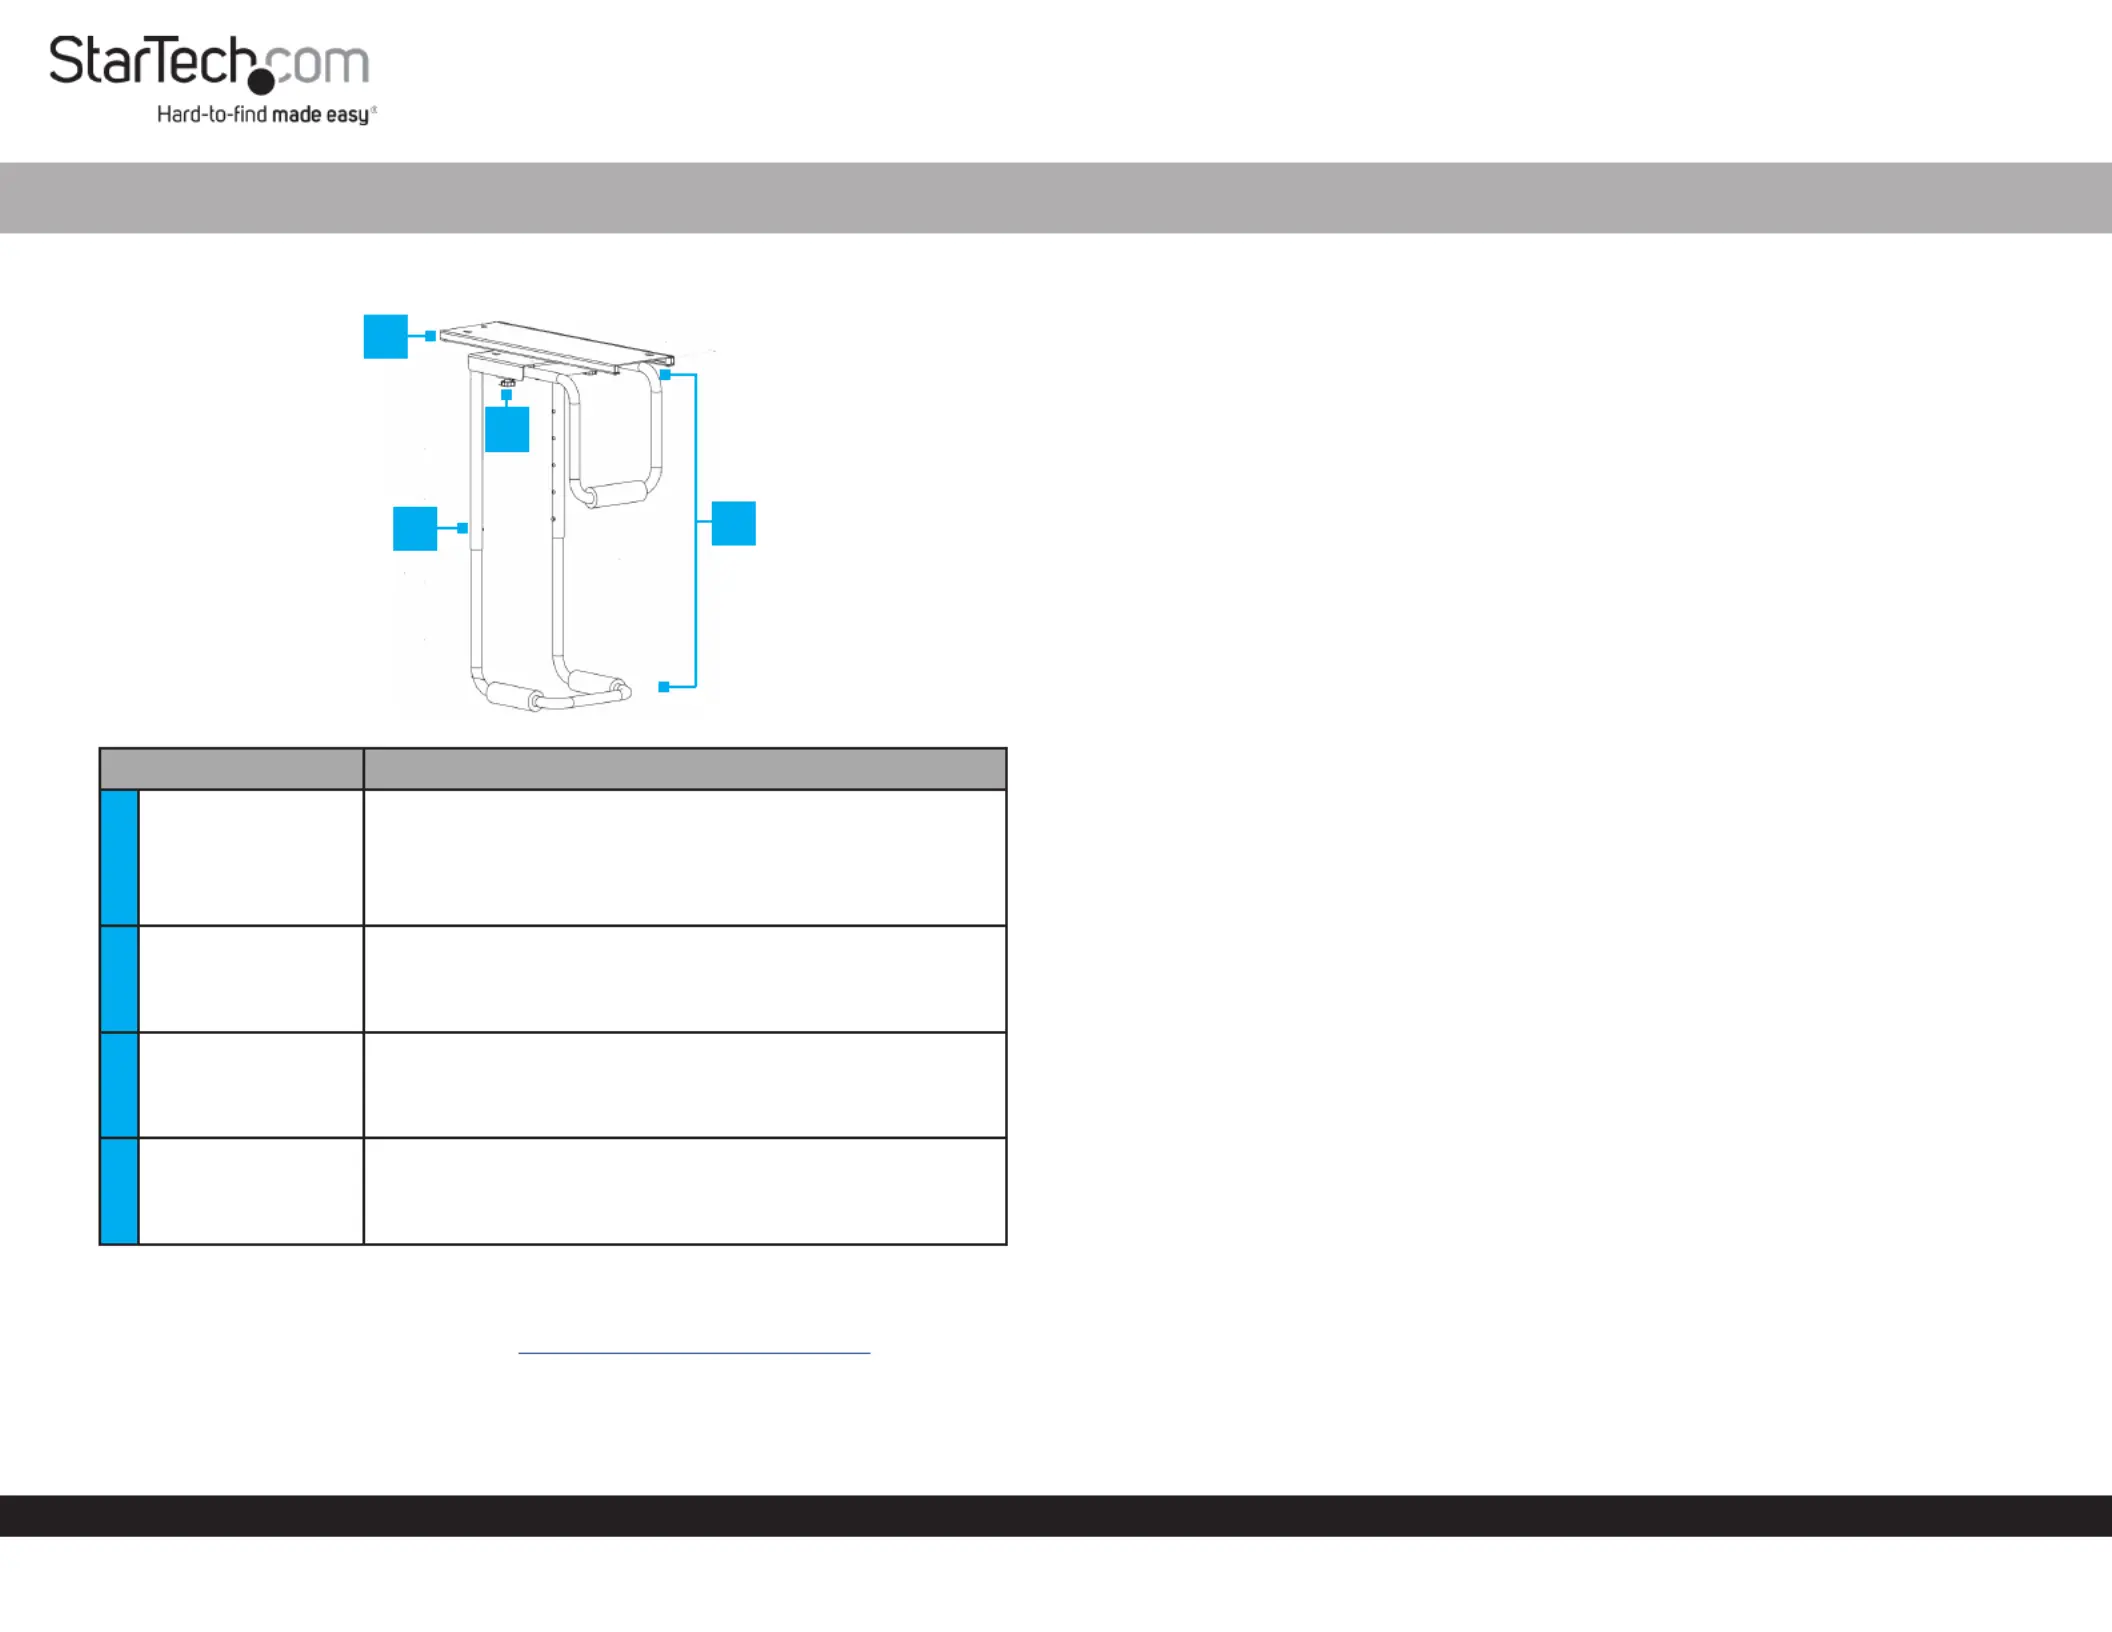
Product Diagram (CPUMNTUD)
PartFunction
1Mounting Plate
• Allows for lateral adjustments.
• Mounts the into place.CPU Holder
Note: The needs a minimum table CPU Holder
thickness of .75” (19mm).
2
Adjustment
buttons (2)
• Allows for height adjustments.
Note: The has a height range of minimum CPU Holder
14” (357mm) and maximum 21.9” (557mm).
3
Adjustment
Knobs (2)
• Allows for width adjustments.
Note: The has a width range of minimum CPU Holder
4.84” (123mm) and maximum 9.96” (253mm).
4CPU Holder
• Mounts the CPU.
Note: The has a maximum weight CPU Holder
capacity of 66 lbs (30 kg).
Requirements
For the latest requirements, please visit .www.startech.com/CPUMNTUD
CPU Table Mount
Installation
Notes: StarTech.com is not responsible for any damages related to the installation of
this product.
The needs a minimum table thickness of .75” (19mm).CPU Holder
Please refer to the warning statements prior to installation.
Mounting Plate
1. Align the into position on the mounting surface.Mounting Plate
2. Insert the (6) through the (6) on the Mounting ScrewsMounting HolesMounting
Plate and into the mounting surface.
3. Using a , tighten the (6). Be careful not Phillips Head ScrewdriverMounting Screws
to over-tighten.
CPU Holder
• Align the on the bottom of the with the on the SwivelCPU HolderRailsMounting
PlateRailsSwivelRails. Make sure that the on the are properly aligned with the on
the so that you can easily slide the across the .Mounting PlateCPU HolderRails
Stopper Installation
1. Align two of the with the (2), on one end of the StoppersStopper HolesMounting
Plate.StopperMounting PlateRails Insert the between the base of the and the on
the .Mounting Plate
2. Insert the through the and into the .Stopper ScrewMount Plate RailStopper
3. Using a , tighten the (2). Be careful not Phillips Head ScrewdriverStopper Screws
to over-tighten.
Adjusting the CPU Holder
Width
The has a width range of 4.84” (123mm) - 9.96” (253mm).CPU Holder
1. Loosen the two located on either side of the .Adjustment KnobsCPU Holder
2. Slide the away from the .Width Adjustment BarCPU Holder
3. Once the is at the desired width, tighten the Width Adjustment BarAdjustment
KnobsWidth Adjustment Bar to lock the in place.
4
1
3
2
Termékspecifikációk
| Márka: | StarTech.com |
| Kategória: | lapos panel támaszték |
| Modell: | CPUMNTUD |
Szüksége van segítségre?
Ha segítségre van szüksége StarTech.com CPUMNTUD, tegyen fel kérdést alább, és más felhasználók válaszolnak Önnek
Útmutatók lapos panel támaszték StarTech.com

15 Január 2025
15 Január 2025
15 Január 2025
15 Január 2025
15 Január 2025
15 Január 2025
15 Január 2025
15 Január 2025
15 Január 2025
15 Január 2025
Útmutatók lapos panel támaszték
Legújabb útmutatók lapos panel támaszték
3 Április 2025
3 Április 2025
3 Április 2025
3 Április 2025
3 Április 2025
3 Április 2025
3 Április 2025
3 Április 2025
3 Április 2025
3 Április 2025