Használati útmutató Whirlpool HSCX 10444
Whirlpool Szárítógép HSCX 10444
Olvassa el alább 📖 a magyar nyelvű használati útmutatót Whirlpool HSCX 10444 (64 oldal) a Szárítógép kategóriában. Ezt az útmutatót 24 ember találta hasznosnak és 9 felhasználó értékelte átlagosan 5.0 csillagra
Oldal 1/64
1
EN
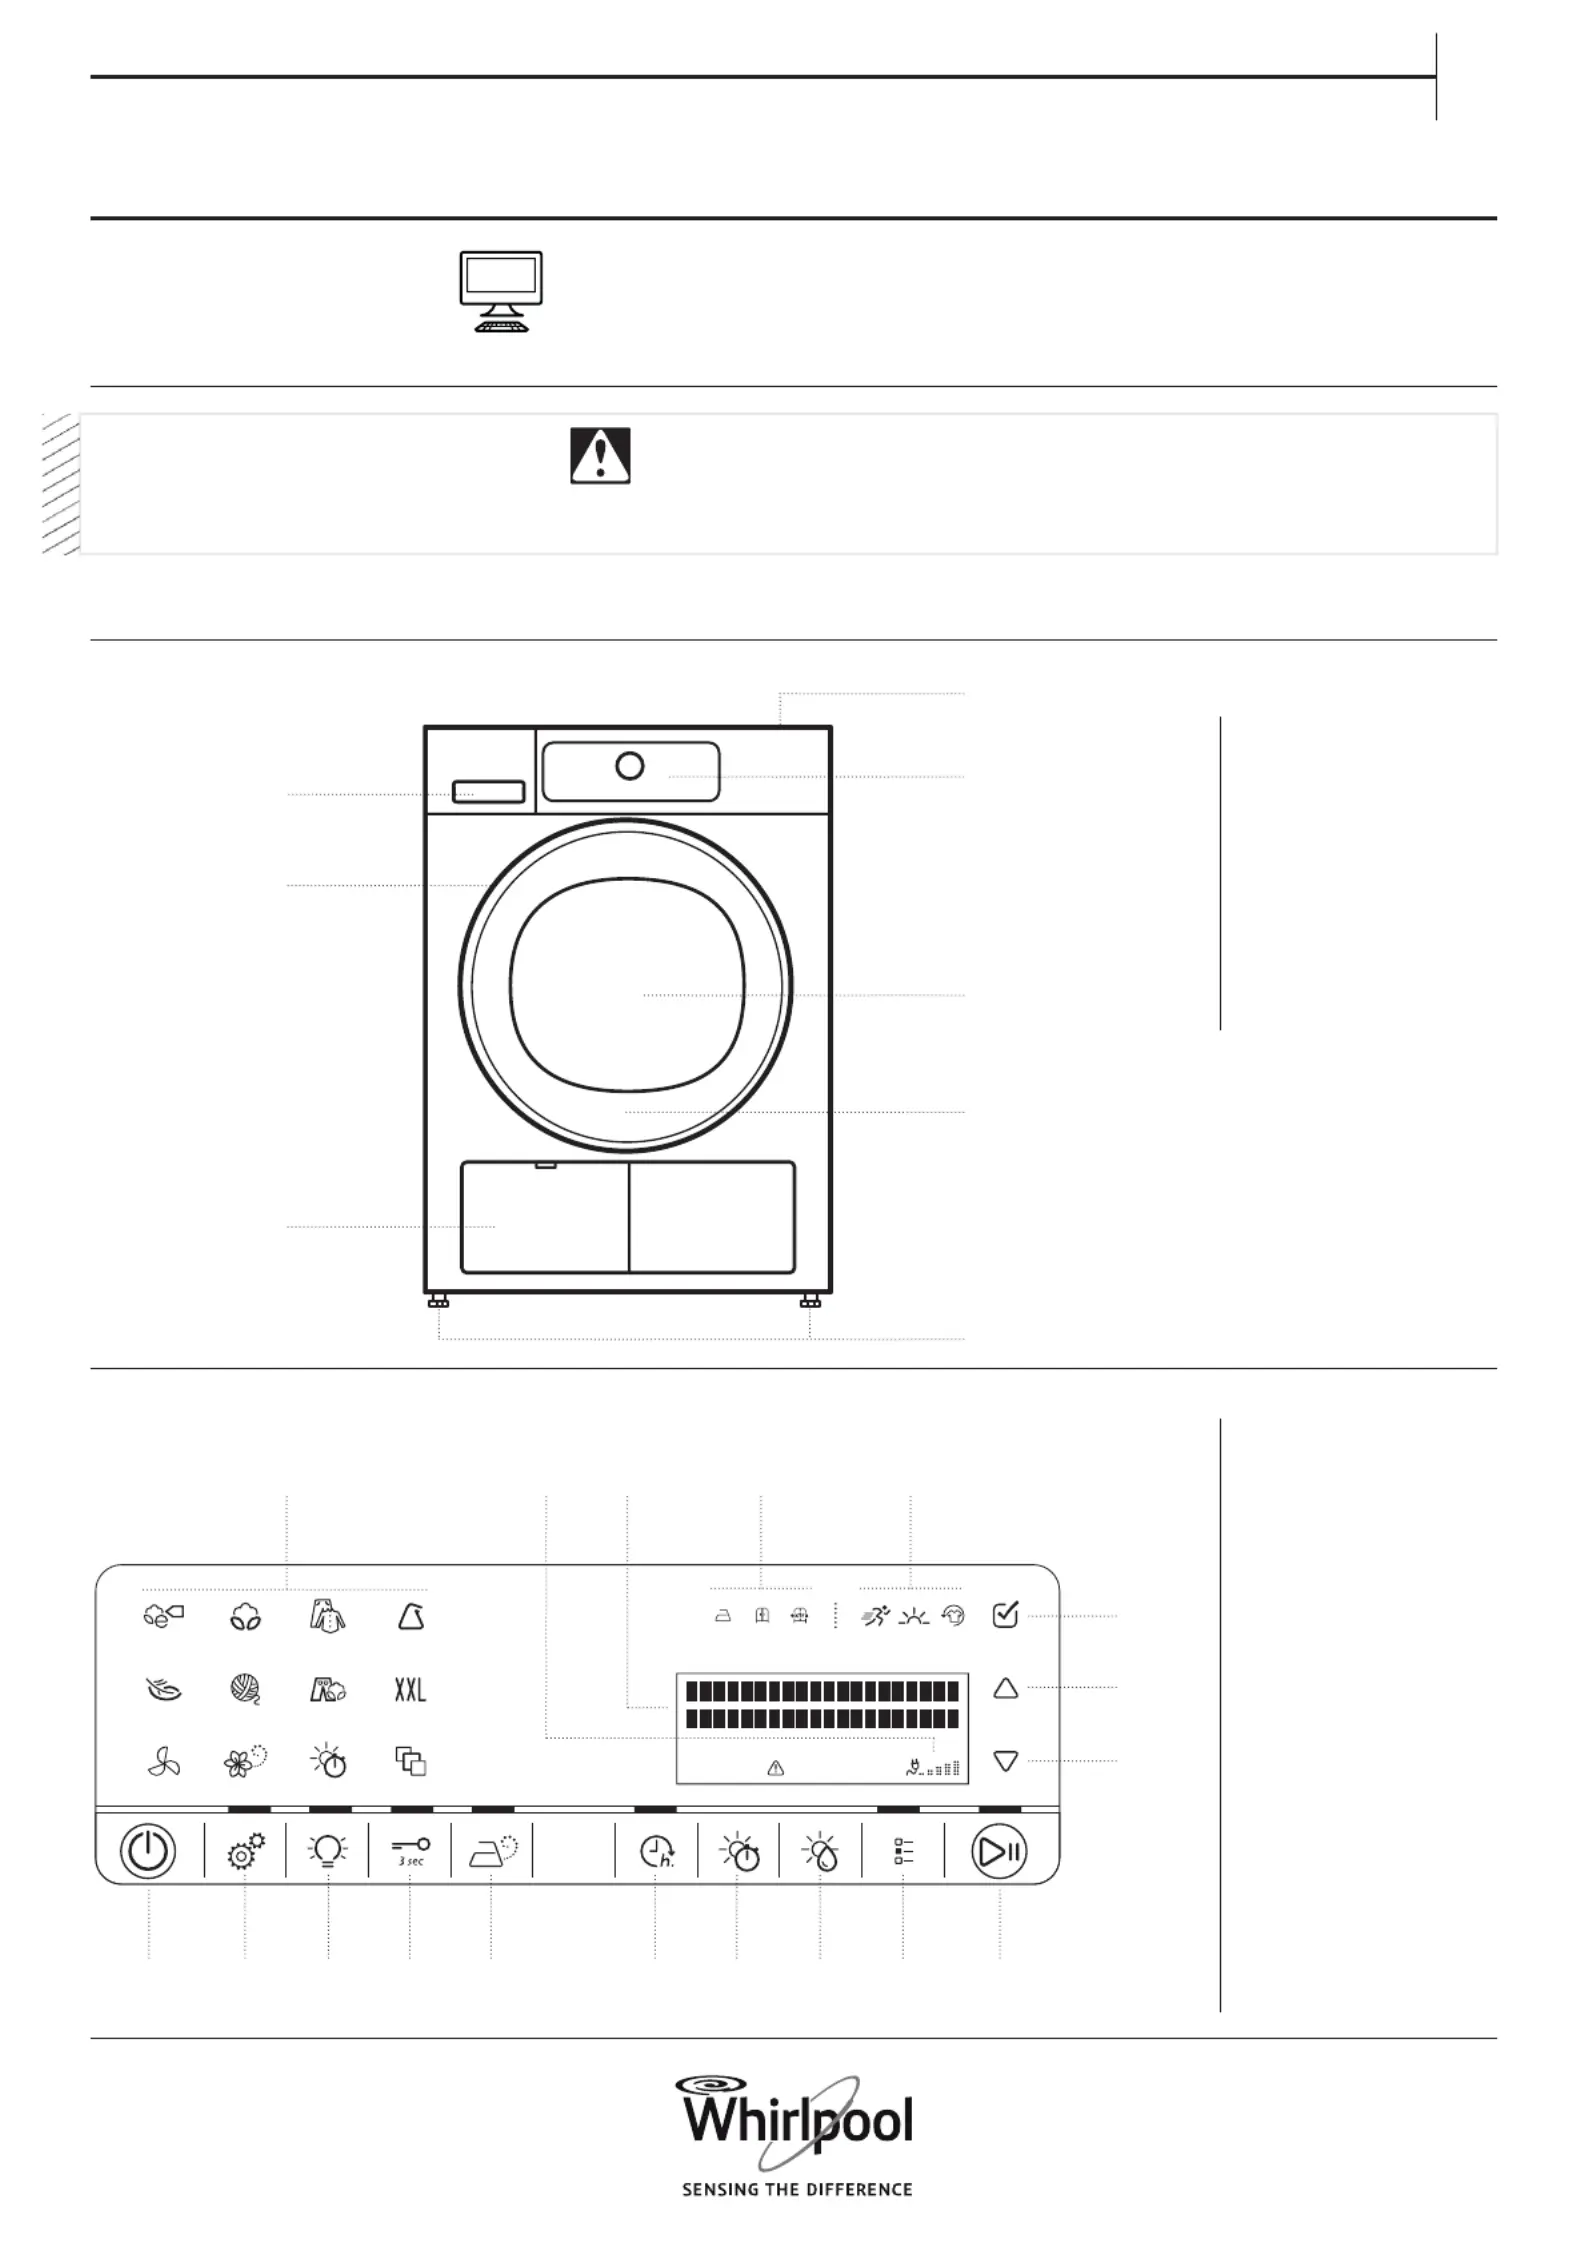
PRODUCT DESCRIPTION
APPLIANCE
DAILY REFERENCE
GUIDE
CONTROL PANEL
1. Worktop
2. Control panel
3. Water tank
4. Door
5. Door handle
6. Door filter (behind
door)
7. Bottom filter (behind
flap)
8. Adjustable feet (4)
1. On/Off button (Reset if
long pressed)
2. Settings button
3. Drum light
4. Key lock
5. Steam option
6. Finish in
7. Drying time
8. Dryness level
9. Options button
10. Start/Pause button
11. OK key (to confirm)
12. UP key
13. DOWN key
14. Options indicators
15. Dryness level
indicators
16. Display
17. Eco monitor
18. Programmes area
1.
2.
3.
6.
4.
7.
8.
5.
1.7.2.6.8.4.10.3.9.5.
11.
12.
13.
18.17.16.15.14.
Before using the appliance, carefully
read the Health and Safety guide.
Before using the dryer, the transport
bolts must be removed.
For detailed instructions on how to
remove them, refer to the Installation Guide.
THANK YOU FOR BUYING A WHIRLPOOL PRODUCT.
In order to receive a more complete assistance,
please register your appliance on http://www.whirlpool.eu/register
Termékspecifikációk
| Márka: | Whirlpool |
| Kategória: | Szárítógép |
| Modell: | HSCX 10444 |
Szüksége van segítségre?
Ha segítségre van szüksége Whirlpool HSCX 10444, tegyen fel kérdést alább, és más felhasználók válaszolnak Önnek
Útmutatók Szárítógép Whirlpool

9 Április 2025
4 Április 2025
4 Április 2025
4 Április 2025
3 Április 2025
2 Április 2025
1 Április 2025
31 Március 2025
30 Március 2025
28 Március 2025
Útmutatók Szárítógép
Legújabb útmutatók Szárítógép
10 Április 2025
10 Április 2025
10 Április 2025
9 Április 2025
9 Április 2025
9 Április 2025
7 Április 2025
7 Április 2025
7 Április 2025
6 Április 2025