Használati útmutató 3Dconnexion CadMouse
3Dconnexion
egér
CadMouse
Olvassa el alább 📖 a magyar nyelvű használati útmutatót 3Dconnexion CadMouse (9 oldal) a egér kategóriában. Ezt az útmutatót 25 ember találta hasznosnak és 13 felhasználó értékelte átlagosan 4.2 csillagra
Oldal 1/9
3Dconnexion CadMouse Properties Panel
You can access the 3Dconnexion Properties panel via the icon in your notification area (systray), 3D
Mouse Home (on your desktop) or by selecting
launched by pressing the Radial Menu Button on the top of the CadMouse).
Speed
This slider sets the overall speed for your CadMouse.
Note: The CadMouse
speed slider sets speed globally for all applications.
Advanced Settings
This is where you can configure specific CadMouse settings.
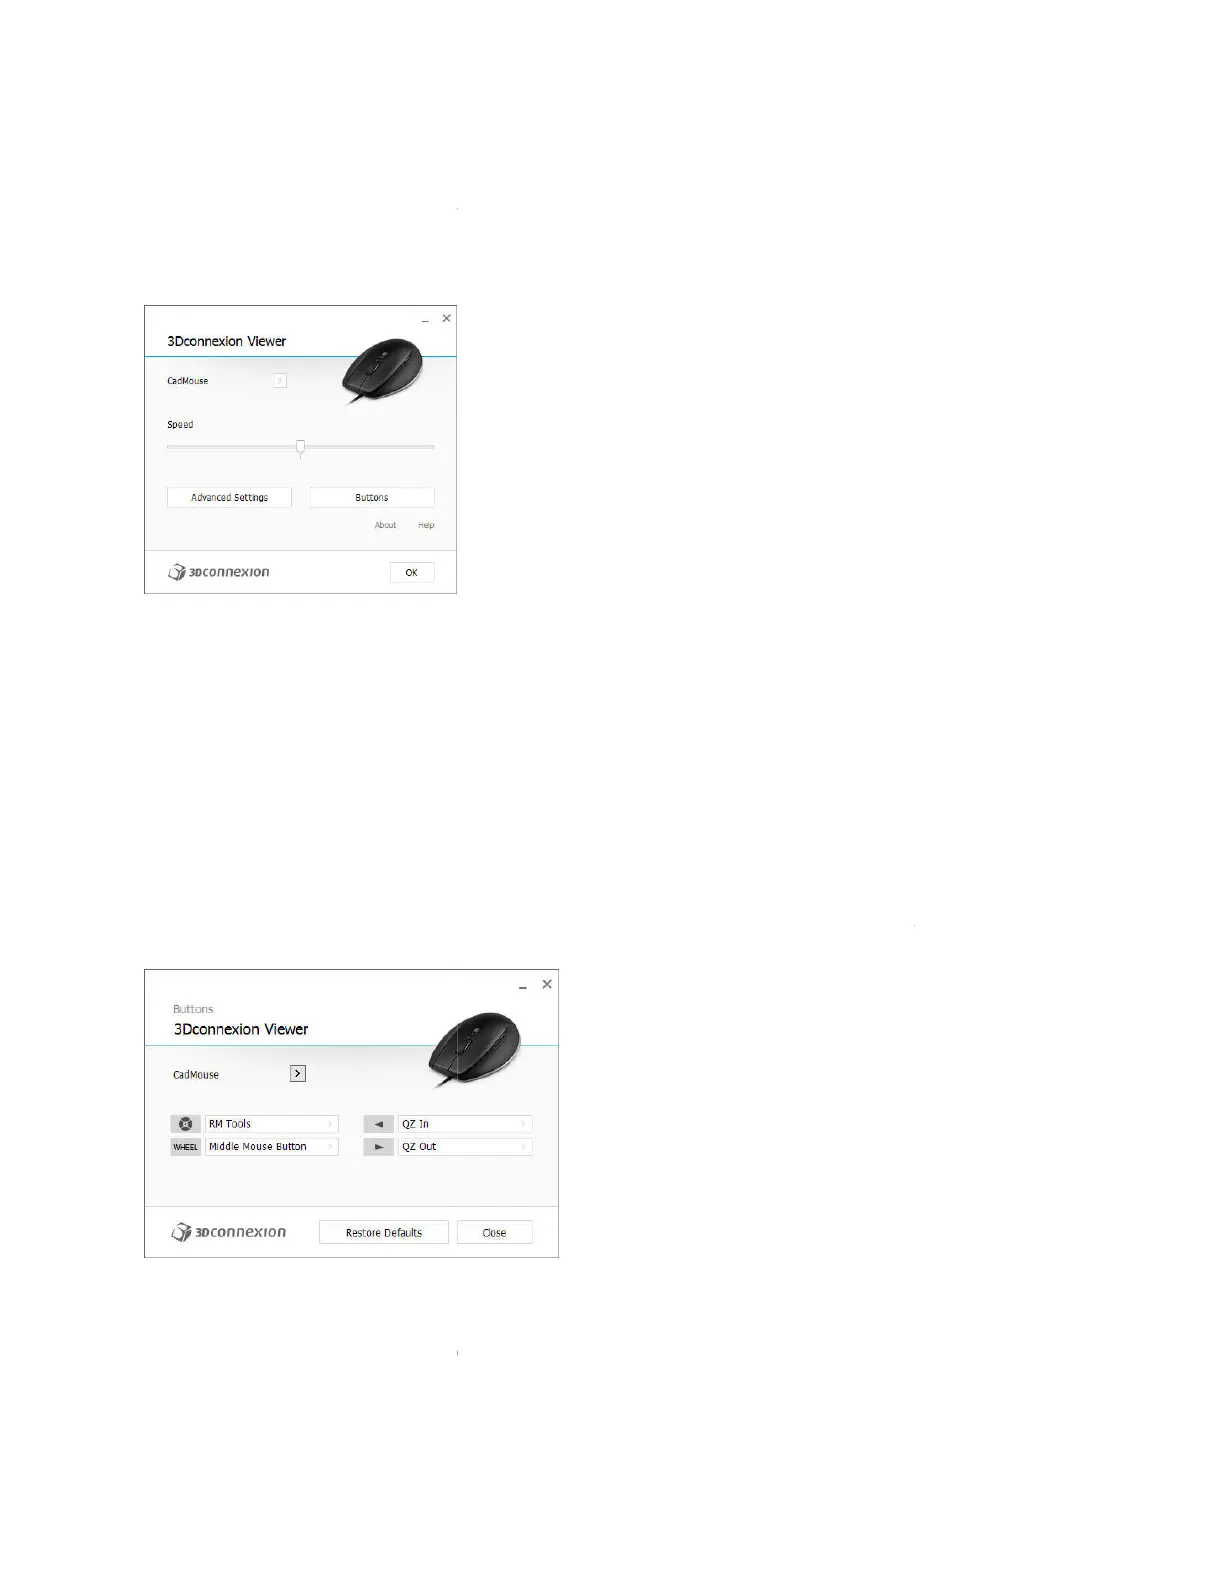
Buttons
The Buttons panel within 3Dconnexion Properties allows you to assign commands, Macros or Radial
Menus to the CadMouse buttons.
The active application is displayed at the top left of the panel and any changes made are only applied to
that application. This allows you to configure your CadMouse individually for each of your applications.
Environment sensitivity
Some applications feature environment sensitive button mapping.
In those applications you can have different button assignments depending on the current active
environment. More information can be found in the application specific help sections of the affe
applications:
3Dconnexion CadMouse Properties Panel
You can access the 3Dconnexion Properties panel via the icon in your notification area (systray), 3D
Mouse Home (on your desktop) or by selecting properties from the radial menu (by default this is
launched by pressing the Radial Menu Button on the top of the CadMouse).
This slider sets the overall speed for your CadMouse.
speed slider sets speed globally for all applications.
This is where you can configure specific CadMouse settings.
The Buttons panel within 3Dconnexion Properties allows you to assign commands, Macros or Radial
The active application is displayed at the top left of the panel and any changes made are only applied to
that application. This allows you to configure your CadMouse individually for each of your applications.
Some applications feature environment sensitive button mapping.
In those applications you can have different button assignments depending on the current active
environment. More information can be found in the application specific help sections of the affe
You can access the 3Dconnexion Properties panel via the icon in your notification area (systray), 3D
properties from the radial menu (by default this is
The Buttons panel within 3Dconnexion Properties allows you to assign commands, Macros or Radial
The active application is displayed at the top left of the panel and any changes made are only applied to
that application. This allows you to configure your CadMouse individually for each of your applications.
In those applications you can have different button assignments depending on the current active
environment. More information can be found in the application specific help sections of the affe
cted
Termékspecifikációk
| Márka: | 3Dconnexion |
| Kategória: | egér |
| Modell: | CadMouse |
Szüksége van segítségre?
Ha segítségre van szüksége 3Dconnexion CadMouse, tegyen fel kérdést alább, és más felhasználók válaszolnak Önnek
Útmutatók egér 3Dconnexion

30 Augusztus 2024

28 Augusztus 2024

28 Augusztus 2024

28 Augusztus 2024
Útmutatók egér
- egér Kunft
- egér Icy Box
- egér Wacom
- egér Adesso
- egér ThunderX3
- egér InLine
- egér Kensington
- egér Corsair
- egér Anker
- egér Steelseries
- egér X-Zero
- egér INCA
- egér Adj
- egér NACON
- egér NZXT
Legújabb útmutatók egér

8 Április 2025

3 Április 2025

30 Március 2025

30 Március 2025

30 Március 2025

28 Március 2025

28 Március 2025

28 Március 2025

28 Március 2025

27 Március 2025