Használati útmutató AMT E1
Olvassa el alább 📖 a magyar nyelvű használati útmutatót AMT E1 (4 oldal) a nincs kategorizálva kategóriában. Ezt az útmutatót 29 ember találta hasznosnak és 9 felhasználó értékelte átlagosan 4.0 csillagra
Oldal 1/4
www.amtelectronics.com www.amtelectronics.com
1 1
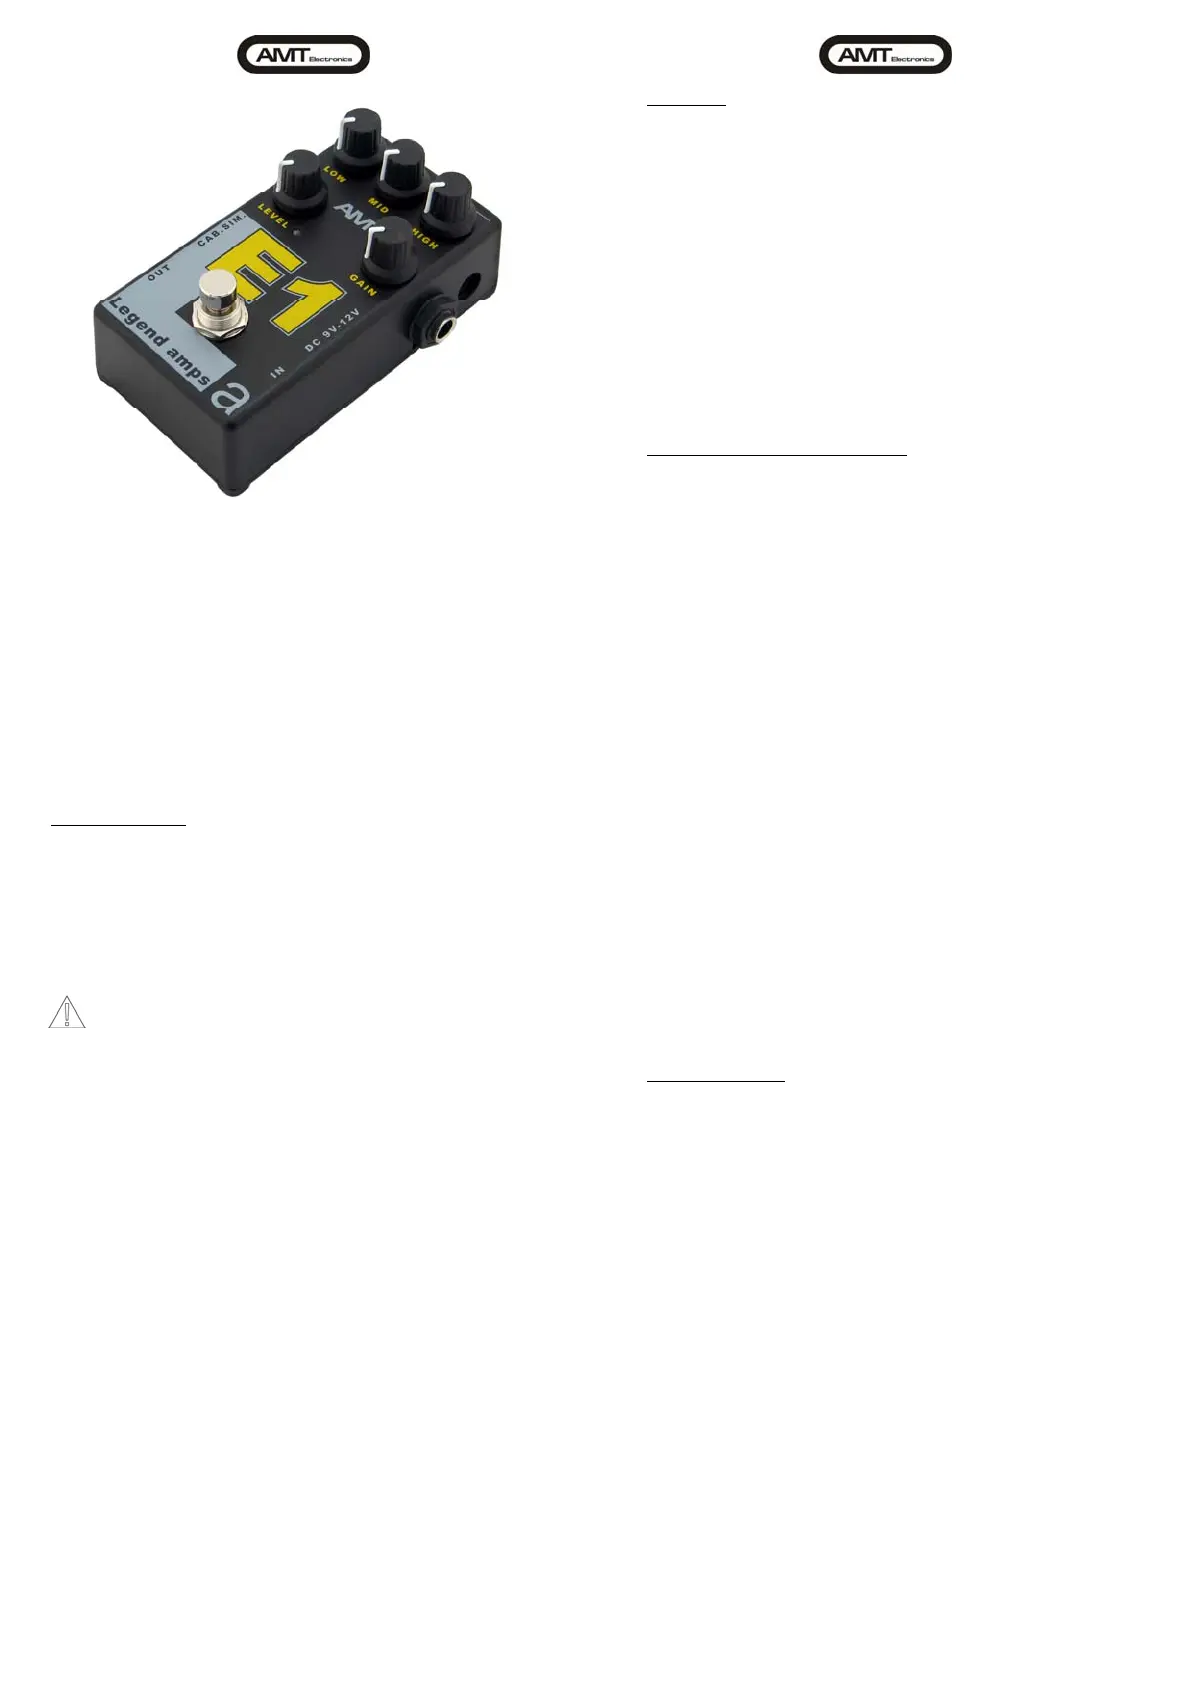
AMT LA E-1 – one-channel preliminary guitar amplifier.
Designed to be connected directly to power amplifier input
or RETURN connector.
SAFETY RULES
CAUTION! The unit contains no user-serviceable parts. Only
qualified professionals can carry out repair of the device.
WARNING! To avoid malfunctions, the device must not be exposed
to rain or moisture. The device interior must not be exposed to
water or other liquid. Do not place containers filled with liquids,
such as vases, etc. on top of the device.
This symbol indicates important information about the
operation of the device and its servicing as reflected in the
accompanying documentation.
Please read the instruction manual carefully.
1.Keep the instruction manual at hand.
2.Please pay attention to the warning signs.
3.Do not forget to follow all the instructions contained in the
manual.
4.Before cleaning the device unplug it from the power adapter.
Use only dry cloth to clean the device.
5.Do not place the device near heat sources; avoid direct
sunlight.
6.Lay the mains cord in such a way that it is not stepped upon.
Make sure it is not in contact with sharp angles etc. If the
mains plug or the socket of the adapter is used to switch the
device off, they must be easily accessible.
7.Use only auxiliary devices and accessories recommended by
the manufacturer.
8.Disconnect the device from the power adapter (when using
power adapter) during thunderstorm.
9.If you don’t use the device for a long time, please remove the
battery from the device.
10.Any works, related to the device repair must be carried out
only by qualified service personnel.
11.WARNING! All service instructions are intended exclusively for
qualified personnel. Do not carry out any repairs not described
in the instruction manual. The repair works must be carried out
only by qualified specialists.
Contents
Important instructions 1
Complete set 1
Introduction 2
Before you start 2
Specifications 2
Power adapter low-voltage connector contacts arrangement 2
Controls 3
Top panel 3
Right panel 3
Only for qualified service personnel 3
Battery installation (replacement) 3
Audio connections and switching 3
Audio connections (1-channel preamp) 3
Audio connections (2-channel preamp) 3
Audio connections (4-channel preamp) 4
Block diagram 4
IMPORTANT INSTRUCTIONS!
THE FAILURE TO OBSERVE THE FOLLOWING INSTRUCTIONS MIGHT
RESULT IN YOUR DEVICE DAMAGE. THE GUARANTEE IS VOID IF THESE
INSTRUCTIONS ARE NOT FOLLOWED.
¾After transportation or storage of the device under low
temperatures keep the device inside its original packaging
under the room temperature for AT LEAST 2 HOURS before
using it!
¾To connect the guitar preamp to other devices use
exclusively the cables intended for such connections.
¾DO NOT use other types of cables e.g. speaker cables and
so on.
CONNECTION of the guitar preamp to the power adaptor:
¾The connection to the power adapter is to be made only
when all other audio connections have been completed.
¾Before connecting the guitar preamp to the power adapter
make sure that the housing, the cable and the mains plug
of the power adapter are intact: no cuts, cracks, dents etc.
and are in operative condition.
¾In order to connect the preamp to the power adapter FIRST
insert the power adapter low-voltage connector to the
corresponding socket on the right panel of the preamp and
THEN insert the power adapter’s plug into the mains.
DISCONNECTION of the guitar preamp from the power adapter:
¾To disconnect the guitar preamp from the power adapter
FIRST disconnect the power adapter’s plug from the mains
and THEN disconnect its low-voltage connector from the
socket on the right panel of the guitar preamp.
COMPLETE SET
The complete set includes:
1. The guitar preliminary amplifier 1
2. Instruction Manual 1
3. Packaging box 1
4. Warranty card 1
Termékspecifikációk
| Márka: | AMT |
| Kategória: | nincs kategorizálva |
| Modell: | E1 |
Szüksége van segítségre?
Ha segítségre van szüksége AMT E1, tegyen fel kérdést alább, és más felhasználók válaszolnak Önnek
Útmutatók nincs kategorizálva AMT

24 Augusztus 2024
24 Augusztus 2024
24 Augusztus 2024
24 Augusztus 2024
24 Augusztus 2024
24 Augusztus 2024
Útmutatók nincs kategorizálva
Legújabb útmutatók nincs kategorizálva
10 Április 2025
10 Április 2025
10 Április 2025
9 Április 2025
9 Április 2025
9 Április 2025
9 Április 2025
9 Április 2025
9 Április 2025
9 Április 2025