Használati útmutató Crestron TST-600-BTP
Crestron nincs kategorizálva TST-600-BTP
Olvassa el alább 📖 a magyar nyelvű használati útmutatót Crestron TST-600-BTP (2 oldal) a nincs kategorizálva kategóriában. Ezt az útmutatót 13 ember találta hasznosnak és 2 felhasználó értékelte átlagosan 4.8 csillagra
Oldal 1/2
DOGUIDE
DO Check the Box
QUANTITYPRODUCTPART NUMBER
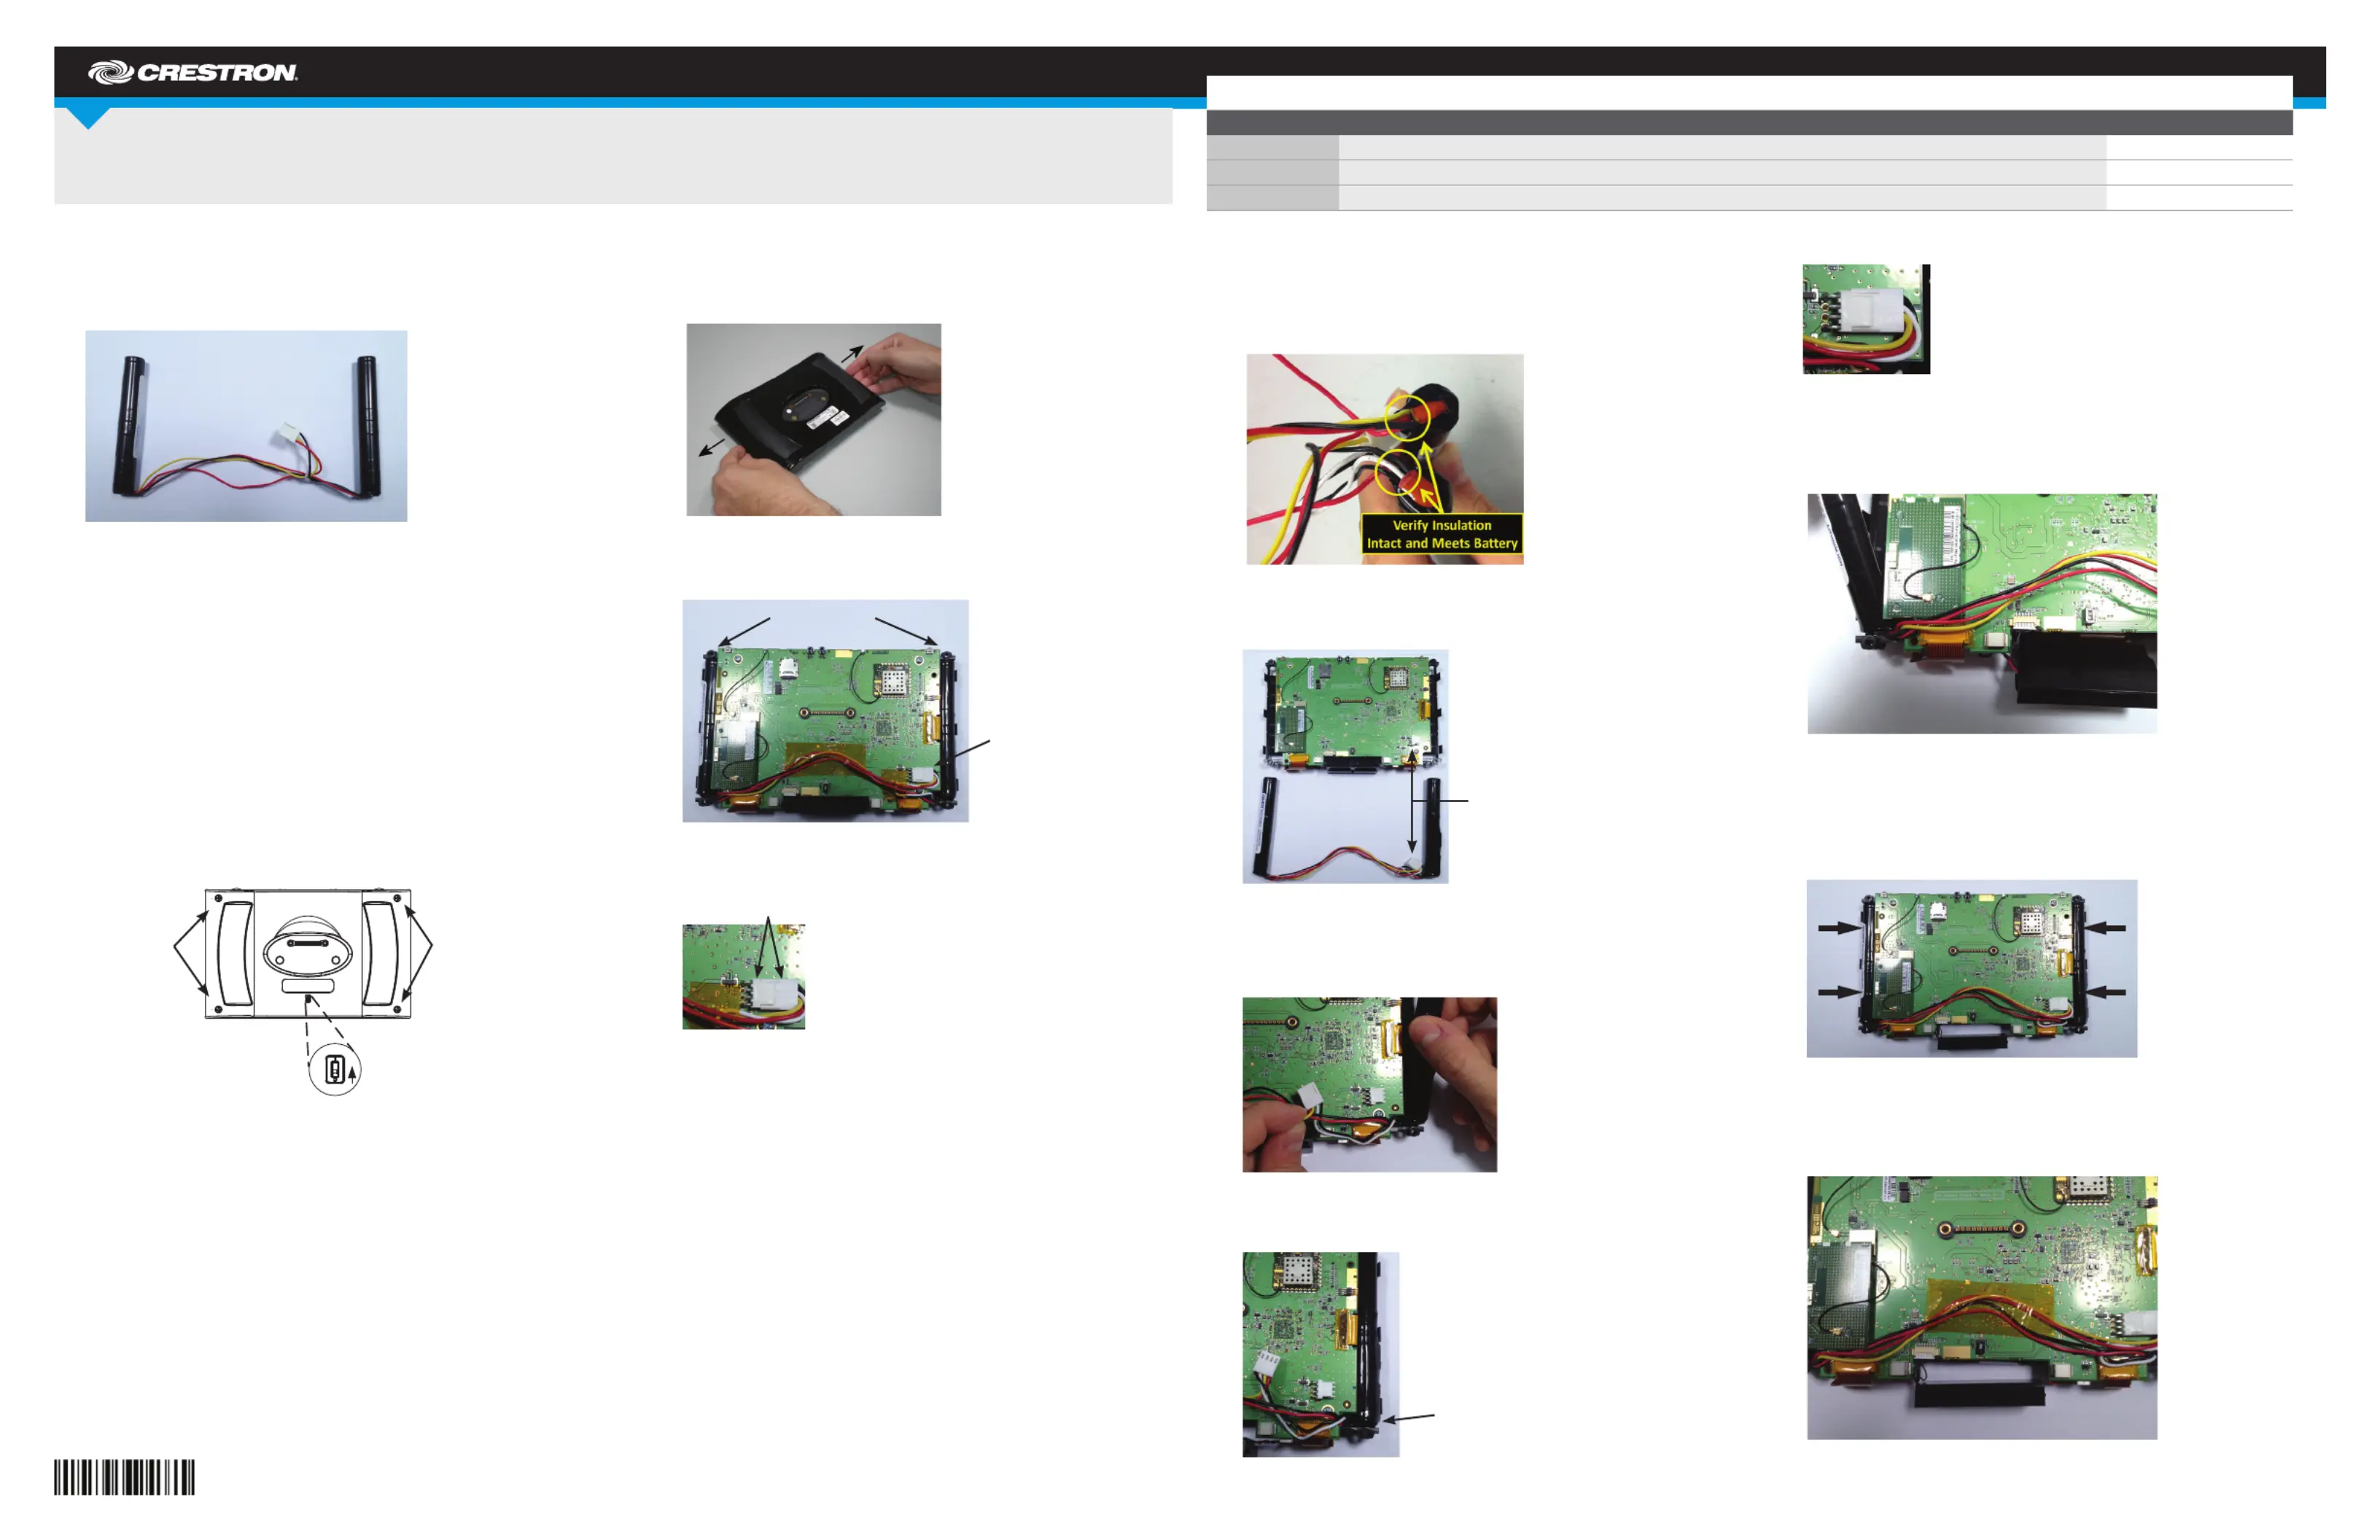
2Tape, Perforated, 1" x 1"2023162
1Tape, Perforated, 1" x 2"2023163
1Metal T-Pin2020478
TST-600-BTP
Battery Pack for TST-600 and TST-602
The Crestron
®
TST-600-BTP consists of two battery cells along with the
integrated wiring. It has a multipin connector that attaches to the inside of
the TST-600 or TST-602.
TST-600-BTP with Multipin Connector
DO Remove the Old Battery Pack
NOTE: The TST-600 and TST-602 Wireless Touch Screens contain
electrostatic discharge (ESD) sensitive devices. To avoid damaging the
unit, perform the following procedure while wearing a grounding strap
that is properly grounded or while working on a grounded workstation.
NOTE: To prevent damage to the multipin connector and wiring, use care
when handling the TST-600-BTP.
Perform the following procedure to remove the existing TST-600-BTP
from a TST-600 or TST-602 touch screen. A #1 Phillips screwdriver is
required.
1.Use the included T-pin to slide the battery switch on the rear to the
off (down) position. Then place the touch screen face down on a
clean, padded work surface.
2.Remove the four screws that secure the front bezel to the touch
screen and return the unit to its normal, face-up position. (Use care
and hold the bezel against the touch screen.)
3.Unsnap the front bezel and lift it off of the touch screen and then
place the touch screen assembly face down on the work surface.
4.Carefully remove the rear of the enclosure from the touch screen
by grasping the support frame at the left and right edges, gently
spreading the edges (as shown in the following image), and then
lifting the assembly. It snaps out of the enclosure.
5.Remove the orange tape securing the battery pack wires to the
assembly.
6.Gently separate the multipin connector from the corresponding
connector on the circuit board of the touch screen.
7.Remove battery cells, with the connecting wires attached, from both
sides of the assembly.
DO Install the New Battery Pack
NOTE: The TST-600 and TST-602 Wireless Touch Screens contain
electrostatic discharge (ESD) sensitive devices. To avoid damaging the
unit, perform the following procedure while wearing a grounding strap
that is properly grounded or while working on a grounded workstation.
After removing the old TST-600-BTP from the touch screen, perform
the following procedure to install the new TST-600-BTP. A #1 Phillips
screwdriver is required.
1.Inspect the wire insulation on the battery pack and verify that it
extends to the battery wrap and is free of nicks or damage.
2.Orient the TST-600-BTP so the wires exiting the battery are facing
the connector on the touch screen.
3.Slide the right stack wires (those closest to the connector) into the
PCB channel, angling the top of the stack into the pocket of the ex
support tray.
4.Fully seat the right stack into the right pocket of the ex support tray
and verify that the wires have not been damaged during installation.
5.Connect the battery pack harness to the PCB connector.
6.With the wire harness positioned above the installed insulator, slide
the left stack wires into the PCB channel, angling the top of the stack
into the pocket of the ex support tray.
7.Fully seat the left stack into the left pocket of the ex support tray
and verify that the wires have not been damaged during installation.
8.Verify that the battery pack is connected and that the stacks are fully
seated into the left and right pockets.
9.Dress the battery wires as shown in the following image. Use the
2 1/2 inch (64 mm) long piece of orange tape to secure the wires.
NOTE: When routing the wires, avoid blocking the battery switch.
Battery Cells
Connector
Connectors
The connectors are aligned.
Seat the right stack in
the ex tray.
UP
ScrewsScrews
Termékspecifikációk
| Márka: | Crestron |
| Kategória: | nincs kategorizálva |
| Modell: | TST-600-BTP |
Szüksége van segítségre?
Ha segítségre van szüksége Crestron TST-600-BTP, tegyen fel kérdést alább, és más felhasználók válaszolnak Önnek
Útmutatók nincs kategorizálva Crestron

2 Április 2025
2 Április 2025
1 Április 2025
1 Április 2025
1 Április 2025
1 Április 2025
1 Április 2025
1 Április 2025
1 Április 2025
1 Április 2025
Útmutatók nincs kategorizálva
Legújabb útmutatók nincs kategorizálva
10 Április 2025
10 Április 2025
10 Április 2025
9 Április 2025
9 Április 2025
9 Április 2025
9 Április 2025
9 Április 2025
9 Április 2025
9 Április 2025