Használati útmutató CRUX VRFBM-77i
CRUX nincs kategorizálva VRFBM-77i
Olvassa el alább 📖 a magyar nyelvű használati útmutatót CRUX VRFBM-77i (11 oldal) a nincs kategorizálva kategóriában. Ezt az útmutatót 11 ember találta hasznosnak és 2 felhasználó értékelte átlagosan 4.4 csillagra
Oldal 1/11
BMW
2015 – 2016 i3*
With OE type Dynamic Parking Guide Lines
On-screen display and setup
2 trigger outputs (+12V max. 1A), separately adjustable switching events (CAN, ACC, rear-view camera,
reverse gear)
Rear-view camera input
Front camera input
Front camera input can also be used as an Auxiliary Video Input
Automatic switching to rear-view camera input on engagement of reverse gear from all operation modes
Forced rear-view camera option (only on vehicles with PDC button)
Manual return from rear-view and front camera (cancellation of automatic switching)
Picture-in-picture mode combining after-market rear-view and front camera picture(s) with factory parking
sensor graphics
Compatible with all factory video accessories (e.g. rear-view camera, DVD-changer, etc.)
Plug & Play installation
For the BMW i3 with navigation system or radio and 6.5”, 7”, 8.8” or 10.25” monitor with 4+2pin HSD2
LVDS connector
The interface is installed under the glove compartment and the radio headunit is located under the rear
seat.
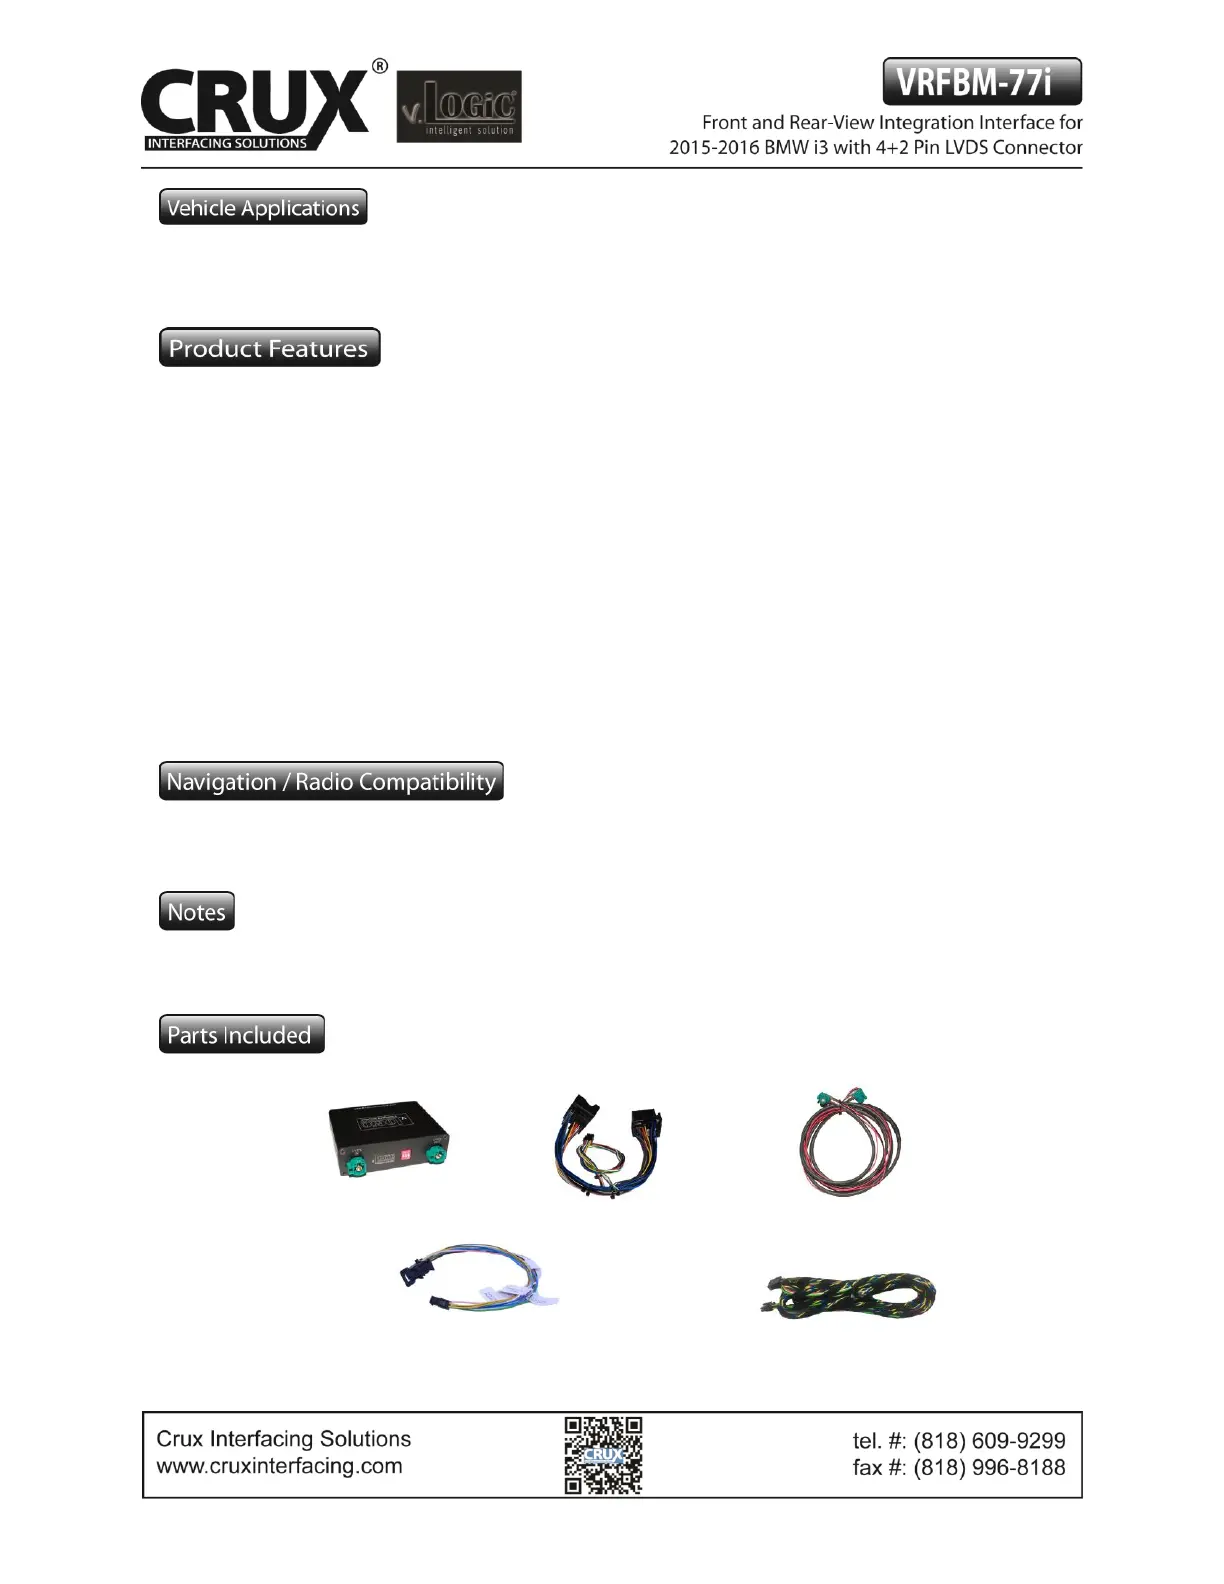
BM-77i Module
BM-77i Harness
4+2 PIN HSD2 LVDS Cable
Power/CAN Harness
i3-HAR
1 / 11
Rev.112816
Termékspecifikációk
| Márka: | CRUX |
| Kategória: | nincs kategorizálva |
| Modell: | VRFBM-77i |
Szüksége van segítségre?
Ha segítségre van szüksége CRUX VRFBM-77i, tegyen fel kérdést alább, és más felhasználók válaszolnak Önnek
Útmutatók nincs kategorizálva CRUX

4 Január 2025
2 Január 2025
2 Január 2025
2 Január 2025
2 Január 2025
2 Január 2025
2 Január 2025
2 Január 2025
2 Január 2025
2 Január 2025
Útmutatók nincs kategorizálva
Legújabb útmutatók nincs kategorizálva
10 Április 2025
10 Április 2025
10 Április 2025
9 Április 2025
9 Április 2025
9 Április 2025
9 Április 2025
9 Április 2025
9 Április 2025
9 Április 2025