Használati útmutató Fellowes Array AR1
Fellowes
Légtisztító
Array AR1
Olvassa el alább 📖 a magyar nyelvű használati útmutatót Fellowes Array AR1 (14 oldal) a Légtisztító kategóriában. Ezt az útmutatót 10 ember találta hasznosnak és 5.5 felhasználó értékelte átlagosan 4.4 csillagra
Oldal 1/14

PLEASE READ THESE INSTRUCTIONS BEFORE USE.
DO NOT DISCARD: KEEP FOR FUTURE REFERENCE.
VEUILLEZ LIRE CES INSTRUCTIONS AVANT D’UTILISER L’APPAREIL.
NE PAS JETER : CONSERVER AFIN DE CONSULTER LES DIRECTIVES
ULTÉRIEUREMENT, EN CAS DE BESOIN.
LEA ESTAS INSTRUCCIONES ANTES DEL USO.
NO LAS DESECHE: CONSÉRVELAS PARA REFERENCIA FUTURA.
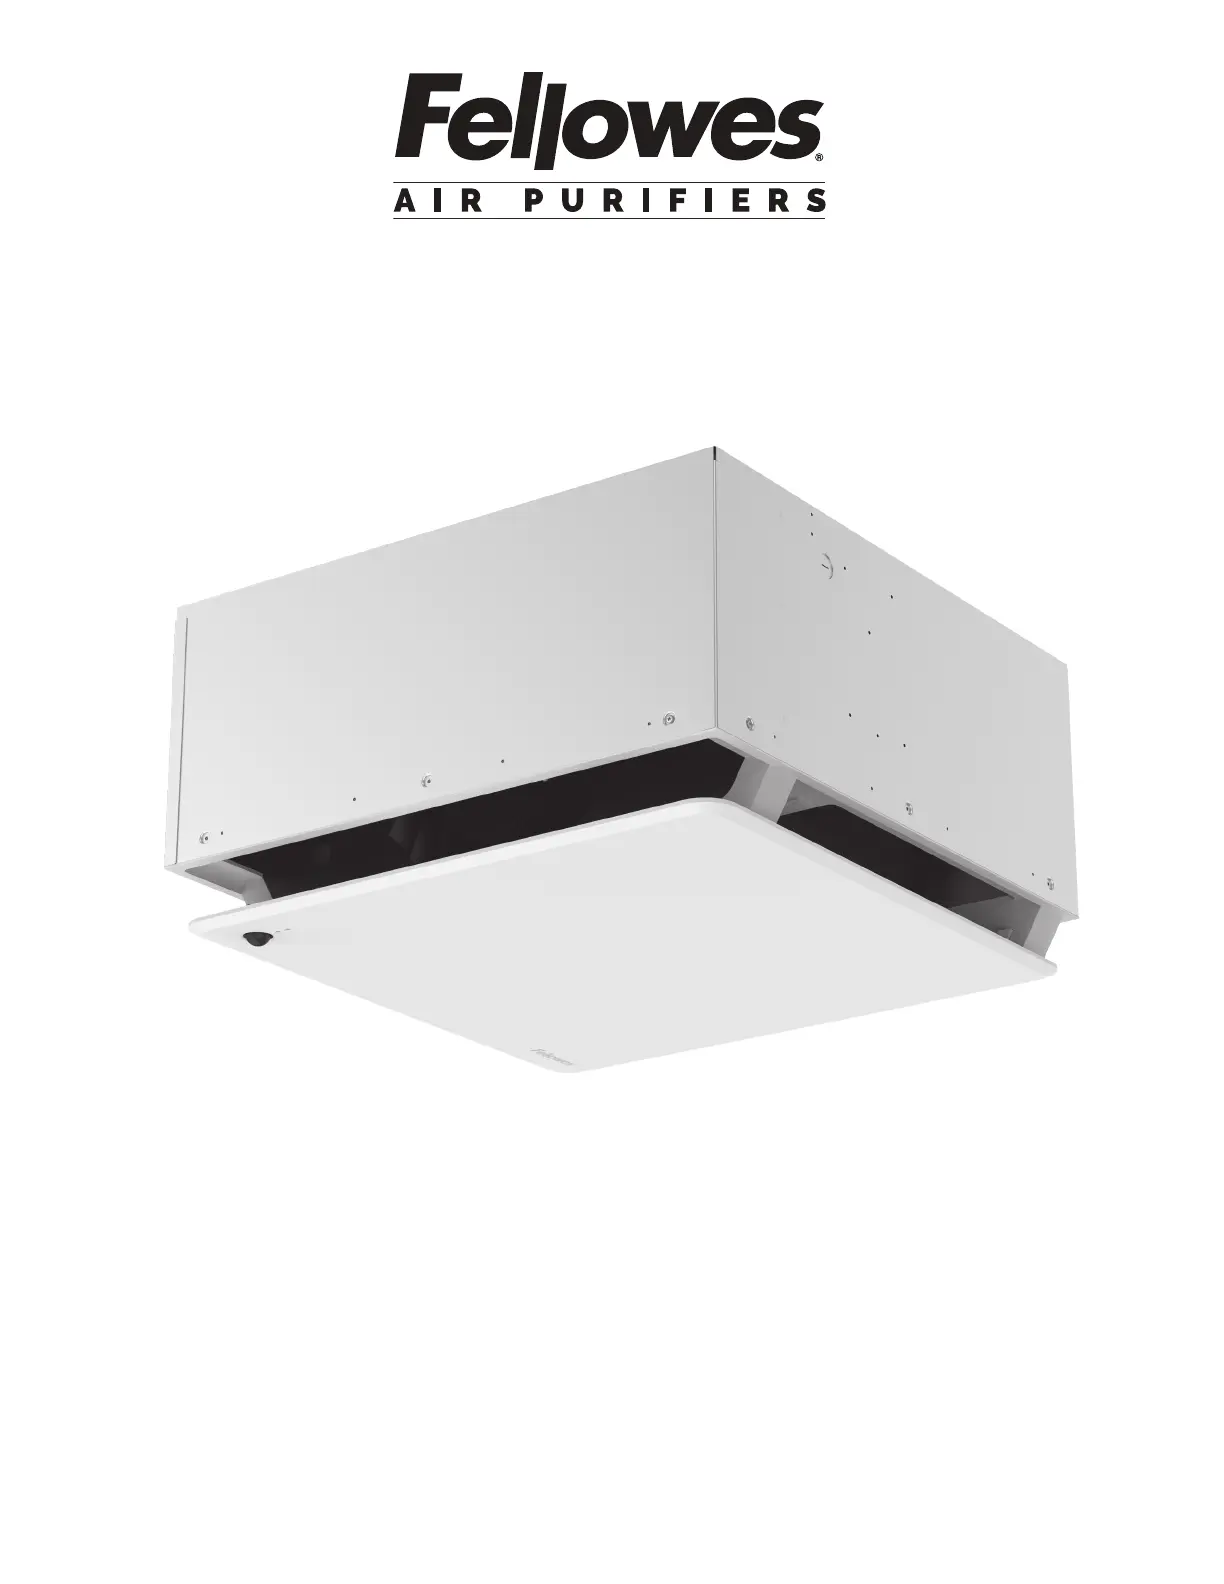
Array AR1
Recessed Air Purier
Puricateur d’air encastré
Puricador de aire empotrado
Install Guide
Guide d’installation
Guía para la instalación

2
ENGLISH
TOOLS REQUIRED FOR INSTALLATION
PACKAGING CONTENTS
NOTE: Three people are recommended for easy and proper installation
NOTE: We recommend removing adjacent ceiling tiles for
easiest installation
NOTE: It is required to remove one cross-tee in the ceiling grid, which will
make installation much easier
NOTE: Do not install next to a return or register
NOTE: Shut off circuit breaker to installation area before
beginning installation
INSTALLATION INSTRUCTIONS
Before beginning installation, ensure that a
qualified electrician has run a 120V circuit
to the installation area. Remove unit from
packaging and stage on a tabletop or other
surface under or near installation area with
door facing upwards.
Open unit door by depressing the latch button
and pulling upward. Have one person hold the
door open for the next few steps or the hinges
can be damaged.
NOTE: do not remove corrugate support trays
attached to door yet.
Disengage the filter clamp lever until a click
is heard.
1
2
3
• Gloves
• Ladder/Step Stool
• UL Elbow or Conduit
• Wire Nuts
• Level
• Tape
• Unobstructed 24” x 24” drop ceiling grid with at least 24” clearance above
the drop ceiling
• Mounting hooks or location installed to local code and capable of holding
the weight of the system
• For ease of installation and optimal placement of unit in the grid, it is
HIGHLY RECOMMENDED that either hooks be drilled into the ceiling, or strut
channels be used to loop cables if there are no existing mounting points
available above the perimeter of the housing.
• Air Purifier (1X)
• Hybrid Filters w/ Pre-Filter (1X)
• 16ft mounting cables with clutches (4X)
• Centering Blocks (4X)
• User Manual (1X)

3
Pull filter out by the strap and set aside for now. Remove mounting hardware and verify included
part quantities.
Close the door until a click is heard. Depending on
type of ceiling, attach proper mounting hardware
above installation area per local regulations for
supporting a 52lb (24kg) fixture. Ideally the
mounting locations would be 23" apart in the shape
of a square.
Loop open end of cables through intended
support or hardware.
Use provided cable clutch hardware to secure
each cable.
If you have not yet, remove the adjacent cross-tee,
tilt fixture about 45° upward toward the grid's
long tees.
Secure the hooks from the provided aircraft
cabling to the housing through the mounting
holes (P7).
Have one person slowly lifting the machine while
the other pulls the free end of the cables to keep
them taut.
Alternate slowly raising each side to keep the
unit relatively level during lifting.
WARNING: During lifting ensure hooks stay
oriented correctly and do not get misaligned or
they may not hold properly.
Raise the fixture to about 1-2 feet below the
ceiling grid on the cables.
NOTE: If unit is raised too high, have one
person raise the unit while the other depresses
the spring section on the wire clutch, allowing
the cable to be loosened.
CAUTION: To reduce the risk of injury to
persons, install fan at least 2.1 m (6.9 ft)
above the floor.
Lift and rotate unit before setting door-side down
on the provided trays. Determine which electrical
knockout will be used and remove it.
WARNING: do not place directly on any flat
surface as this will damage the sensor that sticks
below the bottom surface.
4
5
6
UV BULB RESET
FILTER RESET
UV BULB RESET
FILTER RESET
UV BULB RESET
FILTER RESET
UV BULB RESET
FILTER RESET
UV BULB RESET
FILTER RESET
UV BULB RESET
FILTER RESET
7
8
9
10
11
12
Termékspecifikációk
Márka: | Fellowes |
Kategória: | Légtisztító |
Modell: | Array AR1 |
Szüksége van segítségre?
Ha segítségre van szüksége Fellowes Array AR1, tegyen fel kérdést alább, és más felhasználók válaszolnak Önnek
Útmutatók Légtisztító Fellowes
30 Szeptember 2024
11 Szeptember 2024
31 Augusztus 2024
31 Augusztus 2024
31 Augusztus 2024
31 Augusztus 2024
31 Augusztus 2024
31 Augusztus 2024
31 Augusztus 2024
31 Augusztus 2024
Útmutatók Légtisztító
- Légtisztító Beghelli
- Légtisztító AlorAir
- Légtisztító Eta
- Légtisztító Uni-T
- Légtisztító Sonnenkönig
- Légtisztító Trisa
- Légtisztító Qlima - Zibro
- Légtisztító WDH
- Légtisztító Ufesa
- Légtisztító Inventor
- Légtisztító SilverCrest
- Légtisztító Vicks
- Légtisztító Coplax
- Légtisztító Winix
- Légtisztító Sensede
Legújabb útmutatók Légtisztító
10 Április 2025
10 Április 2025
9 Április 2025
9 Április 2025
8 Április 2025
7 Április 2025
7 Április 2025
6 Április 2025
5 Április 2025
5 Április 2025