Használati útmutató La Crosse Technology CA85176
Olvassa el alább 📖 a magyar nyelvű használati útmutatót La Crosse Technology CA85176 (70 oldal) a nincs kategorizálva kategóriában. Ezt az útmutatót 21 ember találta hasznosnak és 9 felhasználó értékelte átlagosan 4.3 csillagra
Oldal 1/70
1
INTRODUCTION:
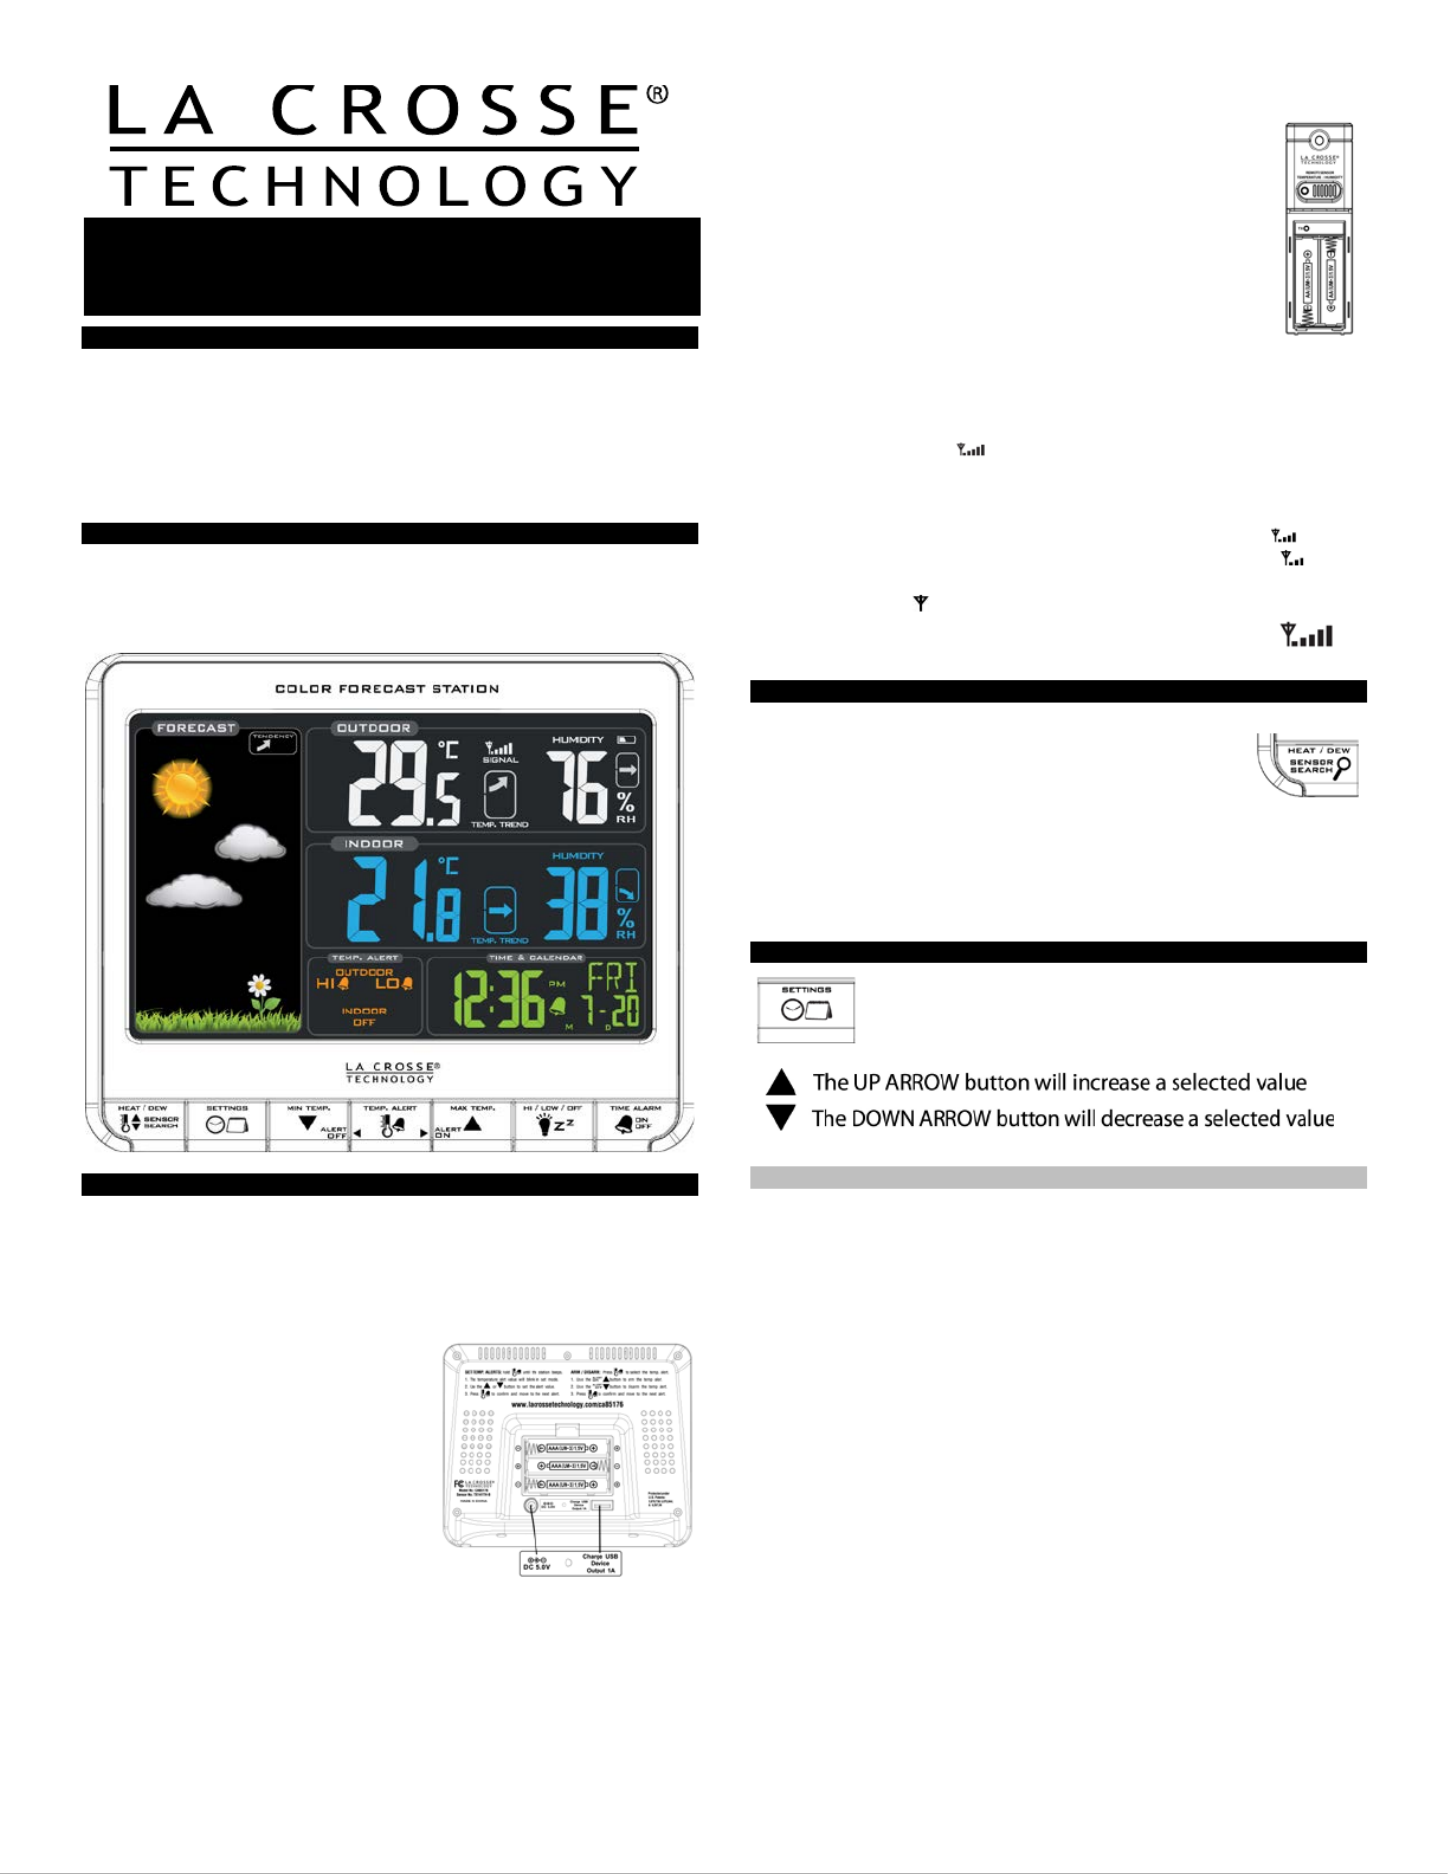
Thefeaturesdate, weather Color Forecast Station manual set time,
forecast, indoor and outdoor temperat, with temperature ure/humidity
alerts, and heat index and dew point, on a stylish,and easy colorful, to
read display.integrated USB charging port to charge your Use the
smartphone, camera or other devicewhen the Forecast Station is
plugged into a power outlet.
COLOR : FORECAST STATION
THIS STATION LEARNS!
Please allow 34 weeks for barometer calibration to generate an -
accurate forecast.
SETUP INSTRUCTIONS STEP BY STEP:
STEP 1:
•-Insert the 5volt a/c power adapter into the designated area on the
back of the Forecast Station.
•Plug the a/c power adapter into a wall outlet for continuous backlight
(ON/OFF), and dimmer feature.
STEP 2: (optional battery operation)
•Remove battery cover from the
Forecast Station: Slide tab down and
pull out to remove the cover.
•A Insert 3 NEW AAbatteries (not
included) into the back of the
Forecast Station. Observe the
correct polarity (see marking inside
the battery compartment).
• The Forecast Station will light up and
show, indoor temperature, humidity
and time.
•(Backlight will illuminate for 8 seconds when using only battery power
with a press/release of the SNOOZE/LIGHT button.)
•Do Not Mix Old and New Batteries
•Do Not Mix Alkaline, Standard, Lithium or Rechargeable
Batteries
S TEP3:
• Ensure thatthe transmitter is within 10 feet of the
Forecast Station.
•Remove battery cover from transmitter: Slide the battery
cover down and lift off the front.
•Insert 2 NEW AA batteries into the TX141TH-B
transmitter. Observe the correct polarity.
• Within 3 minutes the Forecast Station showwill readings
in the Outdoor temperaturearea on the LCD .
Note: Use Alkaline batteries (or Lithium for temperatures
be28.8°C20°Flow -/ - ).
SEARCH FOR TRANSMITTER:
After the batteries are insertedstation will search for the , the forecast
outdoor temperature/humidity transmitter for 3 minutes.
The antenna symbol will flash during reception, and temperature
display will be dashes “---“.
The antenna symbol scroll during RF (radio frequency)
s ynchronization.
If synchronization fails once, the antenna will lose one bar.
If synchronization fails twice, the antenna will lose two bars.
If reception continuously fails to receive 5 times, the antenna symbol
will be shown as.
The antenna will show full display with successful RF
(radio frequency) reception.
TROUBLESHOOTING:
If the outdoor temperature is not displayed after three
minutes, hold the SENSOR SEARCH button on the
forecast station for three seconds to search for
outdoor transmitter.
Next remove the battery cover from the TX141THtransmit-B ter then
press the TX button to send a signal.
If it still does not receive the outdoor temperature, remove the a/c
cord and batteries from both the station and the transmitter forecast
for 15 minutes repeat setup instructions from step 1.
TIME/DATE:
The SETTINGS button gh the program will move throu
menu and confirm settings.
Set Time and Date:
Hold the SETTINGS button for three seconds to enter time set mode.
12/24-HOUR: The time format 12Hwill flash, use the ARROW buttons
to choose 12-hour or 24hour time format and press the -SETTINGS
button to confirm and move to hour.
HOUR: The Hour will flash, use the ARROW buttons to choose the
hour, and press the SETTINGS button to confirm and move to
minutes.
MINUTES: The Minutes will flash, use the ARROW buttons to choose
the minutes, and to confirm and move to press the SETTINGS button
the year.
YEAR: The Year will flash, use the ARROW buttons to choose the
year, and press the SETTINGS button to confirm and move to the
month.
MONTH: The Month will flash, use the ARROW buttons to choose
the month, and press the SETTINGS button to confirm and move to
the date.
DATE: The Date will flash, use the ARROW buttons to choose the
date, and press the SETTINGS button to confirm and move to
Fahrenheit/Celsius.
FAHRENHEIT/CELSIUS: °F or °C will flash. Use the ARROW buttons
to select Fahrenheit or Celsius. Press and release the SETTINGS
button to confirm and exit the program menu.
Note: When no buttons are pressed for ten seconds the forecast station
will save the last change and default back to normal mode.
Color Forecast Station
with USB Charging
Model: C| Quick Setup GuideA85176
Termékspecifikációk
| Márka: | La Crosse Technology |
| Kategória: | nincs kategorizálva |
| Modell: | CA85176 |
Szüksége van segítségre?
Ha segítségre van szüksége La Crosse Technology CA85176, tegyen fel kérdést alább, és más felhasználók válaszolnak Önnek
Útmutatók nincs kategorizálva La Crosse Technology

13 Október 2024
7 Október 2024
4 Október 2024
23 Szeptember 2024
23 Szeptember 2024
14 Szeptember 2024
10 Szeptember 2024
9 Szeptember 2024
7 Szeptember 2024
1 Szeptember 2024
Útmutatók nincs kategorizálva
Legújabb útmutatók nincs kategorizálva
10 Április 2025
10 Április 2025
10 Április 2025
9 Április 2025
9 Április 2025
9 Április 2025
9 Április 2025
9 Április 2025
9 Április 2025
9 Április 2025