Használati útmutató Leviton 4999K-YLC
Leviton nincs kategorizálva 4999K-YLC
Olvassa el alább 📖 a magyar nyelvű használati útmutatót Leviton 4999K-YLC (2 oldal) a nincs kategorizálva kategóriában. Ezt az útmutatót 17 ember találta hasznosnak és 5 felhasználó értékelte átlagosan 4.6 csillagra
Oldal 1/2
For more information please contact tech support at: 1-800-824-3005 or visit: www.leviton.com
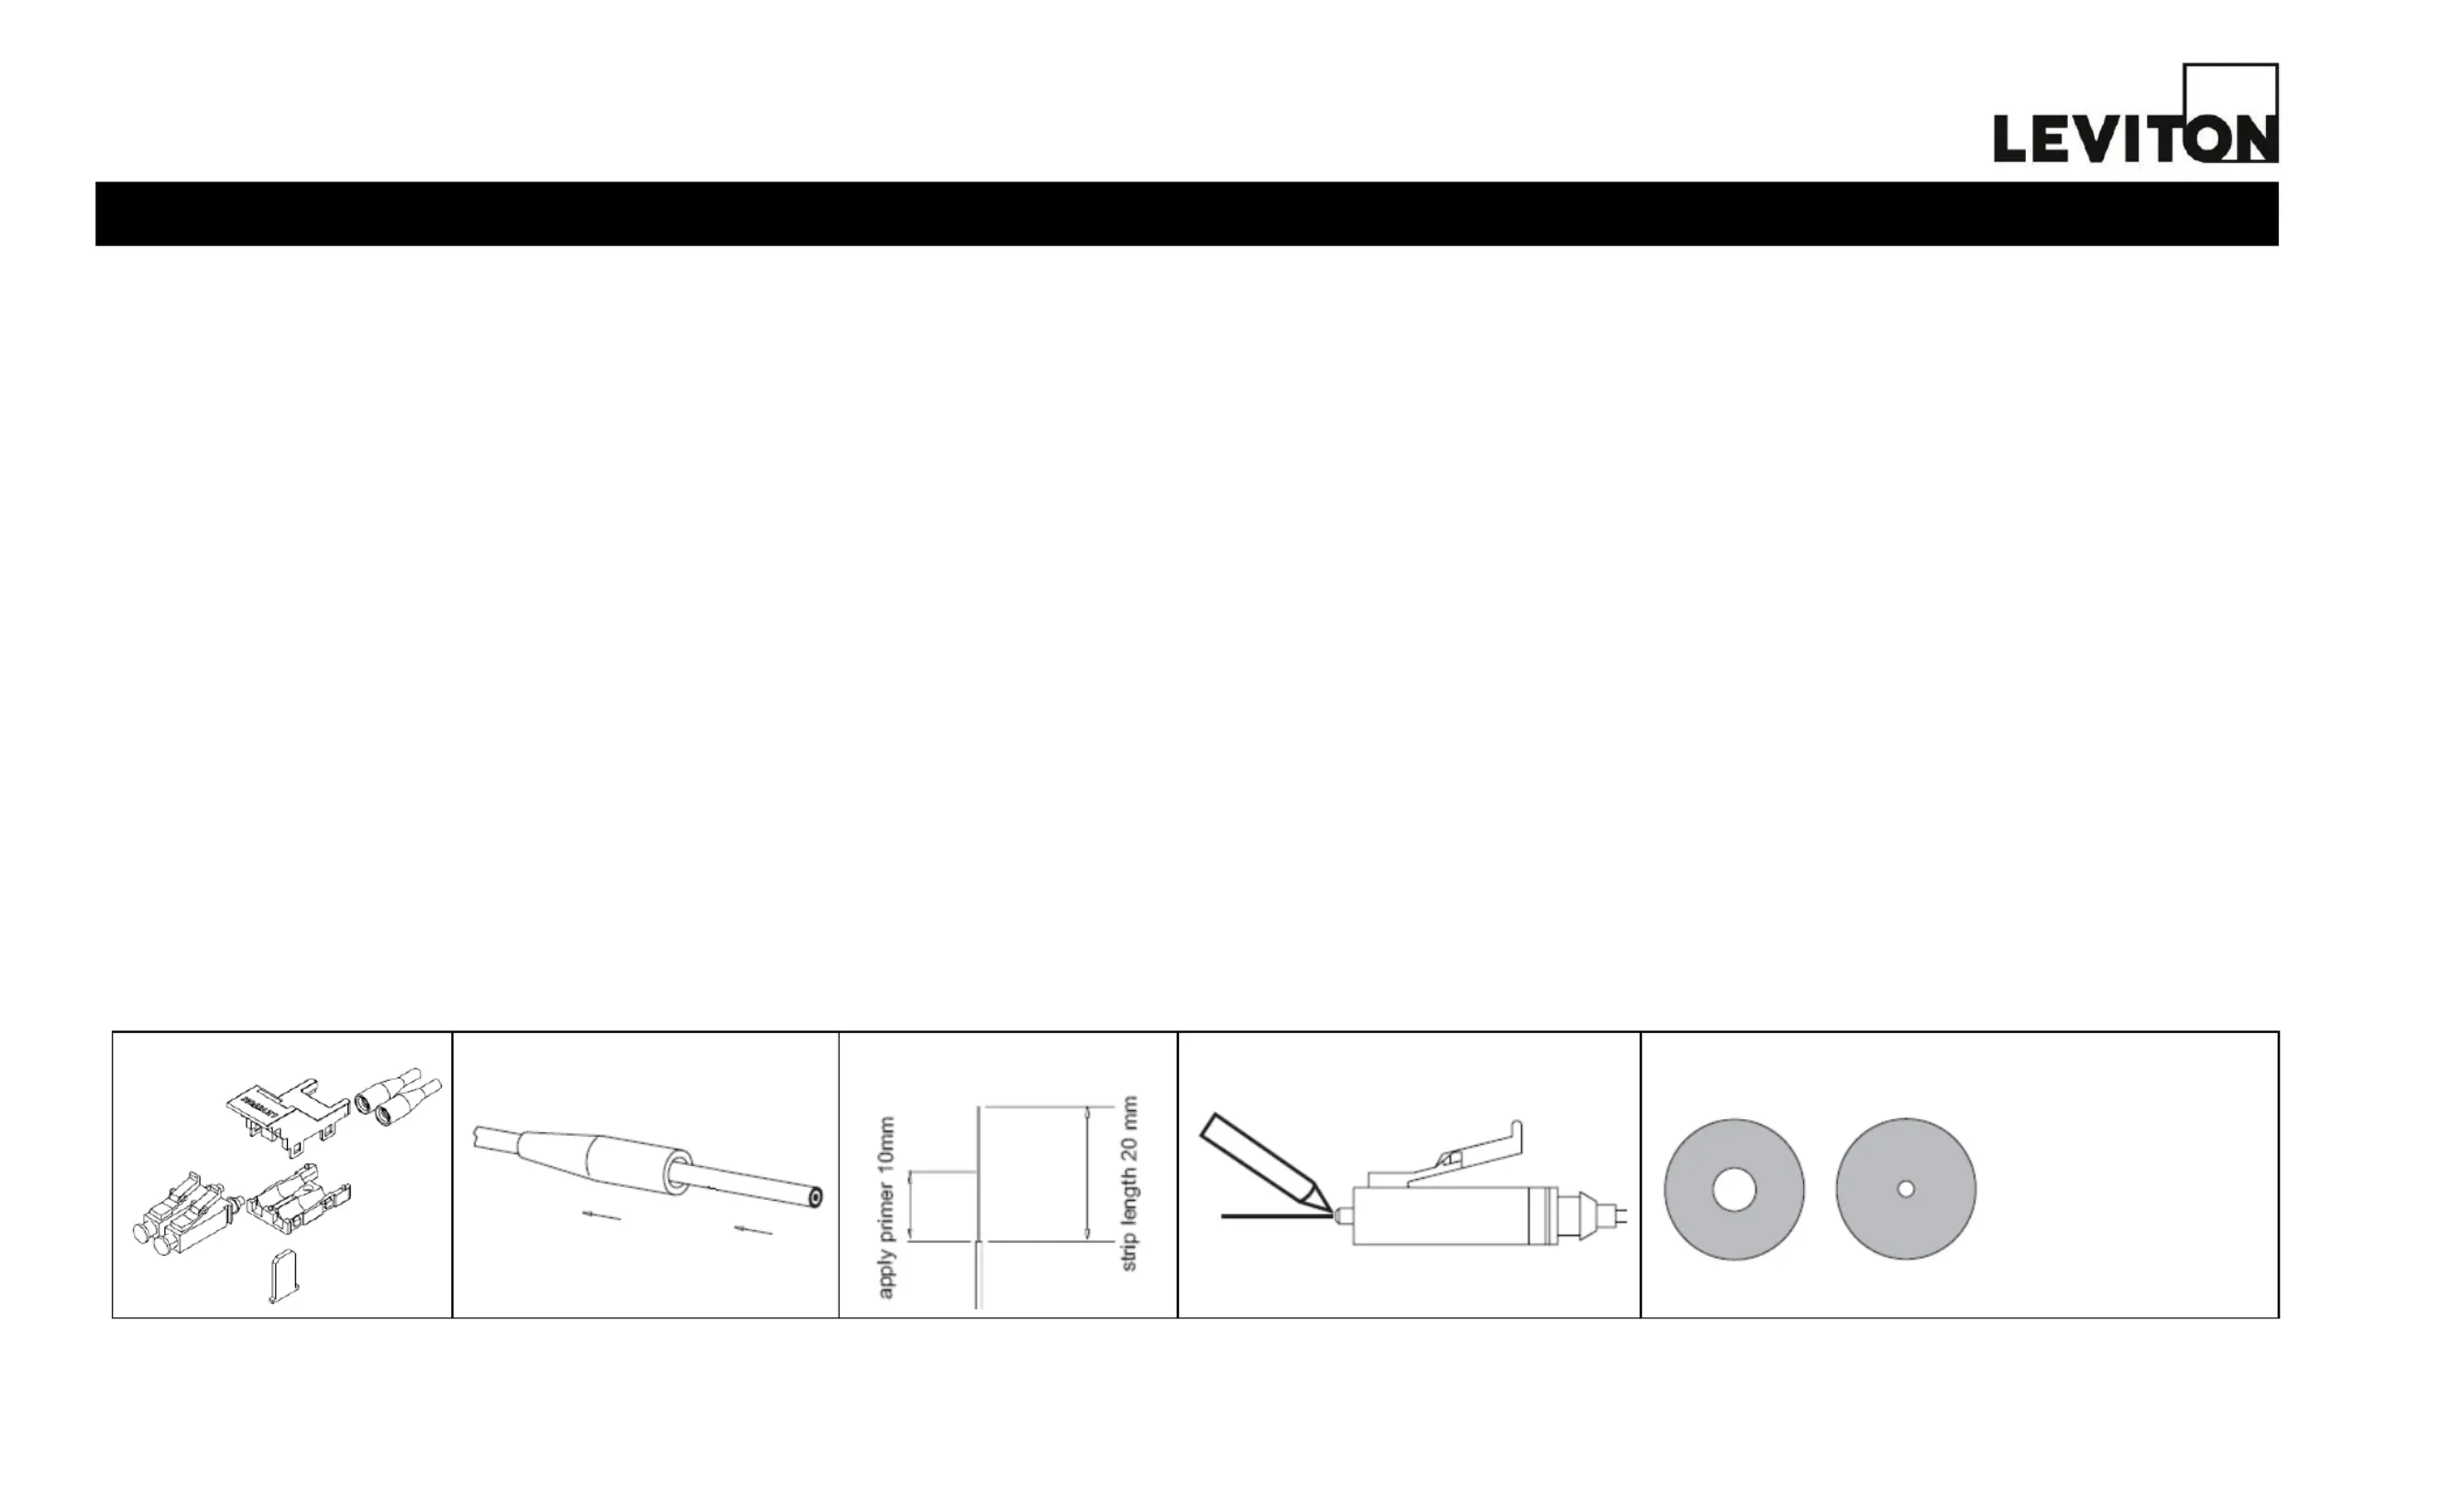
3
2
1
NOTE: 900um boots are sold separately.
4999K-*LC
SKLC (Secure Keyed LC) Connector Field Termination
ASSEMBLY INSTRUCTIONS
5. Using the brush attached to the lid on the bottle of primer, apply the primer to the
area of ber as indicated. See (FIGURE 2).
6. Insert the ber into the back of the connector. To prevent premature bonding, use
a continuous motion, until the ber is fully seated in the connector. The primer will
activate the adhesive and begin the bonding process.
NOTE: The ber should be inserted within 45 seconds of placing the primer on the ber.
7. Hold the ber in place for 10-20 seconds, and allow up to 3 minutes for the
adhesive to fully bond.
8. Slide the boot back up over the back of the connector.
CLEAVE AND POLISH
1. When the adhesive is cured (no longer wet), scribe the ber where it meets the
bead of adhesive at the end of the ferrule. (FIGURE 3)
2. Pull the ber away from the connector, properly dispose of the debris.
NOTE: Loose ber debris can be dangerous. Be sure to properly dispose of ber
debris.
3. Begin by “air polishing” the connector with 12μm polishing film. Leviton’s 12 μm
lm is a dark pink in color. Hold the edge of the lm, with thumb and fore nger,
dull side down. Hold the connector ferrule pointing up. Gently touch the connector
to the lm. While holding the polishing lm in contact with the connector, move the
polishing lm in approximately a 1 inch circle to remove the ber stub. The
scraping sound of the ber on the lm will cease when the air polish process is
complete.
PREPARE
1. Slide boot onto the ber, with the small end inserted rst, away from the
connector. (FIGURE 1)
NOTE: 900um boots are sold separately.
2. Remove 4 inches of the outer cable sheath for jacketed cable.
3. Strip the 900μm buffer as indicated in the measurements provided in the chart
below (FIGURE 2)*, strip the fiber in increments of ¼”.
4. Clean exposed ber with a lint-free wipe damped with 99% isopropyl alcohol to
remove any contaminants.
NOTE: Images are not to scale.
ASSEMBLE
1.
Remove the dust cap from the connector.
2.
Dry t the ber by inserting the ber into the connector. This will assure that
all coating has been removed and the ber can be inserted into the connector
ferrule.
3.
Shake the adhesive bottle before using. Remove the cap from the adhesive
bottle, and attach the needle by pressing it gently onto the top of the bottle
until you feel it set into place.
NOTE: Syringes are also available for inserting adhesive. See parts list for part
number.
4.
Insert the needle into the back of the connector, holding it rmly in place while
lling. Being careful not to over ll the connector, squeeze the bottle gently,
injecting the adhesive into the connector. Continue squeezing until a dot of
adhesive is visible at the ferrule end of the connector, and then remove the
needle. Wipe away any excess adhesive from the end of the ferrule.
4. Hold a lint-free wipe across the nger tips, and then gently press the ferrule
end-face against the wipe. Twist the connector in place to remove any debris.
Do not drag the connector across the lint-free wipe.
5. Wipe the bottom surface of the LC 1.25mm polishing puck and the surface of
the polishing pad with a lint-free wipe damped with 99% isopropyl alcohol to
remove any contaminants.
6. Place the 3μm film on the polishing pad, dull side up. Leviton’s 3μm film is
yellow in color. Place the polishing puck on the lm. Gently insert the
connector ferrule into the polishing puck and using very light pressure, trace 15-
20 figure 8’s on the lm. Inspect to ensure the ber is polished ush by rst
gently dragging the connector across a lint-free wipe. Fiber should not snag. If
the ber snags, continue polishing until it does not snag. Remove debris with a
lint-free wipe dampened with 99% isopropyl alcohol.
7. Repeat steps 5 and 6 with 0.3μm polishing film. Leviton’s 0.3μm film is a light
blue in color.
8. Using a Leviton 200x inspection scope, inspect the ber core to assure the core
is not scratched, cracked, broken and is clean. (FIGURE 4)
9. Replace the dust cap on the connector to maintain cleanliness.
INSPECTING THE BACKLIT FIBER:
SCRIBE AND PULL FIBER AWAY
Multimode 62.5/125 Singlemode 9/125
4
White area must be free
of all obstruction. Grey
area should be free of
scratches and dark
spots.
ALL BUFFERED CABLE
PK-93775---10020A
Termékspecifikációk
| Márka: | Leviton |
| Kategória: | nincs kategorizálva |
| Modell: | 4999K-YLC |
Szüksége van segítségre?
Ha segítségre van szüksége Leviton 4999K-YLC, tegyen fel kérdést alább, és más felhasználók válaszolnak Önnek
Útmutatók nincs kategorizálva Leviton

29 December 2024
4 Szeptember 2024
4 Szeptember 2024
4 Szeptember 2024
4 Szeptember 2024
4 Szeptember 2024
4 Szeptember 2024
3 Szeptember 2024
19 Augusztus 2024
18 Augusztus 2024
Útmutatók nincs kategorizálva
Legújabb útmutatók nincs kategorizálva
10 Április 2025
10 Április 2025
10 Április 2025
9 Április 2025
9 Április 2025
9 Április 2025
9 Április 2025
9 Április 2025
9 Április 2025
9 Április 2025