Használati útmutató Metra 95-8910S
Metra Autós készlet 95-8910S
Olvassa el alább 📖 a magyar nyelvű használati útmutatót Metra 95-8910S (4 oldal) a Autós készlet kategóriában. Ezt az útmutatót 13 ember találta hasznosnak és 6 felhasználó értékelte átlagosan 4.5 csillagra
Oldal 1/4
Metra. The World’s Best Kits.
®
MetraOnline.com © COPYRIGHT 2020 METRA ELECTRONICS CORPORATION REV. 10/21/20 INST95-8910S
INSTALLATION INSTRUCTIONS
95-8910S
Attention!Let the vehicle sit with the key
out of the ignition for a few minutes before
removing the factory radio. When testing the
aftermarket equipment, ensure that all factory
equipment is connected before cycling the
key to ignition.
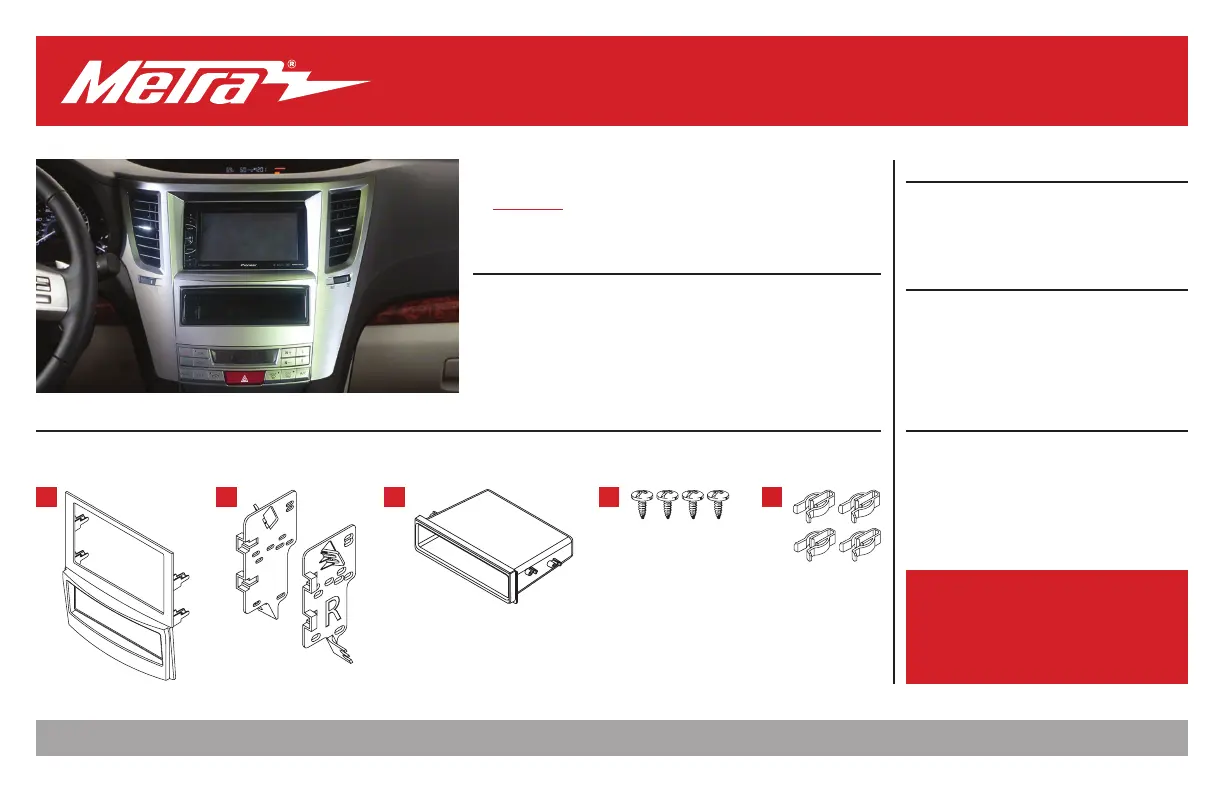
KIT FEATURES
• ISO DDIN radio provision
• Painted silver to match the factory finish
• Includes a pocket to replace the factory radio controls
KIT COMPONENTS
• A) Radio trim panel • B) Radio brackets • C) Pocket • D) (4) #8 x 3/8” Phillips screws • E) (4) Panel clips
TOOLS REQUIRED
• Panel removal tool • Phillips screwdriver
TABLE OF CONTENTS
Dash Disassembly ..................................................2
Kit Assembly ..........................................................3
WIRING & ANTENNA CONNECTIONS
(sold separately)
Wiring Harness: 70-7553†
Antenna Adapter: 40-SB10-18
† Reference note in Kit Assembly
ABCDE
Subaru Legacy/Outback (with NAV)2010-2012
Visit MetraOnline.com for more detailed information about the product and up-to-date vehicle
specific applications
Termékspecifikációk
| Márka: | Metra |
| Kategória: | Autós készlet |
| Modell: | 95-8910S |
Szüksége van segítségre?
Ha segítségre van szüksége Metra 95-8910S, tegyen fel kérdést alább, és más felhasználók válaszolnak Önnek
Útmutatók Autós készlet Metra

3 Április 2025
3 Április 2025
3 Április 2025
3 Április 2025
1 Április 2025
29 December 2024
29 December 2024
29 December 2024
29 December 2024
29 December 2024
Útmutatók Autós készlet
Legújabb útmutatók Autós készlet
2 Április 2025
16 Január 2025
31 December 2025
29 December 2024
16 December 2024
6 Október 2024
2 Október 2024
29 Szeptember 2024
22 Szeptember 2024
21 Szeptember 2024