Használati útmutató Metra 99-8214TG
Metra Autós készlet 99-8214TG
Olvassa el alább 📖 a magyar nyelvű használati útmutatót Metra 99-8214TG (8 oldal) a Autós készlet kategóriában. Ezt az útmutatót 23 ember találta hasznosnak és 4 felhasználó értékelte átlagosan 4.7 csillagra
Oldal 1/8
METRA - The World’s best kits
®
metraonline.com
REV. 3/7/2017 INST99-8214
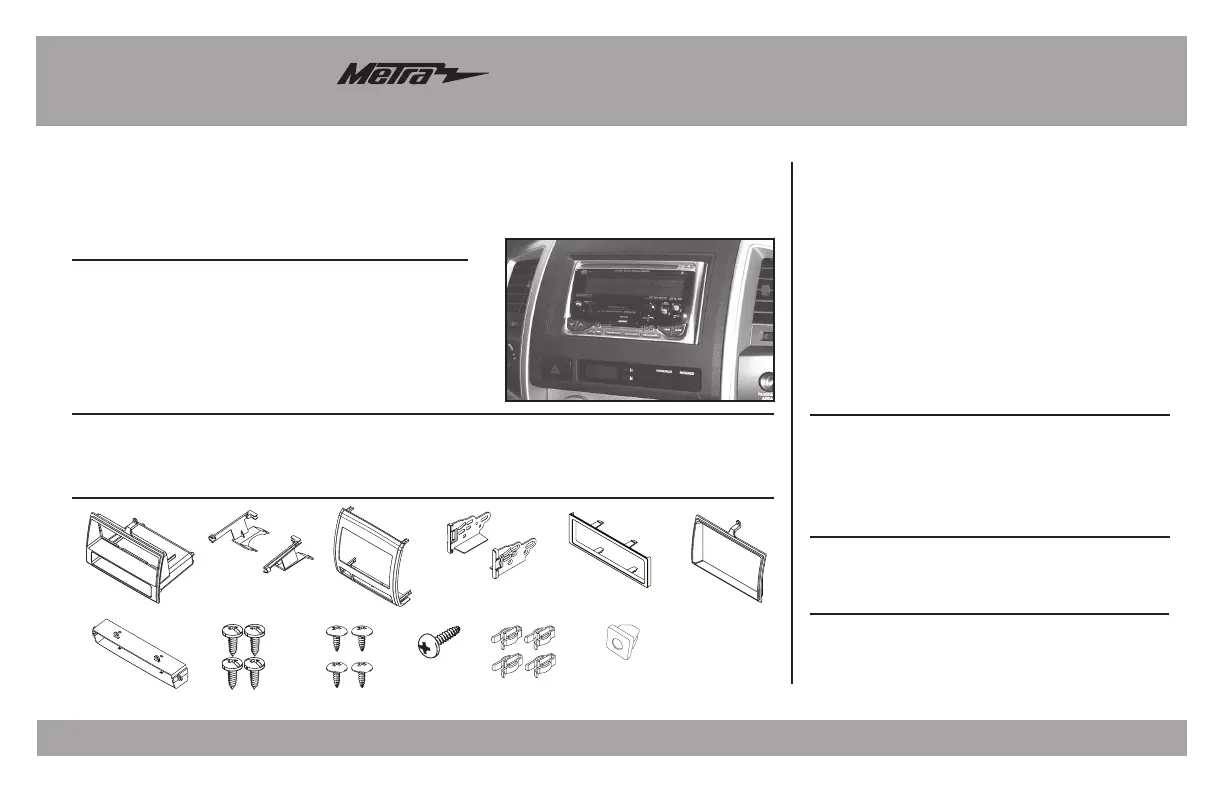
Installation instructions for part 99-8214
®
CAUTION!
All accessories, switches, climate controls panels, and
especially air bag indicator lights must be connected before cycling
the ignition. Also, do not remove the factory radio with the key in the
on position, or while the vehicle is running.
© COPYRIGHT 2017 METRA ELECTRONICS CORPORATION
• DIN radio provision with pocket
• ISO DIN radio provision with pocket
• ISO DDIN radio provision
• Painted and textured to match factory dash
• Available in: Black 99-8214TB or Gray 99-8214TG
• Both kits are factory “golf ball” textured
KIT FEATURES
WIRING & ANTENNA CONNECTIONS (sold separately)
Wiring Harness: 70-1761 • TYTO-01
Antenna Adapter: Not Required
Steering wheel control interface: ASWC-1
• Panel removal tool • Phillips screwdriver
• 10mm socket wrench
TOOLS REQUIRED
Toyota Tacoma 2005-2011
99-8214
• A) Radio housing • B) Radio brackets • C) Radio trim panel • D) ISO brackets • E) ISO trim plate
• F) ISO DDIN trim plate • G) Clock/Hazard switch bracket • H) (4) #6 x 3/8” Phillips pan-head screws
• I) (4) #8 X 3/8” Phillips truss-head screws • J) (1) #10 x 3/4” Phillips pan-head screw • K) (4) Panel clips
• L) Plastic threaded insert
KIT COMPONENTS
BCD
EF
A
IJKLG
H
Dash Disassembly ..................................................2
Kit Preparation ........................................................3
Kit Assembly
– DIN radio provision with pocket .............................4
– ISO DIN radio provision with pocket .......................5
– ISO DDIN radio provision ........................................6
Table of Contents
Termékspecifikációk
| Márka: | Metra |
| Kategória: | Autós készlet |
| Modell: | 99-8214TG |
Szüksége van segítségre?
Ha segítségre van szüksége Metra 99-8214TG, tegyen fel kérdést alább, és más felhasználók válaszolnak Önnek
Útmutatók Autós készlet Metra

3 Április 2025
3 Április 2025
3 Április 2025
3 Április 2025
1 Április 2025
29 December 2024
29 December 2024
29 December 2024
29 December 2024
29 December 2024
Útmutatók Autós készlet
Legújabb útmutatók Autós készlet
2 Április 2025
16 Január 2025
31 December 2025
29 December 2024
16 December 2024
6 Október 2024
2 Október 2024
29 Szeptember 2024
22 Szeptember 2024
21 Szeptember 2024