Használati útmutató NUVO Bento 60/4085
Olvassa el alább 📖 a magyar nyelvű használati útmutatót NUVO Bento 60/4085 (2 oldal) a Lampa kategóriában. Ezt az útmutatót 23 ember találta hasznosnak és 5 felhasználó értékelte átlagosan 4.2 csillagra
Oldal 1/2
ASSEMBLY INSTRUCTION
SKU#60/4085, 60/ 4086
NOTE:Please consult a qualied electrician if you are not certain of theinstallation or service.
CAUTION:Before starting the installation or service, disconnect the power by turning o the circuit breaker
or by removing the fuse at the fuse box.
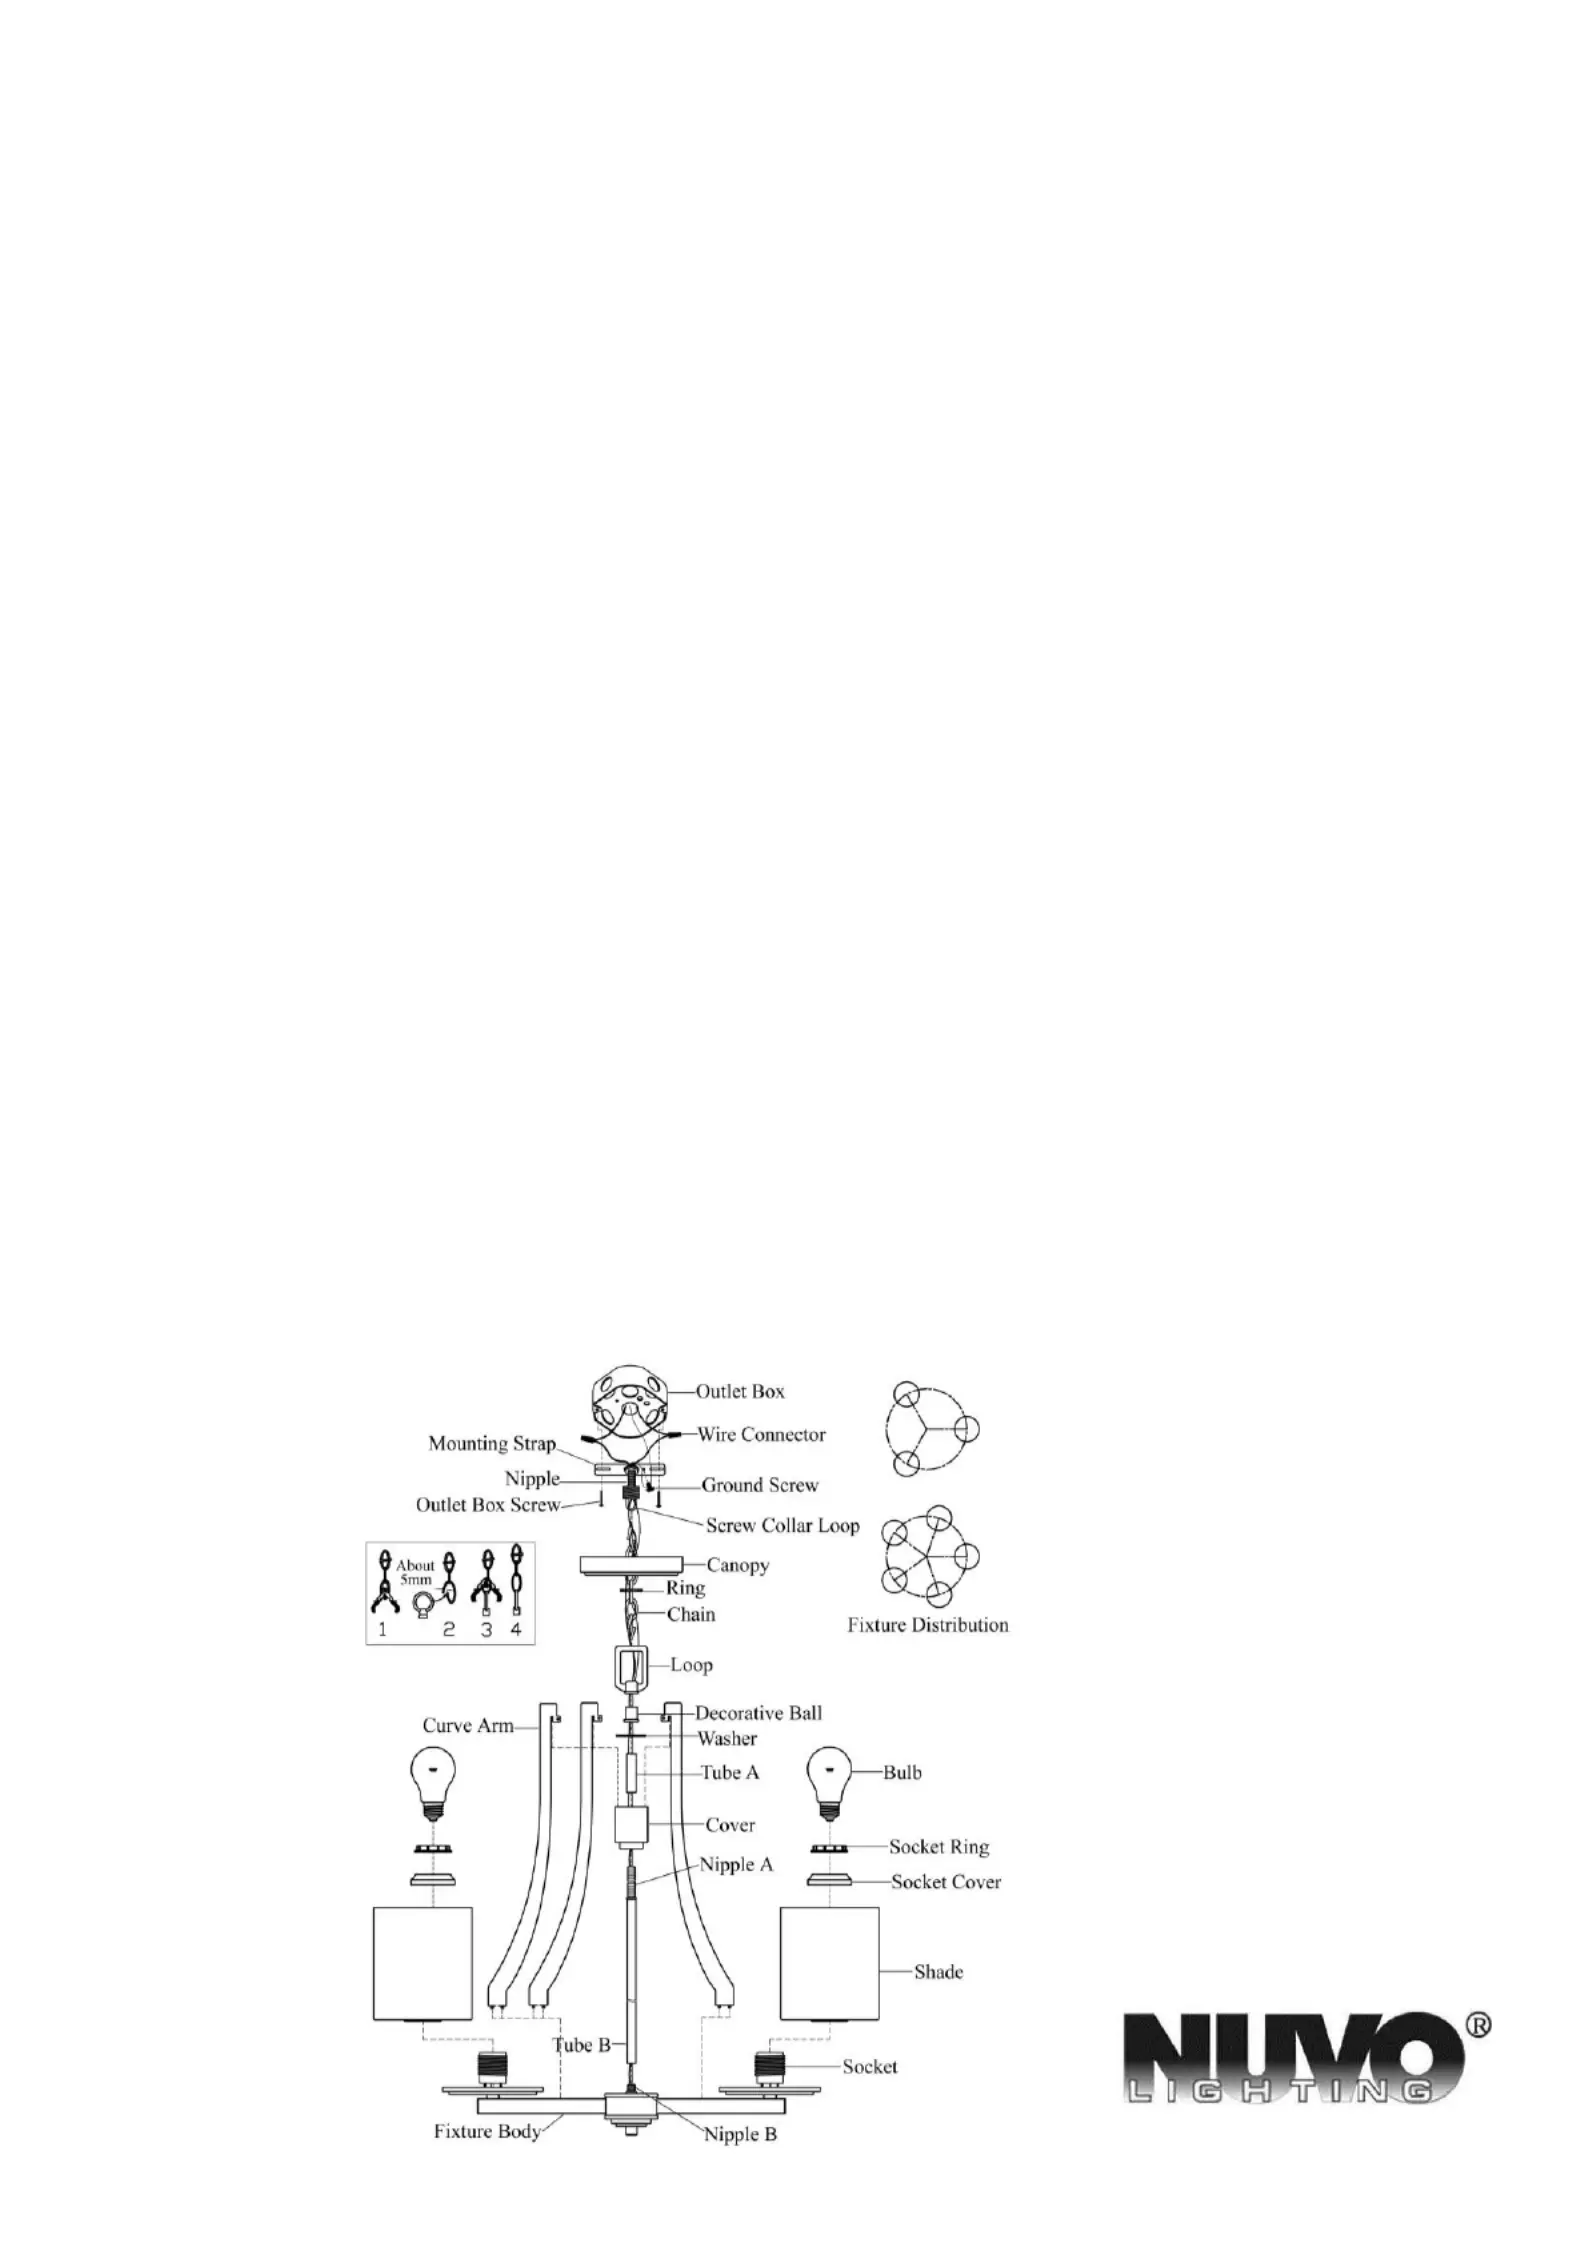
1.Carefully unpack the xture, lay out all parts on a clean surface.
2.Fasten the mounting strap onto the outlet box by using provided 2 outlet box screws.
3.Screw the tube B to the nipple B. Place the cover over the nipple A. Slide the tube A down to the nipple A. Attach the
top of the curve arms to the cover, and insert the bottom of the curve arms to the xture body. Then place the washer
and decorative ball over the nipple A, fasten the loop to the nipple A.
4.Using two pliers, twist open links at two ends of the chain as show. Hook one link to the loop and the other link to the
screw collar loop. Close the links. Place a piece of cloth between the pliers jaws and the chain link to prevent
scratching the link nish.
5.Weave xture wires up through the tube B, through the nipple A, through the cover, through the tube A, through the
washer, through the decorative ball, through the loop, through the chain, through the ring, through the screw collar loop
and through the canopy and through the nipple on the mounting strap.
6.Tie the ground wires from xture and from outlet box to the ground screw on the mounting strap. Connect the wire
without writing on it (with raised ribs) from the xture to the white wire (neutral wire) from the supply circuit.
Connect the wire with writing on it from the xture to the black wire (live wire) from the supply circuit. Cover the
connections using provided wire connectors. Position wires back inside outlet box.
7.Place the canopy over the nipple all the way to the ceiling and tighten the ring onto the screw collar loop until the
canopy is held firmly against the ceiling.
8.Unscrew the socket rings and socket covers from the sockets. Place the shades and socket covers over the sockets,
refasten the socket rings to secure them.
9.Install the bulbs (Not included). Turn on the power.
A Satco Product
Termékspecifikációk
| Márka: | NUVO |
| Kategória: | Lampa |
| Modell: | Bento 60/4085 |
Szüksége van segítségre?
Ha segítségre van szüksége NUVO Bento 60/4085, tegyen fel kérdést alább, és más felhasználók válaszolnak Önnek
Útmutatók Lampa NUVO

5 Április 2025
5 Április 2025
5 Április 2025
5 Április 2025
5 Április 2025
2 Április 2025
2 Április 2025
2 Április 2025
12 Szeptember 2024
12 Szeptember 2024
Útmutatók Lampa
Legújabb útmutatók Lampa
8 Április 2025
8 Április 2025
5 Április 2025
5 Április 2025
5 Április 2025
5 Április 2025
5 Április 2025
5 Április 2025
5 Április 2025
3 Április 2025