Használati útmutató Rowenta X-Plorer Serie 240+ AI RR9695
Rowenta Fietsendrager X-Plorer Serie 240+ AI RR9695
Olvassa el alább 📖 a magyar nyelvű használati útmutatót Rowenta X-Plorer Serie 240+ AI RR9695 (62 oldal) a Fietsendrager kategóriában. Ezt az útmutatót 18 ember találta hasznosnak és 6 felhasználó értékelte átlagosan 4.7 csillagra
Oldal 1/62
45
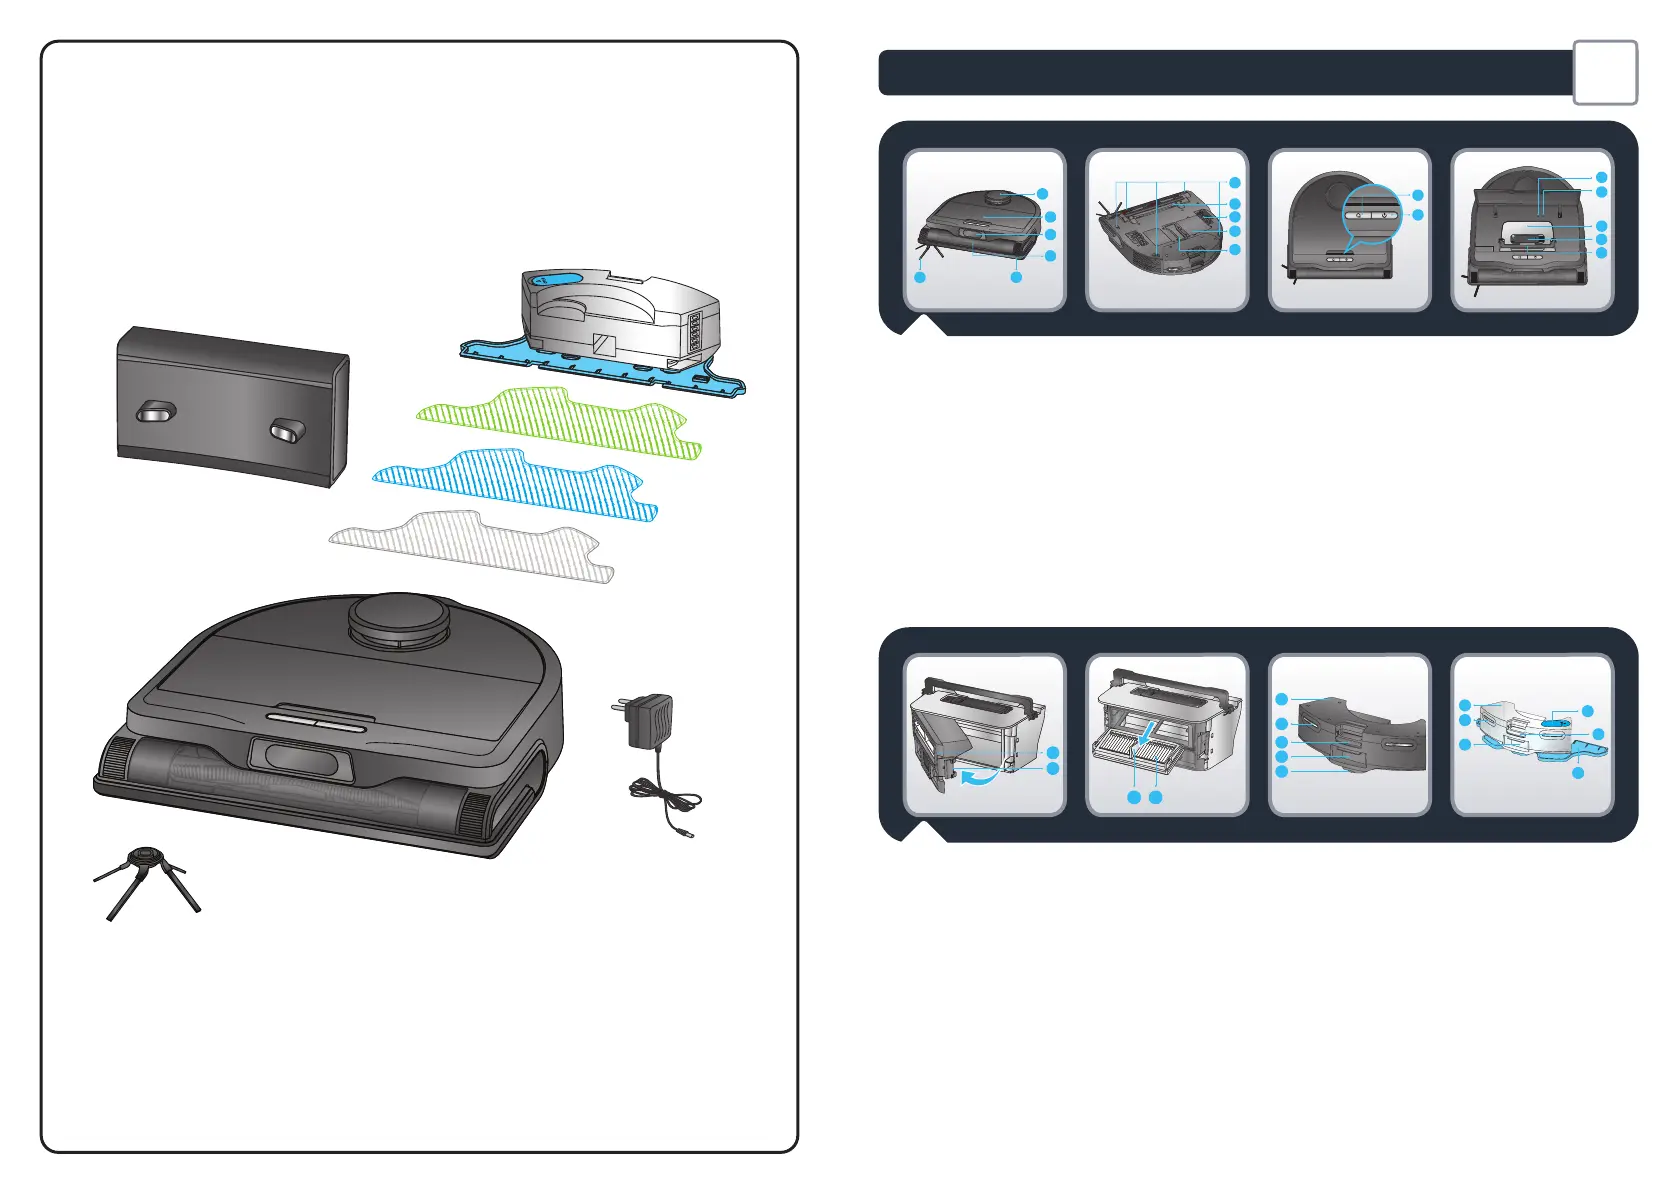
Product Overview
What’s in the box?
1
2
3
4
5
6
8
7
9
10
11
12
13
16
14
15
17
18
EN
1. LiDAR
2. Flip cover
3. «3DVision»cameras
4. Main brush
5. Side brush
6. Bumper
7. Anti-drop sensors
8. Main brush cover
9. Wheel
10. Battery
11. Dust collecting
channel cover
12. Home button
• Press to return to
station
13. Power / Start / Pause
button
• Press and hold to
turn on or off
• Press to start or
pause cleaning
14. WiFi indicator light
• Off: WiFi disabled
• Blinking slowly:
waiting for
connection
• Steady: WiFi
connected
15. Reset button
16. Dust box
17. Cleaning tool
18. Dust box handle
19. Dust box opening
20. Dust box latch
21. Filter handle
22. Filter
23. «Vacuumonly»
module (keep it
installed in the robot
when you don’t use the
mopping function)
24. Charging contacts
25. «Vacuumonly»
module latch
26. Dust trap door
27. Wheel
28. Vibratingwatertank
(to use the mopping
function, unclip the
“vacuum only” module
and replace it by the
water tank)
29. Charging contacts
30. Water tank latch
31. Stopper
32. Dust trap door
33. Vibratingmopbracket
19
20
21
22
23
24
25
26
27
28
29
30
32
33
31
Termékspecifikációk
| Márka: | Rowenta |
| Kategória: | Fietsendrager |
| Modell: | X-Plorer Serie 240+ AI RR9695 |
Szüksége van segítségre?
Ha segítségre van szüksége Rowenta X-Plorer Serie 240+ AI RR9695, tegyen fel kérdést alább, és más felhasználók válaszolnak Önnek
Útmutatók Fietsendrager Rowenta

8 Január 2025
8 Január 2025
8 Január 2025
29 Szeptember 2024
29 Augusztus 2024
29 Augusztus 2024
25 Augusztus 2024
25 Augusztus 2024
6 Augusztus 2024
21 Július 2024
Útmutatók Fietsendrager
Legújabb útmutatók Fietsendrager
9 Április 2025
2 Április 2025
30 Március 2025
30 Március 2025
25 Március 2025
18 Március 2025
14 Január 2025
14 Január 2025
12 Január 2025
8 Január 2025