Használati útmutató RTS OKI
Olvassa el alább 📖 a magyar nyelvű használati útmutatót RTS OKI (2 oldal) a nincs kategorizálva kategóriában. Ezt az útmutatót 19 ember találta hasznosnak és 9 felhasználó értékelte átlagosan 4.3 csillagra
Oldal 1/2
Quick Start Guide
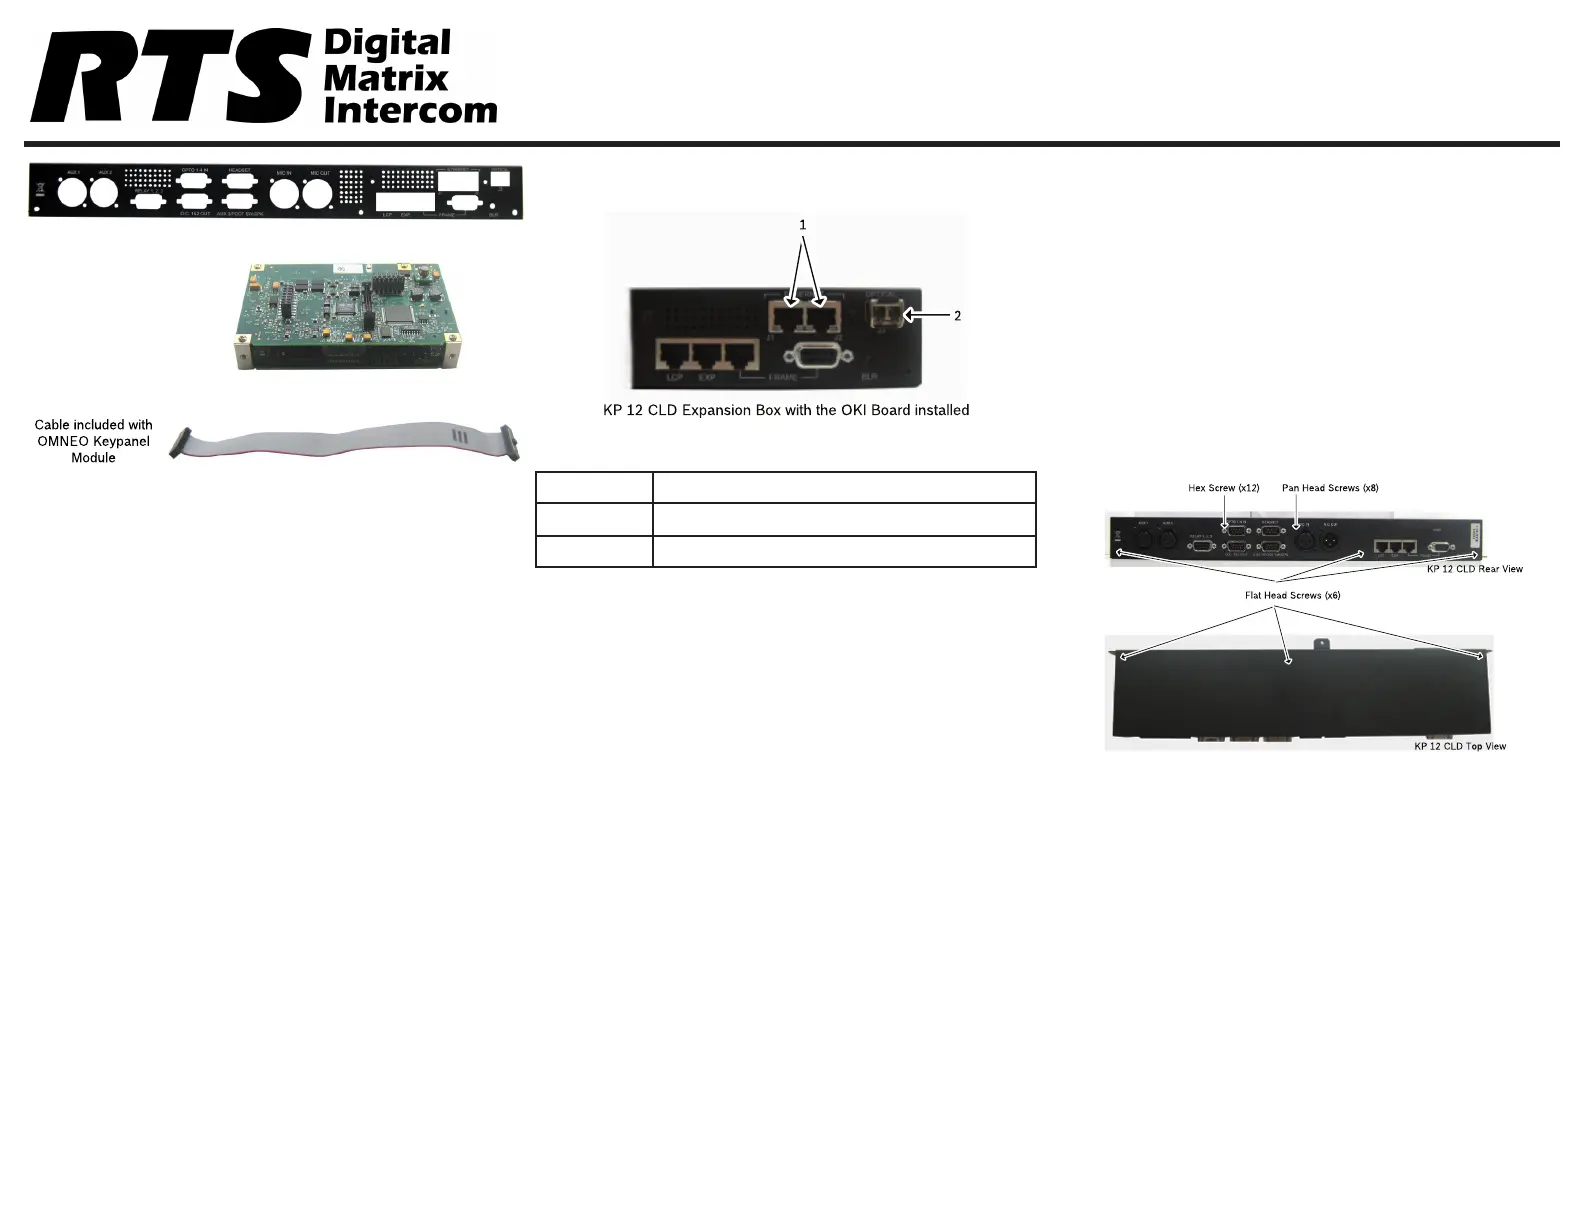
OKI - OMNEO Keypanel Interface KP 12 CLD
Included:
•OMNEOKeypanelModule
•RearPanel,KP12CLD,Expansion
•2-Screw,4-40x.25LG.
•3-Screw,PH,4-40x3/16LG.
•SafetyInstructionsST-CO
•OKIQuickStartGuide
•OKIDocumentationResourceDisk
Requirements:
Youmusthavethefollowing:
•PhillipsScrewdriver
•HexNutDriver
Firmware Requirements
•KP12CLDversion1.30
IMPORTANTThekeypanelrmwaremustbeupdatedbefore
youinstalltheOKImoduleintothekeypanel.
Reference View - OKI KP 12 CLD
Description
1.J1&J2RJ-45Connectors(2)
2.J3LCFiberConnector(Optional)
OKI Installation – KP 12 CLD
Toinstall the OKI board set for the KP 12 CLD,dothe
following:
NOTE:Becauseallthechangesaremadetothe
expansionbox,removetheexpansionboxfrom
theKP12CLDunit.
1.PowerofftheKP12CLDunit.
2.Removetheexpansion boxfromtheKP12CLD
unit.
NOTE:Steps3and4areonlynecessaryifanRCoption
isinstalled.
3.Usingahexnutdriver,removethe12 hex screws
fromtheKP12CLDexpansionbox.
4.Usingthesamescrewdriver,removetheeight (8)
pan head screwsfromtheKP12CLDexpansion
box.
5.UsingaPhillipsscrewdriver,removethesix (6) at
head screwsfrom KP12CLDexpansionbox.
F01U280811Rev0101/2013
Termékspecifikációk
| Márka: | RTS |
| Kategória: | nincs kategorizálva |
| Modell: | OKI |
Szüksége van segítségre?
Ha segítségre van szüksége RTS OKI, tegyen fel kérdést alább, és más felhasználók válaszolnak Önnek
Útmutatók nincs kategorizálva RTS

17 December 2024
12 December 2024
12 December 2024
29 Augusztus 2024
29 Augusztus 2024
7 Augusztus 2024
Útmutatók nincs kategorizálva
Legújabb útmutatók nincs kategorizálva
10 Április 2025
10 Április 2025
10 Április 2025
9 Április 2025
9 Április 2025
9 Április 2025
9 Április 2025
9 Április 2025
9 Április 2025
9 Április 2025