Használati útmutató Schaudt LT320
Schaudt
távirányító
LT320
Olvassa el alább 📖 a magyar nyelvű használati útmutatót Schaudt LT320 (4 oldal) a távirányító kategóriában. Ezt az útmutatót 17 ember találta hasznosnak és 9 felhasználó értékelte átlagosan 4.6 csillagra
Oldal 1/4
Date: 08.01.2015
E Schaudt GmbH, E lektrotechnik und Apparatebau, Planckstraße 8, 88677 Markdorf, Germany, Tel. +4 9 7544 9577-0, Fax +49 7544 9577-29, www.schaudt--gmbh.de
931.021 BAMA / EN
Operating and Installation Instructions
for the LT 320 Control Panel
(Solar Display)
1 Operating instructions
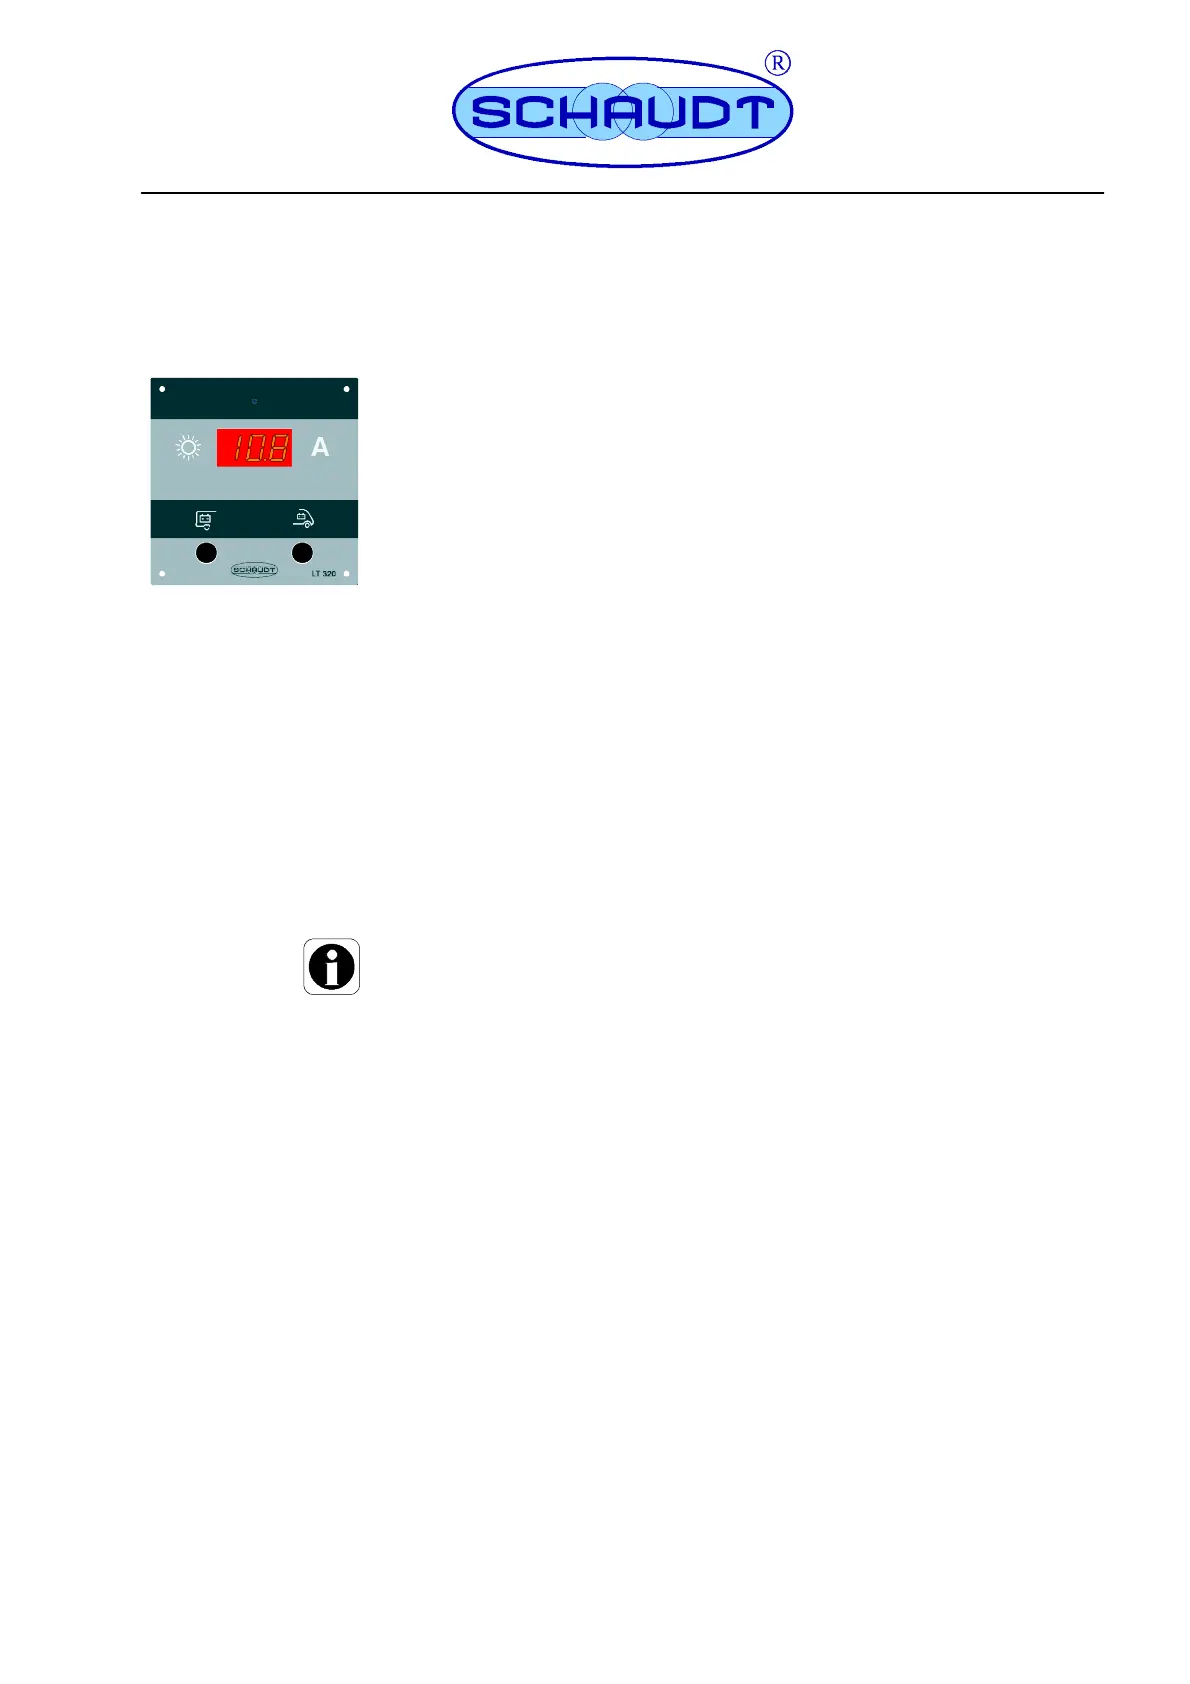
1.1 Purpose
The LT 320 control panel enables the current charging current being supplied from
the solar regulator to the leisure area and starter batteries to be displayed.
The panel has 2 buttons and a three-digit 7-segment display for this purpose.
1.2 Operation
Press the ”Leisure Battery” button.
F The ”Leisure Battery” symbol and the current flowing into the leisure
battery are displayed.
F The display automatically goes out after about 20 seconds.
Press the ”Starter Battery” button.
F The ”Starter Battery” symbol and the current flowing into the starter
battery are displayed.
F The display automatically goes out after about 20 seconds.
Y Re-pressing the relevant button enables the current display to be swit-
ched of f immediately.
Proceed as follows to have a continual display:
Press the ”Starter Battery” or ”Leisure Battery” button and keep it pres-
sed for longer than 5 seconds.
F The relevant symbol and the current flowing are displayed. The dis-
play does not go out until after 4 hours.
The continual display can be exited at any time by briefly re-pressing the
relevant button.
2 Installation instructions
2.1 Mechanical installation
The device is designed for installation into the front of a piece of furniture.
Install in a dry, sufficiently ventilated location.
Ensure a minimum clearance to the surrounding fixtures and fittings:
F The installation depth, including free space necessary for the connec-
tors and cables, is 35 mm.
F The ambient temperature may not exceed +50 C during operation.
Minimum clearance
Termékspecifikációk
| Márka: | Schaudt |
| Kategória: | távirányító |
| Modell: | LT320 |
Szüksége van segítségre?
Ha segítségre van szüksége Schaudt LT320, tegyen fel kérdést alább, és más felhasználók válaszolnak Önnek
Útmutatók távirányító Schaudt

28 Augusztus 2024
Útmutatók távirányító
- távirányító Alpine
- távirányító Samlex
- távirányító NEC
- távirányító TomTom
- távirányító Danfoss
- távirányító Tihao
- távirányító Neewer
- távirányító Voxx
- távirányító Schwaiger
- távirányító JL Audio
- távirányító Nemef
- távirányító Beoplay
- távirányító Entone
- távirányító LG
- távirányító Loewe
Legújabb útmutatók távirányító

9 Április 2025

3 Április 2025

2 Április 2025

1 Április 2025

31 Március 2025

29 Március 2025

29 Március 2025

27 Március 2025

27 Március 2025

27 Március 2025