Használati útmutató Signature Hardware Bennett 433107
Signature Hardware nincs kategorizálva Bennett 433107
Olvassa el alább 📖 a magyar nyelvű használati útmutatót Signature Hardware Bennett 433107 (2 oldal) a nincs kategorizálva kategóriában. Ezt az útmutatót 19 ember találta hasznosnak és 6 felhasználó értékelte átlagosan 4.3 csillagra
Oldal 1/2
1Bennett Kitchen Faucet Installation Instructions
INSTALLATION
BENNETT KITCHEN FAUCET INSTALLATION
BEFORE YOU BEGIN
We recommend consulting a professional if you are
unfamiliar with installing plumbing fixtures. Signature
Hardware accepts no liability for any damage to the
faucet, plumbing, sink, counter top, or for personal injury
during installation.
Observe all local plumbing and building codes.
Unpack and inspect the faucet for shipping damage. If
any damage is found, contact our Customer Relations
team at 1-8-55
7118005-.
Note: Make sure to winterize your outdoor faucet
before cold weather arrives to prevent burst pipes and
protect the faucet’s hardware.
*not included
TOOLS AND MATERIALS:
GETTING STARTED
Ensure that you have gathered all the required
materials that are needed for the installation.
For these instructions, it is assumed that the old
faucet has been completely removed and any
necessary repairs or modifications to the water
supply have been completed.
Plumbers
Tape*
Thread
Sealant*
Adjustable
Wrench*
Phillips
Screwdriver*
Small
Bucket*
Basin
Wrench*
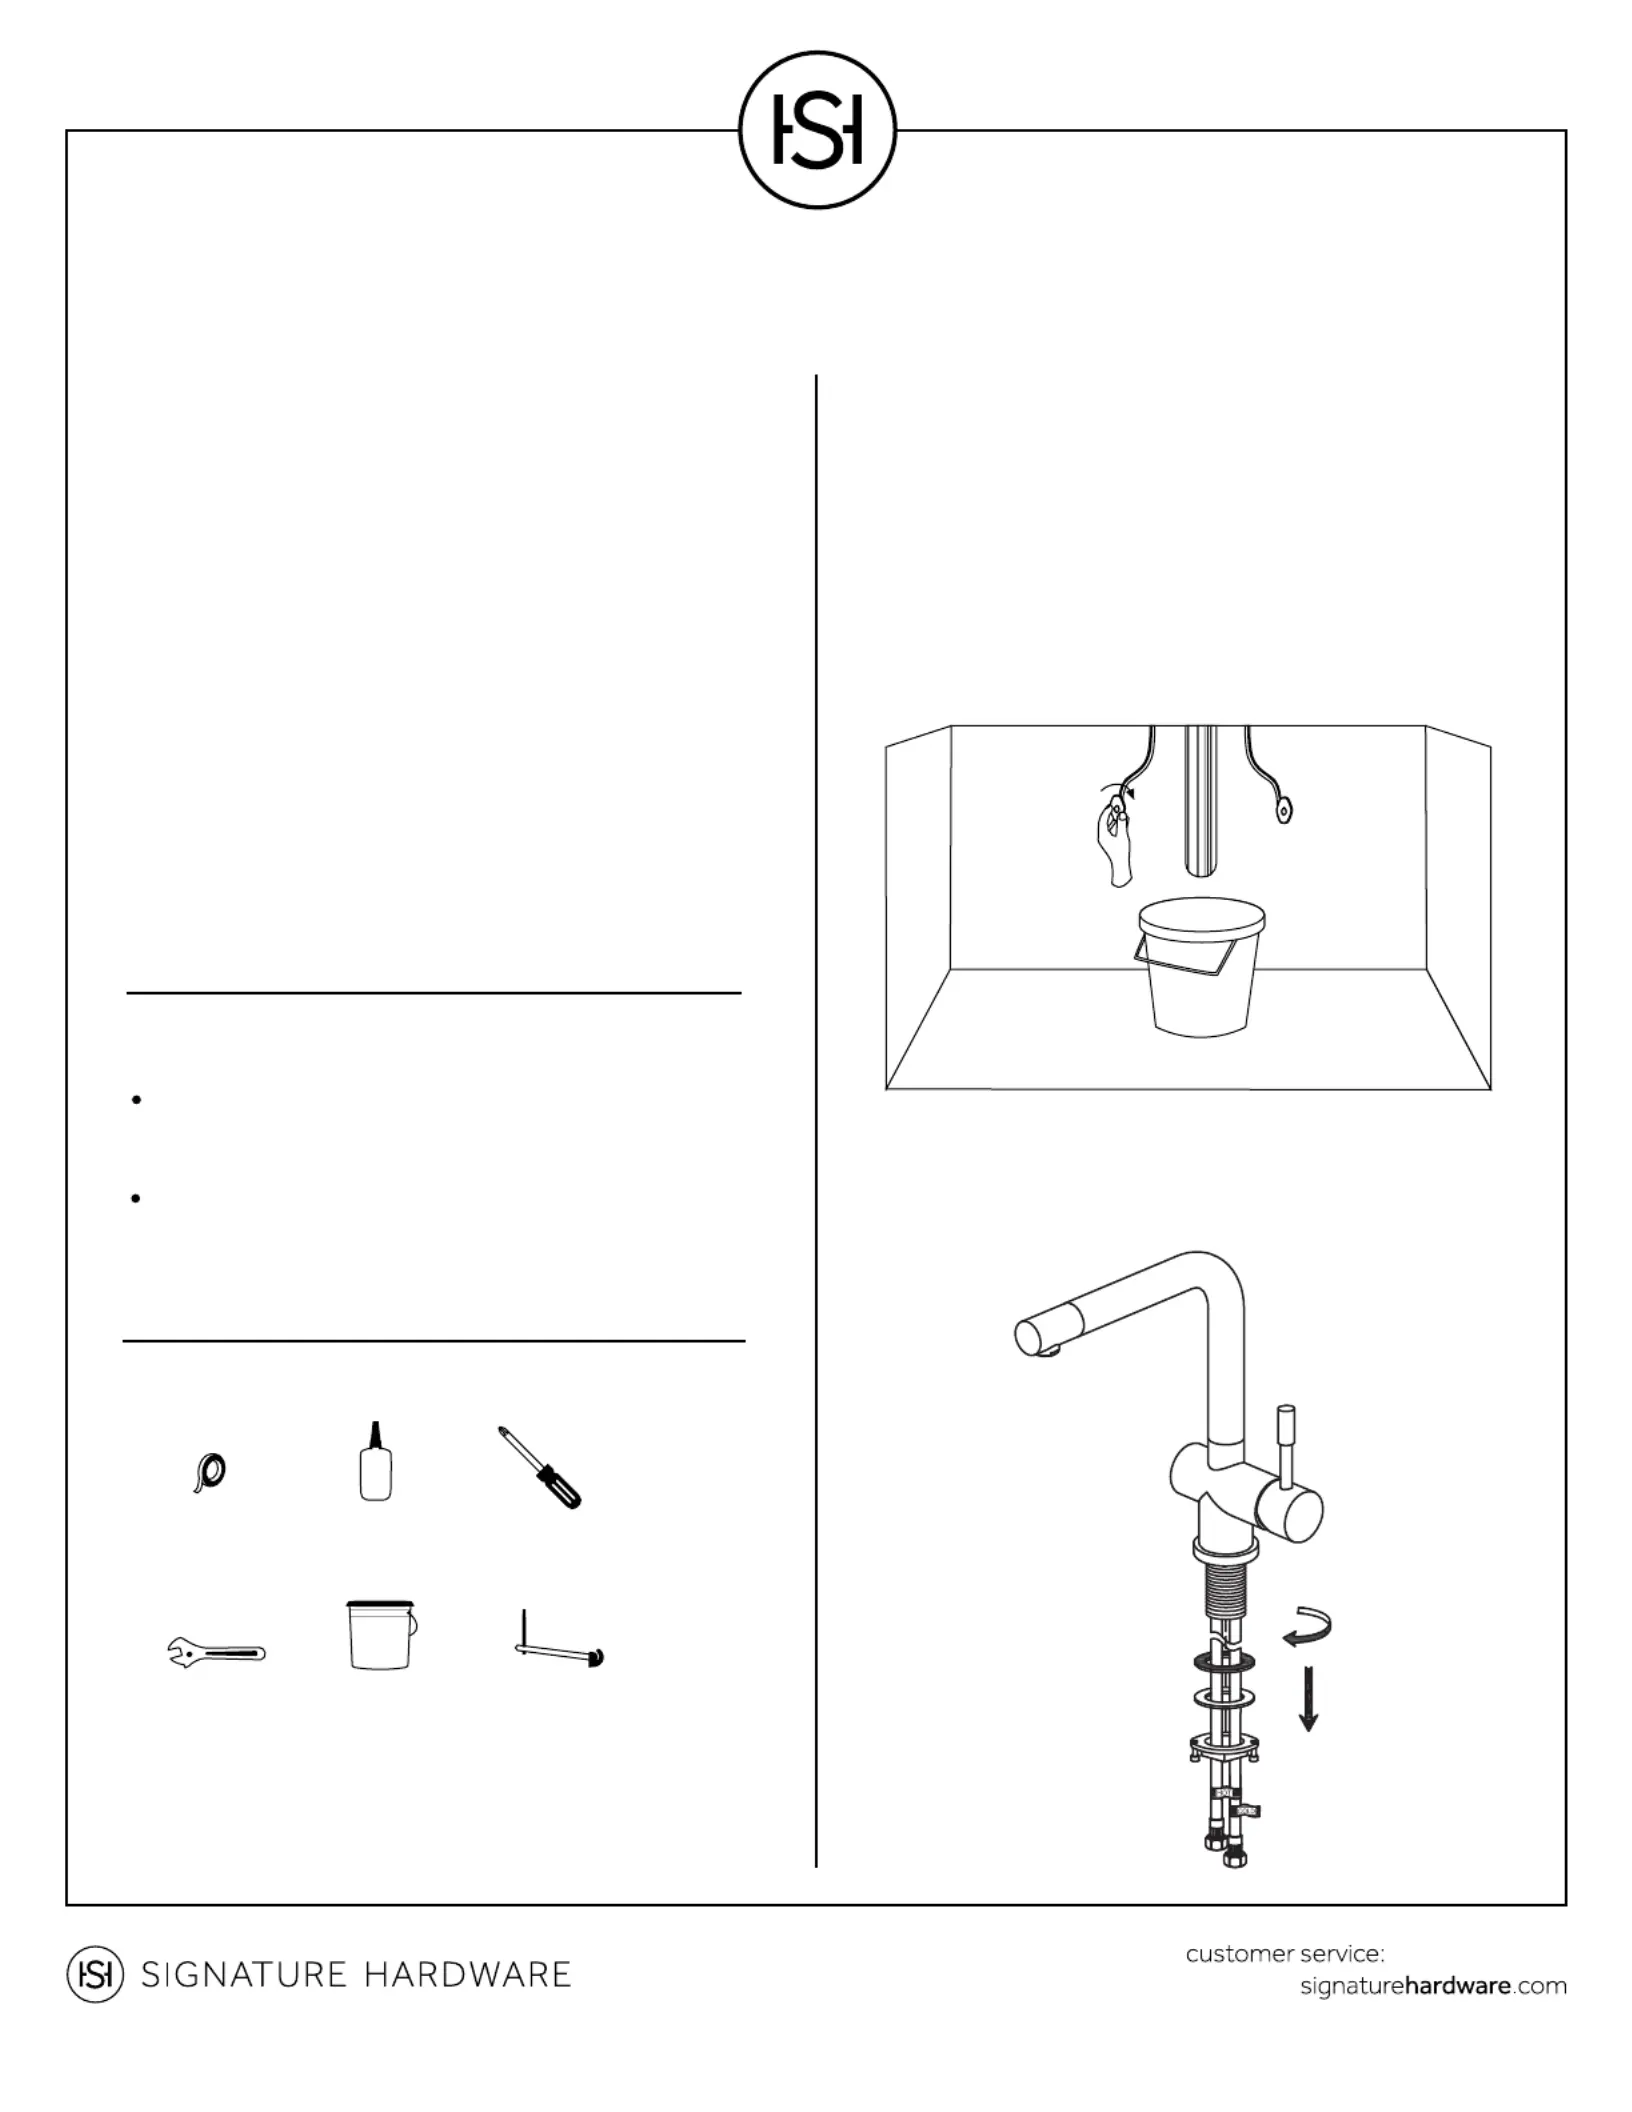
2.Remove the lock nut, rubber washer, and metal
washer from the faucet body. Insert the faucet through
the mounting hole in your counter top.
1.Ensure that the water supply below your sink is
completely shut off by turning the shutoff valves all the
way to the right.
Tip: Place a small bucket below your workspace to
catch any water that may drip during the installation
process.
OFF
SKU(s): 433107, 433135
1.855.715.18001.855.715.1800
Termékspecifikációk
| Márka: | Signature Hardware |
| Kategória: | nincs kategorizálva |
| Modell: | Bennett 433107 |
Szüksége van segítségre?
Ha segítségre van szüksége Signature Hardware Bennett 433107, tegyen fel kérdést alább, és más felhasználók válaszolnak Önnek
Útmutatók nincs kategorizálva Signature Hardware

25 Szeptember 2024
25 Szeptember 2024
Útmutatók nincs kategorizálva
Legújabb útmutatók nincs kategorizálva
10 Április 2025
10 Április 2025
10 Április 2025
9 Április 2025
9 Április 2025
9 Április 2025
9 Április 2025
9 Április 2025
9 Április 2025
9 Április 2025