Használati útmutató StarTech.com PRIVSCNMON34W
StarTech.com Képernyőszűrő PRIVSCNMON34W
Olvassa el alább 📖 a magyar nyelvű használati útmutatót StarTech.com PRIVSCNMON34W (2 oldal) a Képernyőszűrő kategóriában. Ezt az útmutatót 15 ember találta hasznosnak és 8 felhasználó értékelte átlagosan 5.0 csillagra
Oldal 1/2
Quick-Start Guide
To view manuals, FAQs, videos, drivers, downloads, technical drawings, and more, visit www.startech.com/support.
Manual Revision: June 10, 2021 10:08 AM
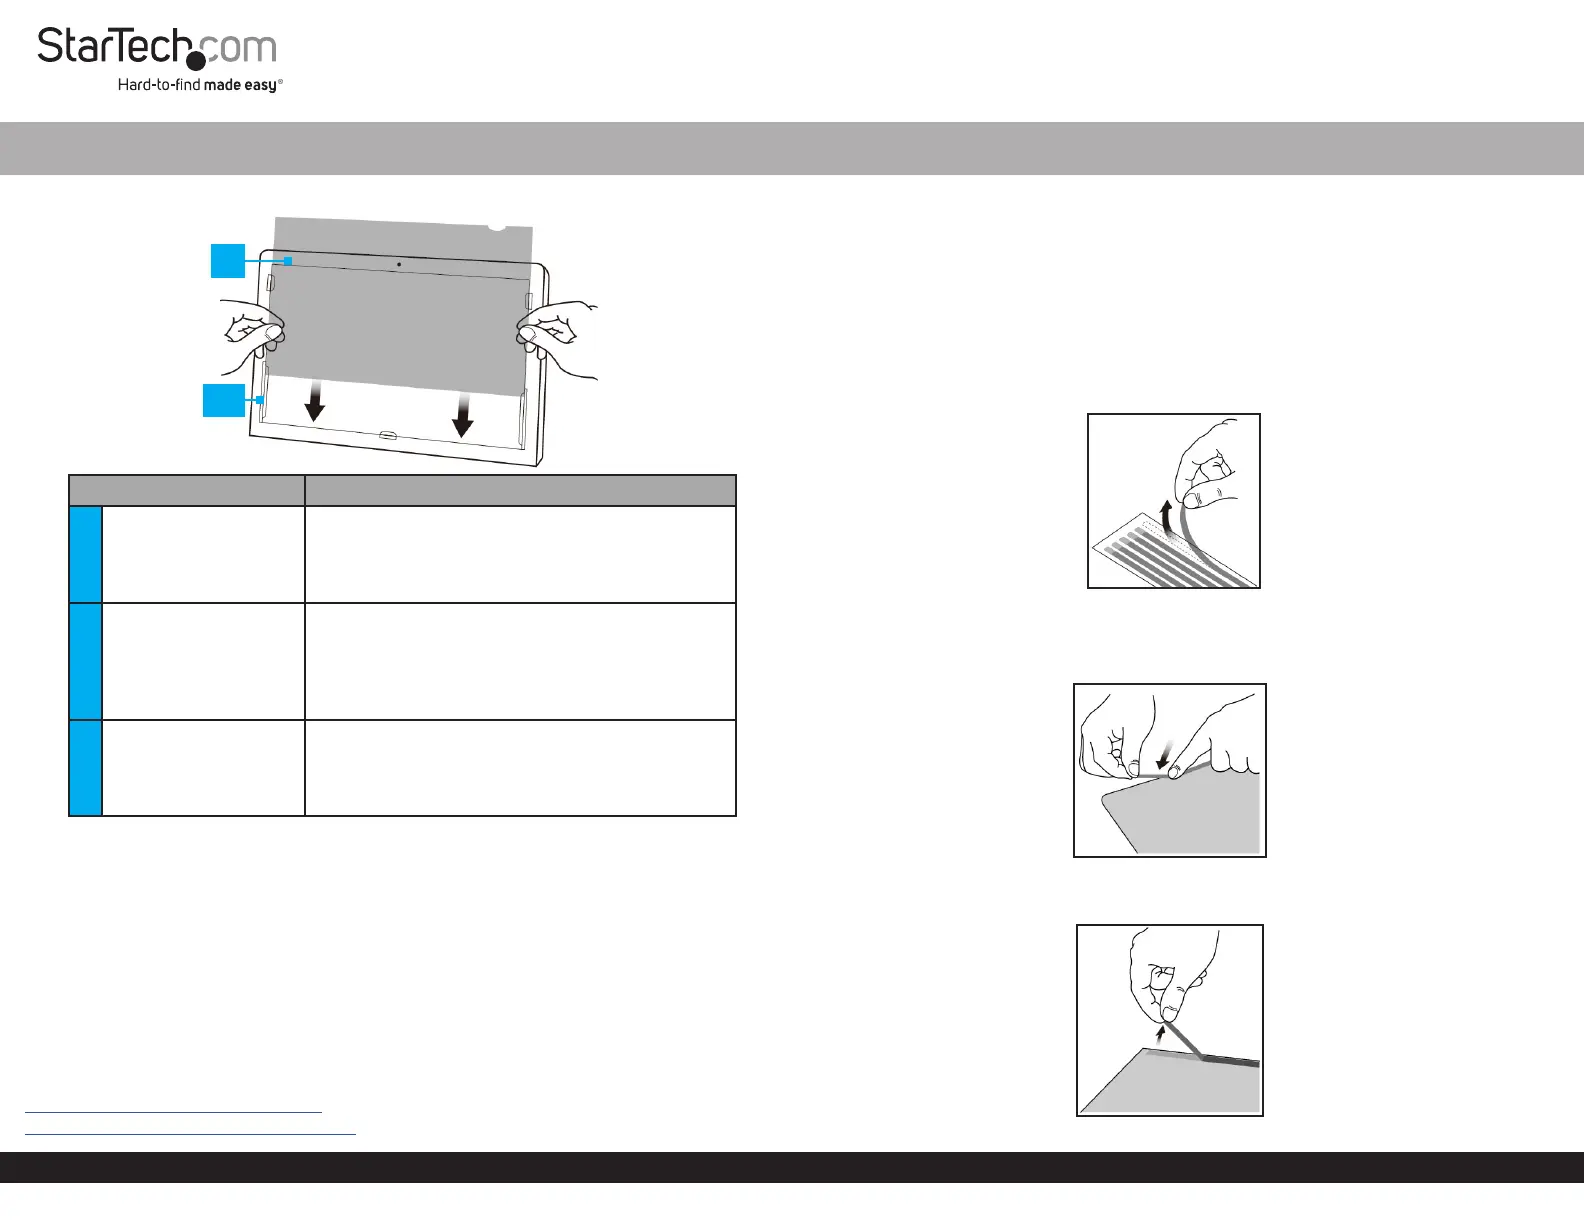
Product Diagram (PRIVSCNMONxx and PRIVACY-SCREEN-xx)
ComponentFunction
1Privacy Filter
• Privacy comes into eect when viewing
anywhere past 30 degrees from the left and
right of center
• Total eld of view of 60 degrees
2Mounting Tabs (x 5)
• Secure the Privacy Filter to the Monitor’s
surface
• The adhesive on the Mounting Tabs
becomes less eective with frequent removal/
reapplication
3
Adhesive Strips (not
displayed)
• Secure the Privacy Filter to the Monitor’s
surface
• The Adhesive Strips become less eective
with frequent removal/reapplication
Package Contents
• Privacy Screen x 1
• Set of Adhesive Strips x 1 (screens up to 27”) or x 2 (screens larger than 27”)
• Set of Mounting Tabs x 1
• Wiping Cloth x 1
• Quick Start Guide x 1
Requirements
For the latest requirements, please visit the following link and replace “xx” with the desired
privacy lter size / SKU:
www.startech.com/PRIVSCNMONxx
www.startech.com/PRIVACY-SCREEN-xx
Universal Privacy Filter
Install the Privacy Filter -- Adhesive Strips
For installations that are intended to be permanent, or if the Monitor does not feature
large Bezels, please use the Adhesive Strips.
1. Clean the Laptop Display and Bezels, using the Wiping Cloth.
2. Select the side of the Privacy Filter that is intended to face outward (i.e. matte or
glossy side) and place the Privacy Filter on a clean and at surface with the selected
side facing down.
3. Remove all the Adhesive Strips from the Transparent Lining.
Removing the Adhesive Strips
4. Carefully align the Adhesive Strips along the edges (top, bottom, left, and right) of
the Privacy Filter and ax to the Privacy Filter by applying rm pressure to all the
Adhesive Strips.
Applying the Adhesive Strips
5. Carefully remove the Protective Backing from the Adhesive Strips, exposing the
screen side adhesive.
Remove the Protective Backing from the Adhesive Strips
1
2/3
Termékspecifikációk
| Márka: | StarTech.com |
| Kategória: | Képernyőszűrő |
| Modell: | PRIVSCNMON34W |
Szüksége van segítségre?
Ha segítségre van szüksége StarTech.com PRIVSCNMON34W, tegyen fel kérdést alább, és más felhasználók válaszolnak Önnek
Útmutatók Képernyőszűrő StarTech.com

18 Augusztus 2024
18 Augusztus 2024
18 Augusztus 2024
17 Augusztus 2024
16 Augusztus 2024
16 Augusztus 2024
16 Augusztus 2024
16 Augusztus 2024
15 Augusztus 2024
15 Augusztus 2024
Útmutatók Képernyőszűrő
Legújabb útmutatók Képernyőszűrő
3 Október 2024
3 Október 2024
3 Október 2024
3 Október 2024
3 Október 2024
3 Október 2024
3 Október 2024