Használati útmutató StarTech.com SSPMSVESA
StarTech.com Lapos panel támogatás SSPMSVESA
Olvassa el alább 📖 a magyar nyelvű használati útmutatót StarTech.com SSPMSVESA (8 oldal) a Lapos panel támogatás kategóriában. Ezt az útmutatót 16 ember találta hasznosnak és 7 felhasználó értékelte átlagosan 4.6 csillagra
Oldal 1/8
Quick-Start Guide
To view manuals, FAQs, videos, drivers, downloads, technical drawings, and more, visit www.startech.com/support.
Manual Revision: July 24, 2019 3:57 PM
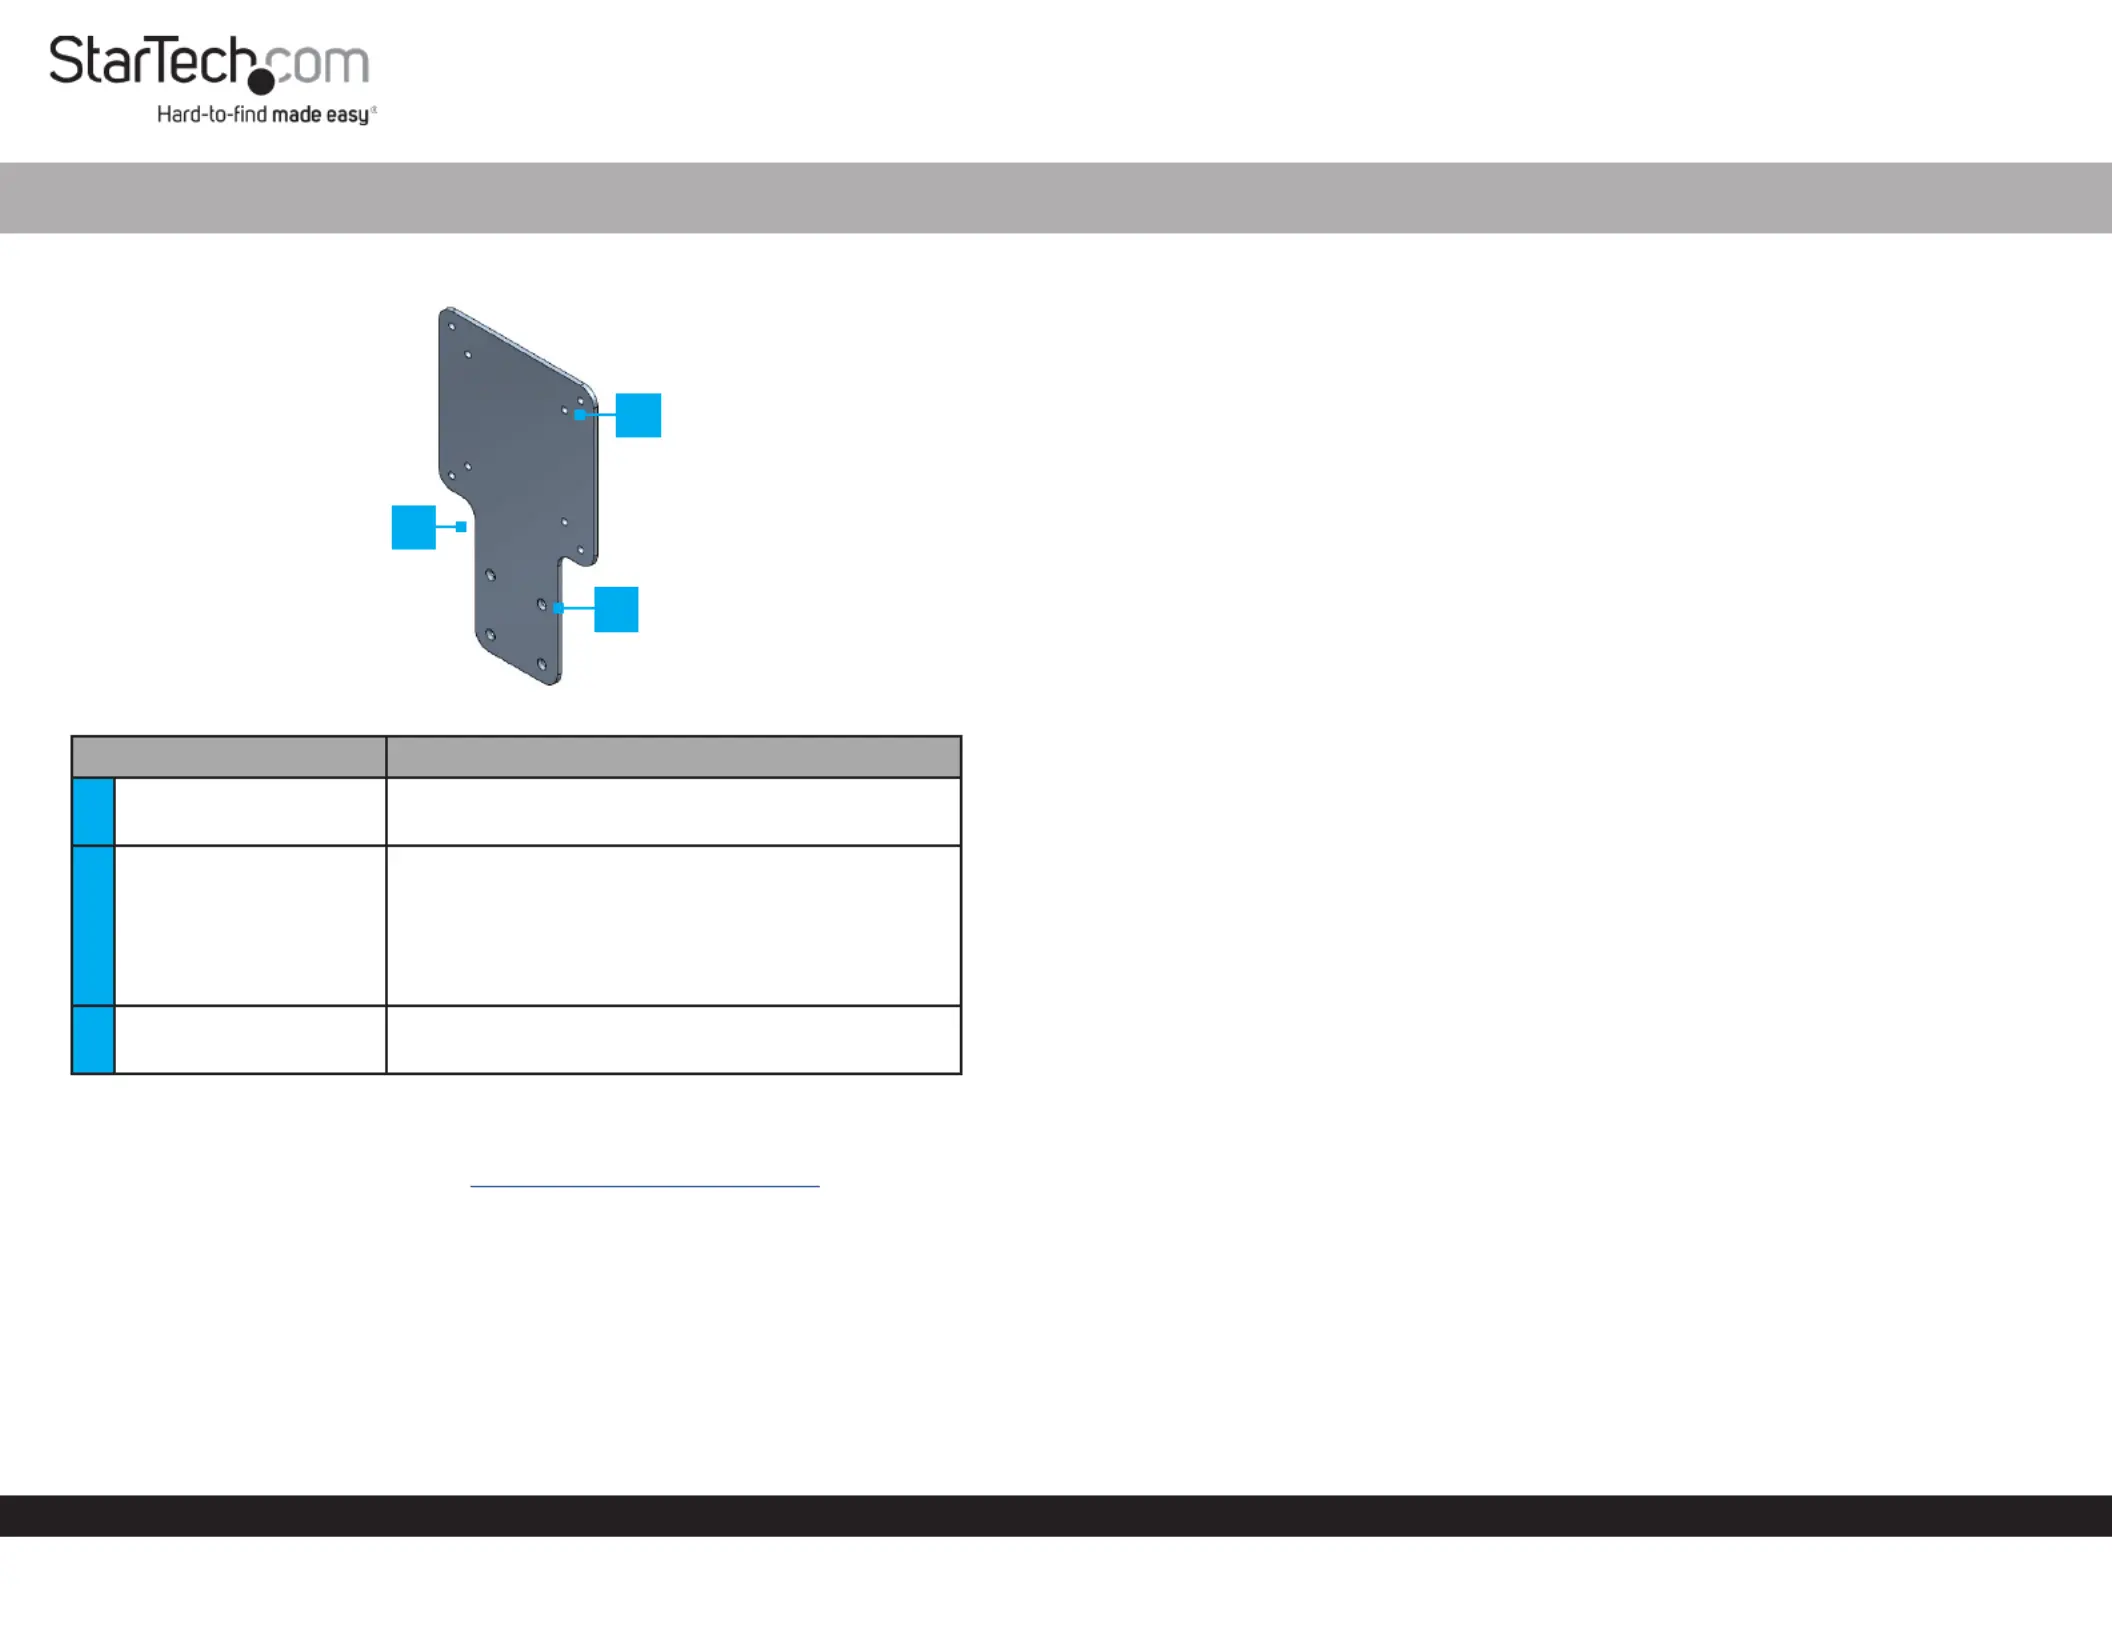
Product Diagram (SSPMSVESA)
ComponentFunction
1
VESA Mounting
Bracket
• Used to mount a StarTech.com Docking
StationHubMonitor or to the back of a .
2VESA Mounting Holes
• Used to mount the to the back of a Adapter
Monitor Monitor’s VESA Mounting ,using the
Pattern.
Note: VESA mounting sizes are 75x75 and
100x100.
3Mounting Holes
• Used to mount a StarTech.com Docking
StationHubAdapter or to the .
Requirements
For the latest requirements, please visit www.startech.com/SSPMSVESA
If you are using a that covers the on the back of Monitor StandVESA Mounting Holes
the , a VESA compatible monitor mount will be require to use the .MonitorAdapter
Package Contents
• VESA Mounting Bracket x 1
• M3 x 5 mm Screws x 4
• M4 x 12 mm Screws x 4
• M4 x 20 mm Screws x 4
VESA Mount Adapter for StarTech.com Docking Stations and Hubs
• Spacers x 4
• Quick-Start Guide x 1
Attaching a StarTech.com Docking Station or Hub
1. Align the on the with the on the Mounting HolesAdapterMounting Holes
StarTech.com Docking StationHub or . The recessed hole pattern should be facing
outward so the will t properly.M3 x 5 mm (Countersunk) Screws
2. Insert the four through the on the M3 x 5 mm ScrewsMounting HolesAdapter
and into the on the or .Mounting HolesStartech.com Docking StationHub
3. Using a (sold separately) tighten the , Phillips Head ScrewdriverM3 x 5 mm Screws
being careful not to over-tighten the .M3 x 5 mm Screws
Mounting the Adapter (Flush)
1. Place the screen facing down on a at, clean, and secure surface.Monitor
2. Align the on the with the on the Mounting HolesAdapterVESA Mounting Holes
back of the .Monitor
3. Align the with the on the back of the VESA Monitor MountVESA Mounting Hole
Adapter, Adapter VESA Monitor Mount sandwiching the between theand the
back of the. Monitor
4. Insert four of the through the and the M4 x 12 mm ScrewsVESA Monitor Mount
AdapterMounting HolesMonitor and into the on the back of the .
5. Using a , tighten the , being careful Phillips Head ScrewdriverM4 x 12 mm Screws
not to over-tighten the .M4 x 12 Screws
Mounting the Adapter (Recessed)
Note: The and provided with the can be installed on SpacersScrewsAdapter
monitors with VESA mounting holes with a maximum depth of 7mm.
1. Place the screen facing down on a at, clean, and secure surface.Monitor
2. Place the four over the on the back of the .SpacersVESA Mounting HolesMonitor
3. Align the on the with the on the back on the Mounting HolesAdapter Spacers
Monitor.
4. Align the with the on the back of the VESA Monitor MountVESA Mounting Hole
AdapterAdapterVESA Monitor Mount, sandwiching the between the and the
Spacers.
2
1
3
Termékspecifikációk
| Márka: | StarTech.com |
| Kategória: | Lapos panel támogatás |
| Modell: | SSPMSVESA |
Szüksége van segítségre?
Ha segítségre van szüksége StarTech.com SSPMSVESA, tegyen fel kérdést alább, és más felhasználók válaszolnak Önnek
Útmutatók Lapos panel támogatás StarTech.com

15 Január 2025
15 Január 2025
15 Január 2025
15 Január 2025
15 Január 2025
15 Január 2025
15 Január 2025
15 Január 2025
15 Január 2025
15 Január 2025
Útmutatók Lapos panel támogatás
Legújabb útmutatók Lapos panel támogatás
8 Április 2025
3 Április 2025
3 Április 2025
3 Április 2025
3 Április 2025
3 Április 2025
3 Április 2025
3 Április 2025
3 Április 2025