Használati útmutató Artillery Sidewinder X1
Artillery 3D nyomtató Sidewinder X1
Olvassa el alább 📖 a magyar nyelvű használati útmutatót Artillery Sidewinder X1 (2 oldal) a 3D nyomtató kategóriában. Ezt az útmutatót 19 ember találta hasznosnak és 4 felhasználó értékelte átlagosan 4.3 csillagra
Oldal 1/2
Arllery 3D Printer
Sidewinder X1
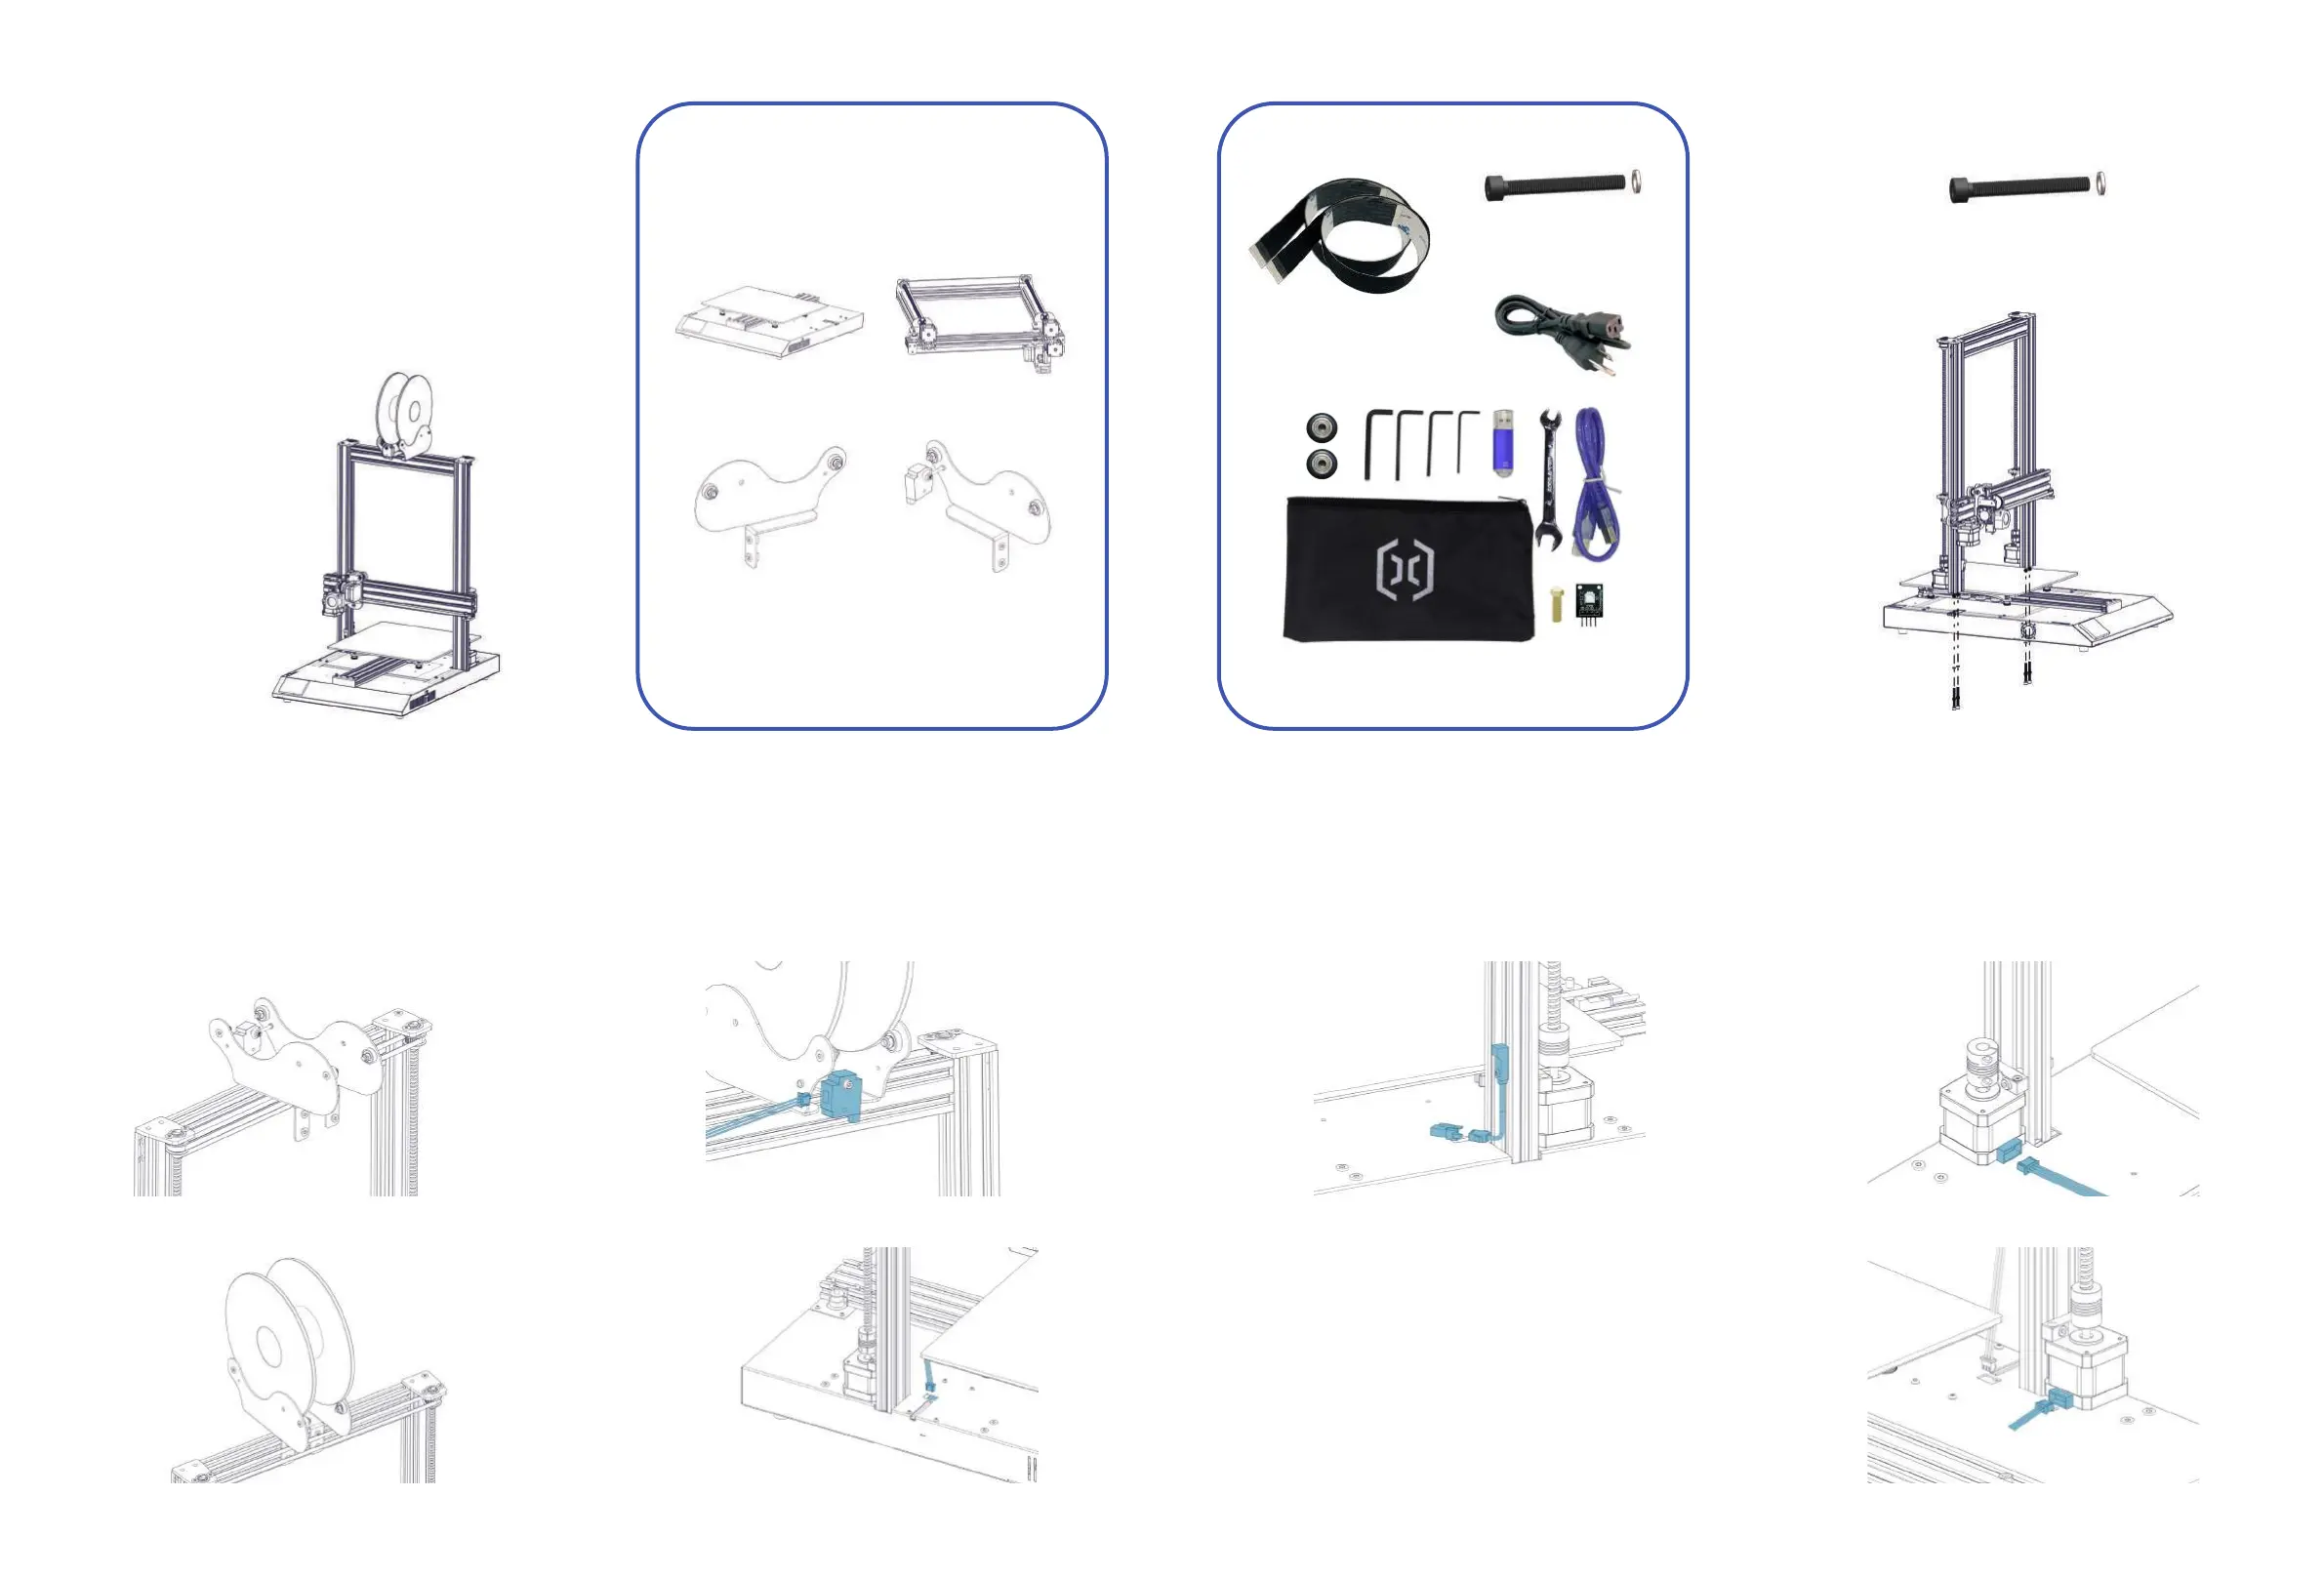
List 1 - Main Modules
List 2 - Tools & Spares
M4x45 (5pcs)
Step 1
M4x45 (4pcs)
Fix the XZ gantry to the base with 4pcs of M4x45
screws as shown in the picture below.
Step 2
Fix the spool holder to the top of the printer, adjust
the width to fit the size of your filament spool. Make
sure the filament sensor is facing forward.
Step 3
Connect the filament runout sensor as shown in
pictures below:
Step 4
Connect the Z endstop to the cable.
Step 5
Connect the Z Stepper Motors as shown in the
pictures below:
Front
30pin (1pc)
20pin (1pc)
Termékspecifikációk
| Márka: | Artillery |
| Kategória: | 3D nyomtató |
| Modell: | Sidewinder X1 |
Szüksége van segítségre?
Ha segítségre van szüksége Artillery Sidewinder X1, tegyen fel kérdést alább, és más felhasználók válaszolnak Önnek
Útmutatók 3D nyomtató Artillery

13 Augusztus 2024
Útmutatók 3D nyomtató
Legújabb útmutatók 3D nyomtató
31 December 2025
27 December 2024
27 December 2024
27 December 2024
27 December 2024
12 December 2024
27 Szeptember 2024
14 Szeptember 2024
3 Szeptember 2024
3 Szeptember 2024