Használati útmutató OSD Audio NERO MAX8
Olvassa el alább 📖 a magyar nyelvű használati útmutatót OSD Audio NERO MAX8 (11 oldal) a Vevő kategóriában. Ezt az útmutatót 16 ember találta hasznosnak és 8.5 felhasználó értékelte átlagosan 4.4 csillagra
Oldal 1/11

NERO
MULTIROOM PRE-AMP & AMPLIFIERS
MAX/CONTROL
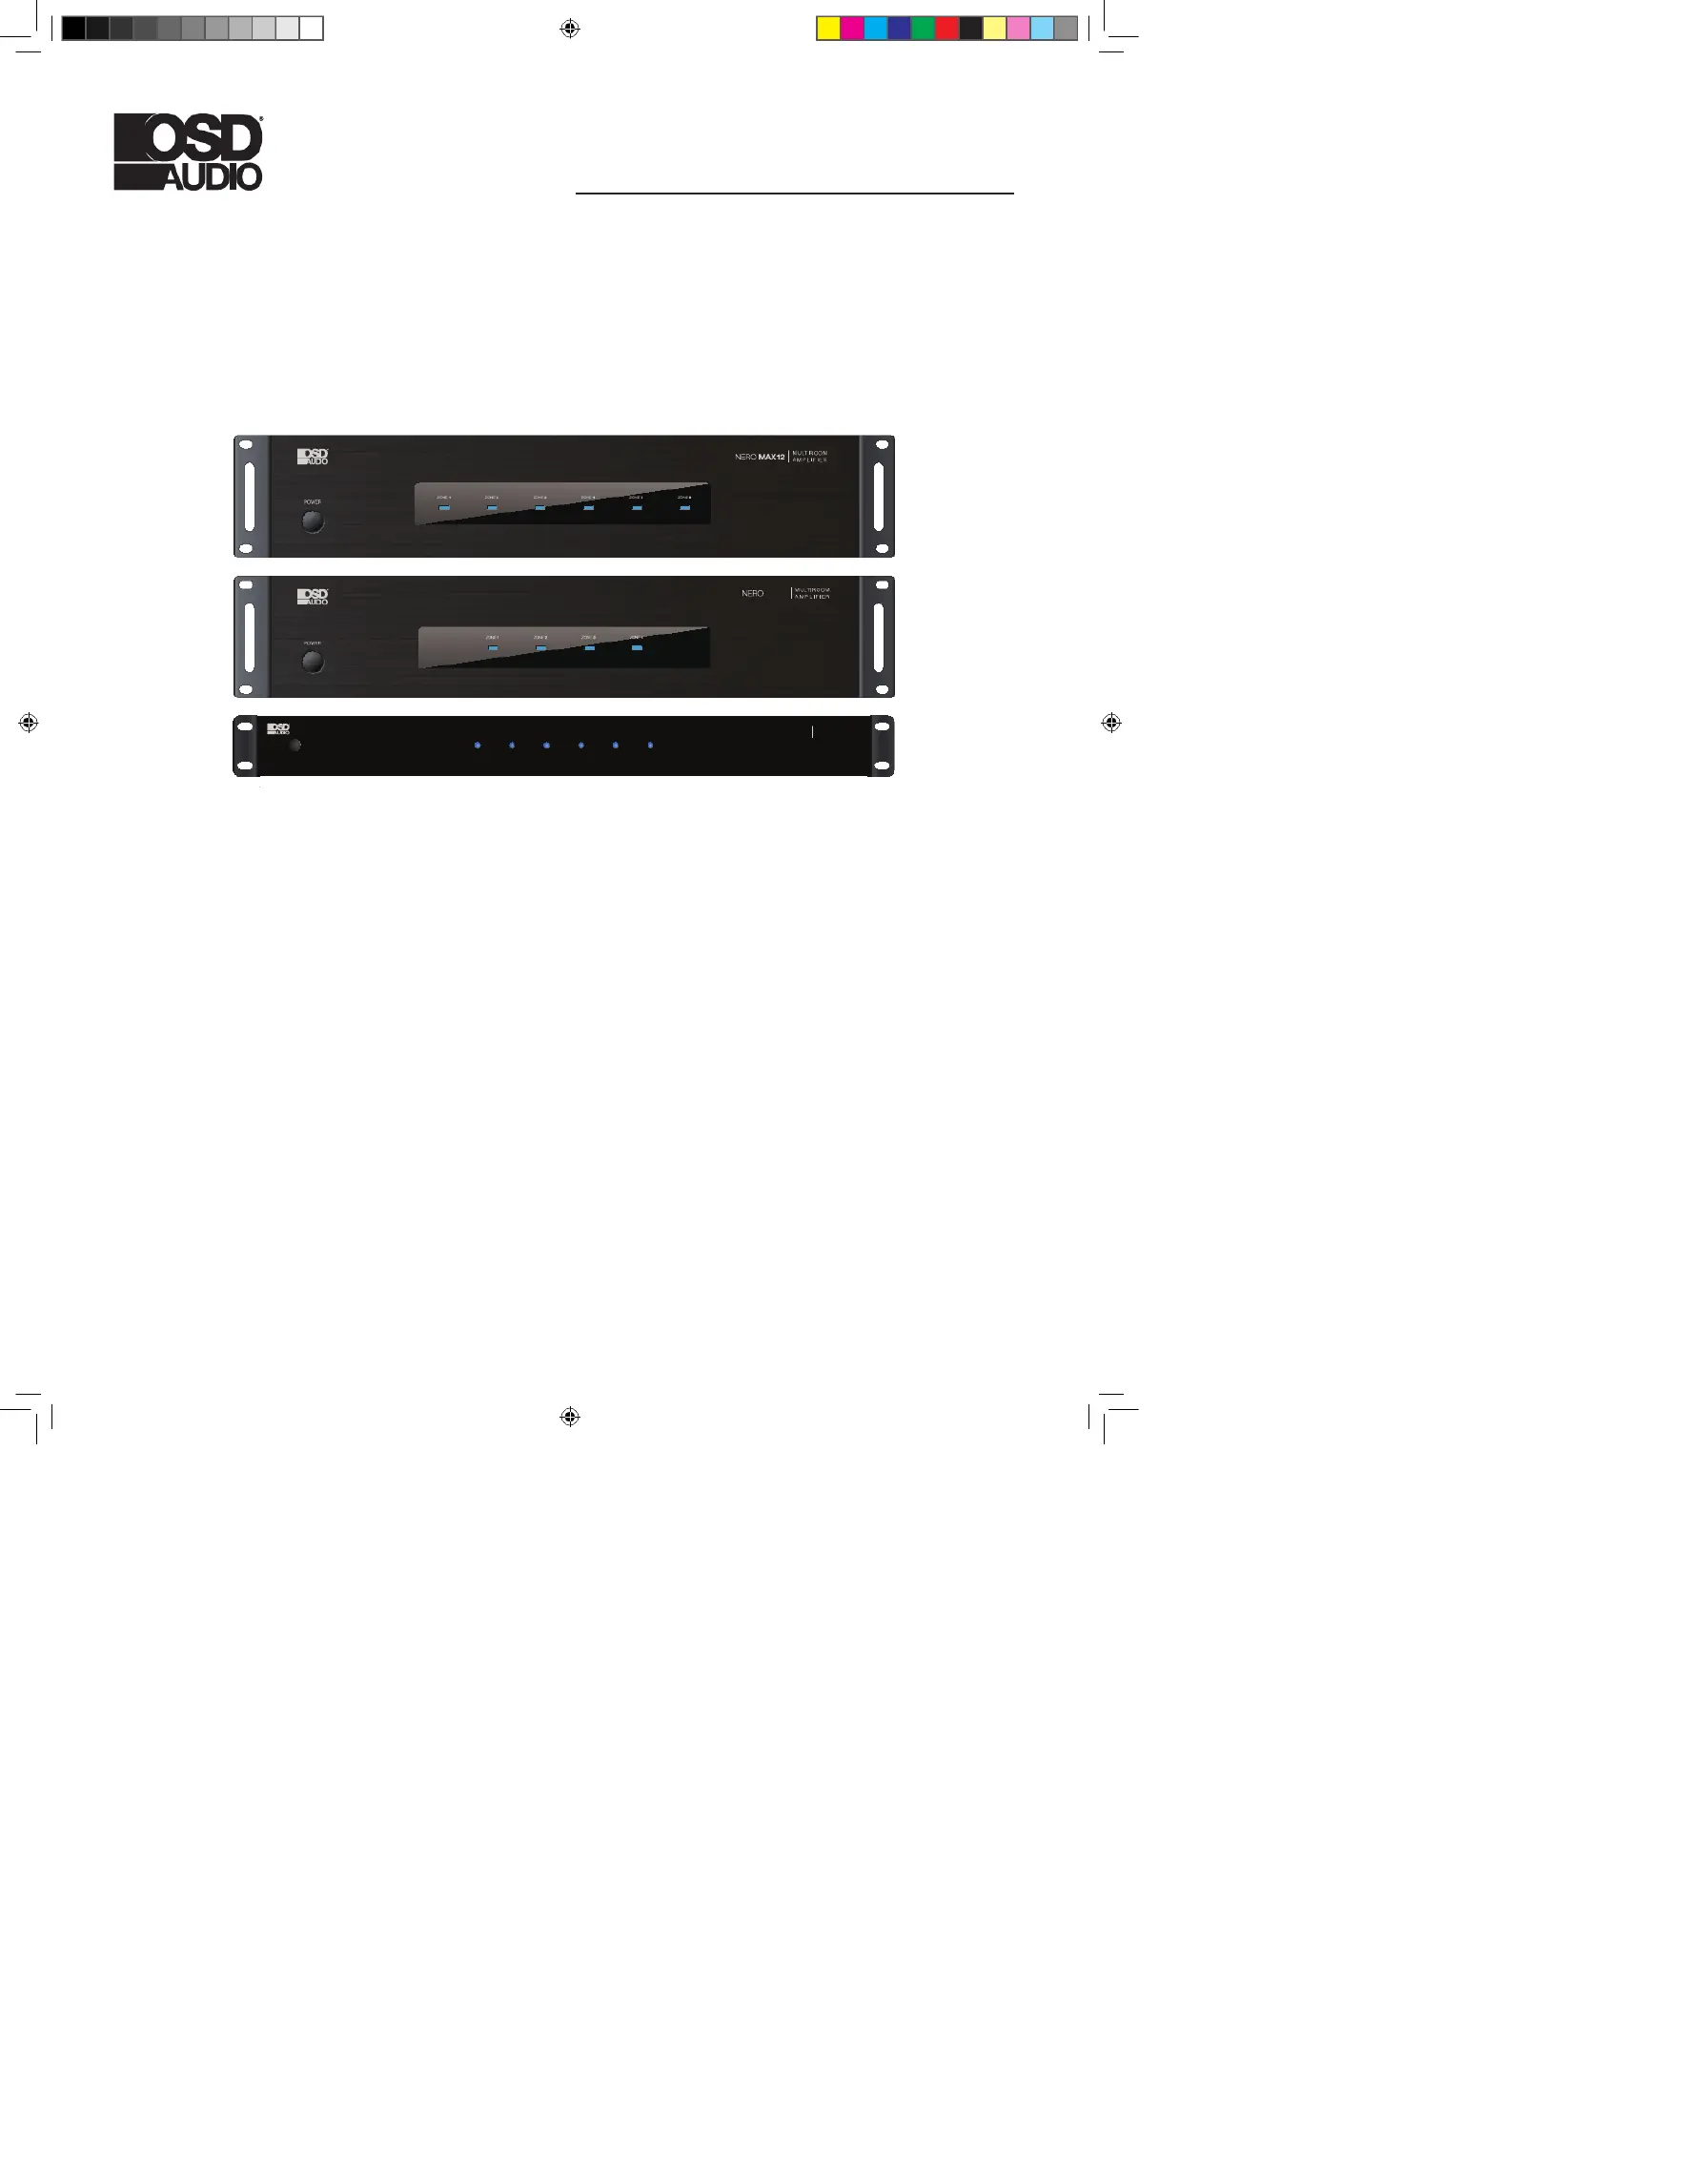
MAX 12 - Six Source Six Zone Multi-Room Amp
MAX 8 - Six Source Four Zone Multi-Room Amp
CONTROL 12 Six Source Six Zone Multi-Room Pre-Amp
All with iOS / Android App Control and Integrated App
Control with Optional Keypad Control
OWNER’S
MANUAL
MAX8
POWER
ZONE ZONE ZONE ZONE ZONE ZONE 1 2 3 4 5 6
NERO CONTROL12
M U LT I - Z O N E
C O N T R O L L E R
NERO MAX-CNTRL man.indd 1 11/14/22 11:37 AM

IMPORTANT SAFETY PRECAUTIONS
This manual contains important instructions for the safe operation of the unit. Read and follow the safety
instructions and all other instructions. Keep the manual for future reference. Make sure that it is available to
all those using the device. If you sell the unit, please make sure that the buyer also receives this manual.
• Use only an approved power cable and plug or distribution board to connect your amplier to a power outlet. Do not
use an extension cable.
• Never touch the mains plug if your hands are wet.
• Do not attempt to open the equipment. Refer servicing and repair to qualied service personnel. Touching live
components inside the case can result in a fatal electrical shock!
• Read the Owner’s Manual and Safety Precautions before operating the equipment.
• Keep this Manual in a safe place so that you can refer to it later.
• Please heed all warnings on the equipment itself and in the Owner’s Manual.
• Please follow the instructions contained in your Owner’s manual and never use this equipment for any purpose
other than is explained in this Owner’s Manual.
• Only connect this equipment to a power source of the type described in the Owner’s Manual and specied for this
equipment.
• Make sure that there is adequate ventilation around the equipment to allow proper cooling. Keep the equipment
away from direct sunlight. Avoid installing the unit close to sources of heat or in spaces such as bookshelves or
cupboards where heat radiation may be obstructed. Avoid excessive temperatures in the room, as these could
ultimately damage sensitive components and reduce the service life of your player.
• Never use the unit in damp rooms, at temperatures of below 15°C, or in the open air. When bringing your amplier
in from the cold, allow it time to achieve room temperature before plugging it in.
• Always switch the unit off before removing or inserting interconnects. Doing this with the amplier switched on can
damage not only the amplier itself but also equipment connected to it.
• If you ever spill water or any other liquid onto the equipment: Do not touch the case! Remove the plug from the wall
outlet and contact your dealer or our service department.
• Never remove the earth connection from the plug. It is there to ensure your safety.
• Arrange the power cable so that no one can accidentally stand on it. Avoid locating it under objects that might put
pressure on the cable. Pay particular attention to areas where the cable exits from plugs, AC outlets and from the
unit itself.
• Never operate the unit without being present. Disconnect the plug from the wall outlet and remove all aerial
connections (including cable aerials) when: you clean the unit, you do not expect to use the unit for long periods of
time, during an electrical storm.
• If you have an external antenna or cable antenna connected to your hi- system, we recommend that you use a
signal isolating lter to avoid interference or damage during thunderstorms.
• Problems: If you lose the sound while the amplier is operating, or if you notice smoke or burning, switch the unit
off immediately and contact your dealer or our service department.
• Only replace defective fuses after you have traced and removed the cause of the fault and then only with a fuse of
the same rating. Remove the mains plug before changing fuses. Use an insulated screwdriver to remove and replace
the fuse.
NERO MAX-CNTRL man.indd 2-3

INTRODUCTION
The NERO MAX12, MAX8 and CONTROL12 are functional, easy to install, highly compatible, expandable, and user-
friendly audio distribution systems. They feature 6 Analog Source Inputs, the MAX12 and MAX8 providing up to 80W
@4-ohm from a Class D amplier for 6 or 4 zones - expandable to 18 zones, which can be controlled by the either
the OSD Control App (Free App that Duplicates the Keypads), Optional Keypads with IR Remote Control or RS-232.
The CONTROL12 offers the same 6 sources with pre-amp outputs only. Allowing for integration with alternative,
more powerful, amps such as the MX Series.
FEATURES:
• 6x6 or 6x4 Audio Matrix Switch and 6 Source Inputs.
• MAX12 and MAX8 have 6 or 4 Stereo, Bridgeable, amplied speaker outputs.
• Expandable to 2 or 3 units, giving 8/10/12/16/ and 18 stereo zones of distributed Audio.
• Free iOS & Android App (2.4GHz wireless networks only) duplicates the Control Panels for each Zone/Room.
Optional Control Pads/IR Remote are available as well.
• High Efciency Class D Amplier (MAX12 & MAX 8); 80 watts (4-ohms) and 40 watts (8-ohms) Each Zone
can drive a single 4-ohm pair of speakers or two pair of 8-ohm speakers, Stereo or Bridged Mono Output for combining ones for
100 Watts at 8 ohms (single 8-Ohm speaker per channel only)
• 3 Stereo line-level Pre-AMP L&R RCA Outputs (Zones 1-3) – MAX12 & MAX8 only
• 6 Stereo line-level Pre-AMP L&R RCA Outputs (Zones 1-6) – CONTROL12 only
• 4 Stereo line-level L&R RCA Analog Source Inputs, 1 Mini 3.5 mm Stereo Analog input, 1 auto-selecting Optical or
Mini 3.5 Analog
• Optional keypads have a built-in IR receiver & IR remote controller for Source select/Volume/Treble/Bass.
• RS232 for transferring and receiving the serial data for control systems.
• 6 Individual Zone Status (3.5mm): Used to control external Zone Devices (12V triggers)
• 6 IR Emitter 3.5mm Mono RCA outputs + 1 IR Emitter/Blaster 3.5mm Mono Jack (MAX12 and MAX8 only),
CONTROL12 - 2 IR Emitter 3.5mm Mono RCA outputs + 1 IR Emitter/Blaster 3.5mm Mono Jack
• Front panel LEDs for 6/4 zones indicating Power On, Standby and Mute.
• 1 PA Input jack to set all zones to Source 1 (12Vdc Trigger)
• External Mute In/Control Out (3.5mm Mono Jack RCA connections/12Vdc)
• AGC (Automatic Gain Control): brings low input levels up to a present-level
• Unit ID Selector Switch: Master/Slave 1/Slave 2(Expandable settings)
• Multi Voltage Selector 115V or 230V, AC Input connection with Fuse Receptacle (CE Certied)
SPECS:
Power: (MAX12 and MAX8 only):
8 Ohm - 40W x 2 per zone 4 Ohm - 80W x 2 per zone
Bridgeable: 8 Ohm Only - 80W
S/N: MAX12 and MAX8 - >85dB A WTD
S/N: CONTROL12 -110dB
THD: MAX12 and MAX8 - <0.1%
THD: CONTROL12 – 0.05% (0.5dB)
Freq Response: 20Hz-20KHz
Input Impedance: >47 K Ohm
Output Impedance (line level) 100 Ohms
Input Sensitivity: 250mv
Protection: Overload, Short Circuit, Temperature
System Voltage: DC +12V
External Mute and TRIGGER OUT Voltage: DC +12V
Network Connector: RJ45, Standard 10/100Mb
Power Supply: AC 115V/60Hz - 230V/50Hz (CONTROL12 DC 15V/1.6A)
Output Connection: Terminal Block
Dimensions: 16.9” W x 3.5” H x 16.4” D (MAX12 and MAX8)
16.9” W x 1.75” H x 16.4” D (Control12)
Weight: MAX12 25lbs, MAX8 19lbs, Control12 4.5lbs
CONTENTS:
• NERO MAX12 Amp or MAX8 or Control12
• Expansion Ribbon Cable
• Rack Ears
• Speaker Terminal Blocks (Pre-Installed on Amp)
• AC Power Cable
• Product Manual
NERO MAX-CNTRL man.indd 4-5
Termékspecifikációk
Márka: | OSD Audio |
Kategória: | Vevő |
Modell: | NERO MAX8 |
Szüksége van segítségre?
Ha segítségre van szüksége OSD Audio NERO MAX8, tegyen fel kérdést alább, és más felhasználók válaszolnak Önnek
Útmutatók Vevő OSD Audio
14 Január 2025
2 Január 2025
28 December 2024
28 December 2024
24 Szeptember 2024
3 Szeptember 2024
3 Szeptember 2024
3 Szeptember 2024
3 Szeptember 2024
19 Augusztus 2024
Útmutatók Vevő
- Vevő Godox
- Vevő Fenton
- Vevő Smartwares
- Vevő Accell
- Vevő Pyle Pro
- Vevő Maxview
- Vevő Panduit
- Vevő GigaBlue
- Vevő WyreStorm
- Vevő Exposure
- Vevő HQ
- Vevő Shinybow
- Vevő Salora
- Vevő FoneStar
- Vevő Futaba
Legújabb útmutatók Vevő
9 Április 2025
9 Április 2025
5 Április 2025
5 Április 2025
2 Április 2025
2 Április 2025
2 Április 2025
31 Március 2025
31 Március 2025
30 Március 2025